09
Mar 17

Wristrest

So I’m still cleaning down the shed from the cot (finally got all the shavings under control…) but yesterday an officemate (hi Gary!) was looking at MassDrop (think “what to get for the rich geek who has everything” with a pricetag to match) and specifically at a wrist rest. For those who don’t type all day, it’s something to rest the wrist on while typing:

If you type all day every day like a lot of software engineers do, this is a pretty necessary thing or you wind up with carpal tunnel syndrome. I’ve had that, it’s not fun (it’s why I’ve used kinesis ergonomic keyboards for twenty years).

So the specific one Gary was looking at was wooden, and nice enough if a bit simple:

I mean, it’s not some gel-filled cushion, it’s not articulated, it’s just a shaped plank of wood. Walnut maybe? Fourteen inches wide (the width of a MacBook Pro) and about three inches deep.

They’re charging $95 for it (or they were, it’s not for sale any longer). I nearly choked on my coffee. I told him that was insane, that it was a lump of wood and not worth it and that I could knock that up in my shed in twenty minutes from an offcut. So he said “prove it”.

That’s how I keep getting myself into these things. You’d think I’d have learned by now.

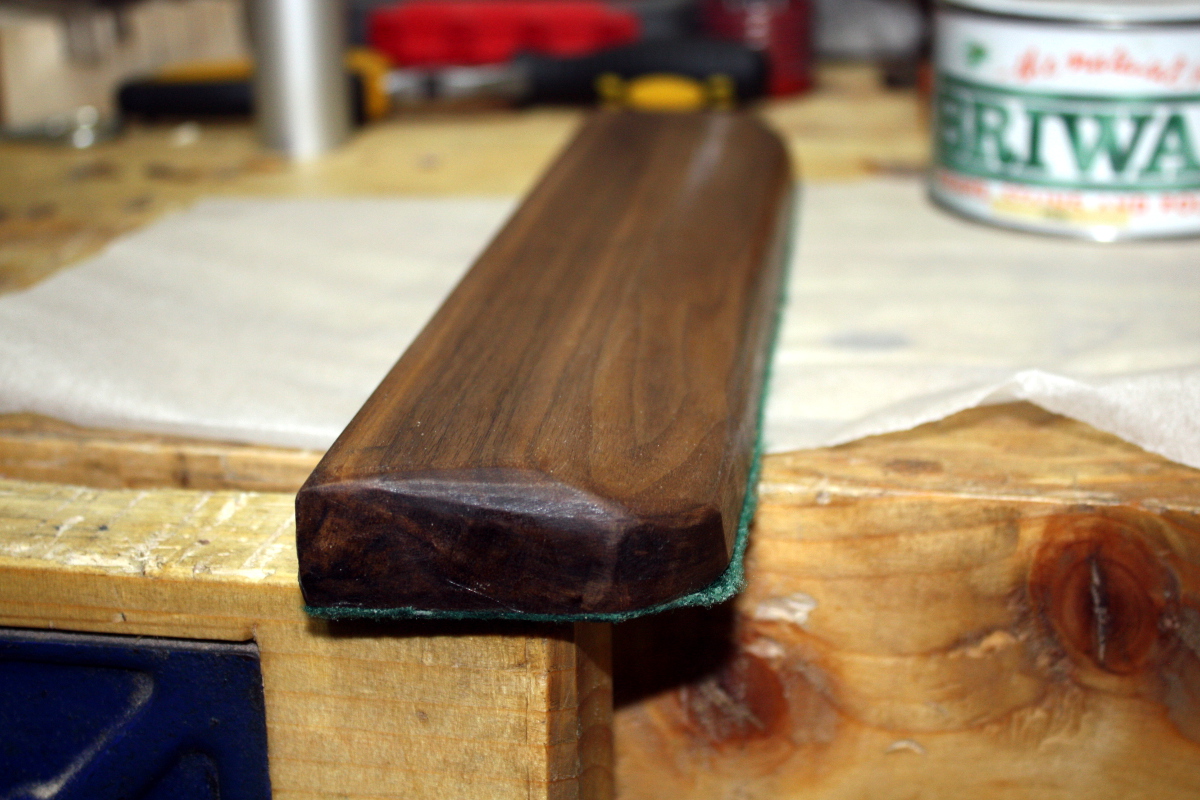
So I go home, I find a piece of walnut offcut (in this case it was a length intended to be part of the cot frame but a bad rip cut and a waney edge made it unusable for that), I cut out a 14″x3″ piece from it (I don’t even take the time to lay it out) and skim plane it to clean off the rough-cut furriness. Then I plane one face and edge to square, and shoot the ends square from that. I don’t bother with the other edge or face because they’re going to get shaped anyway. And I cut the corners curved on the front using my new toy that just arrived from Dictum today:

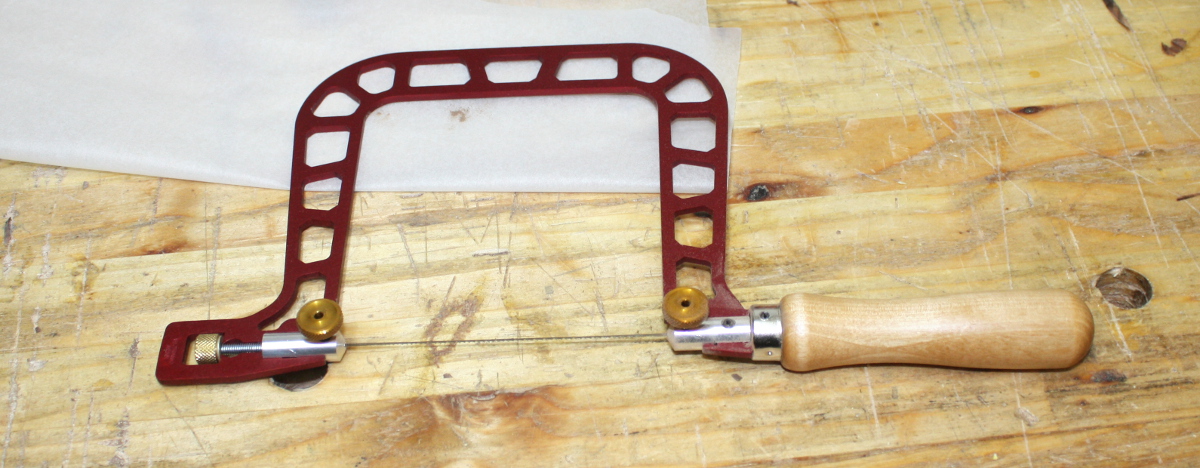
Well, I have a project or ten in mind that will involve dovetails and I want to try sawing out the waste on the pinboard instead of chopping it out because that took a bit longer than I thought it would on the cot drawer. I need a better place for it to live though…

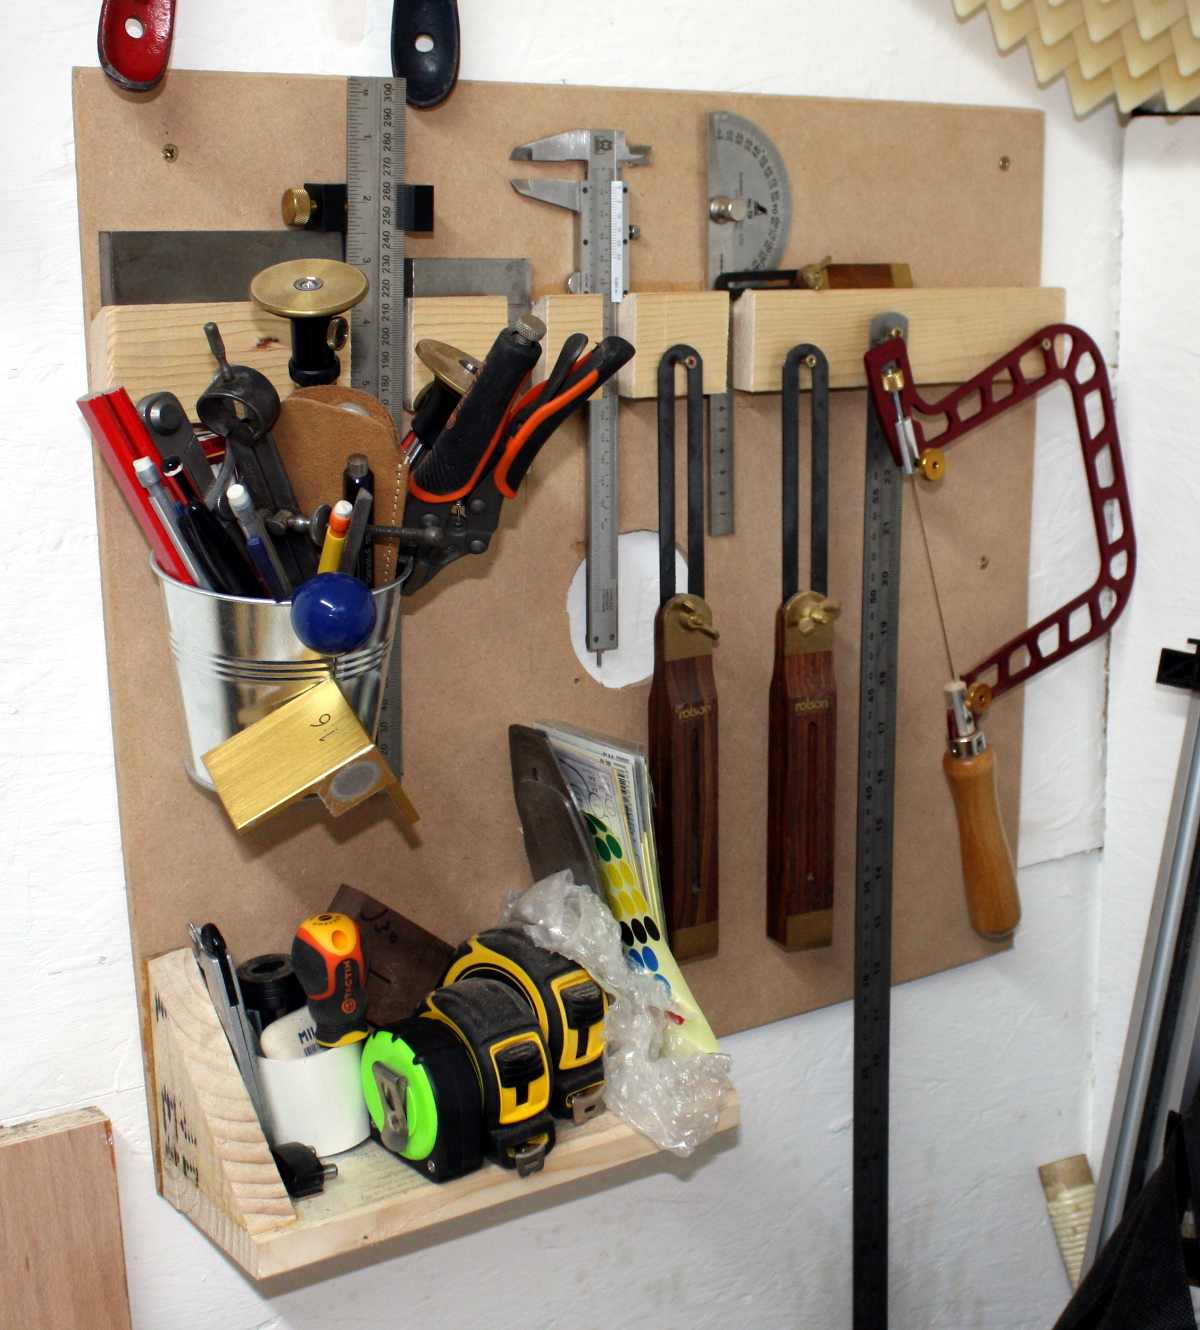
I also need to finish tidying up, and one of the next shed projects is tool storage. But for now…

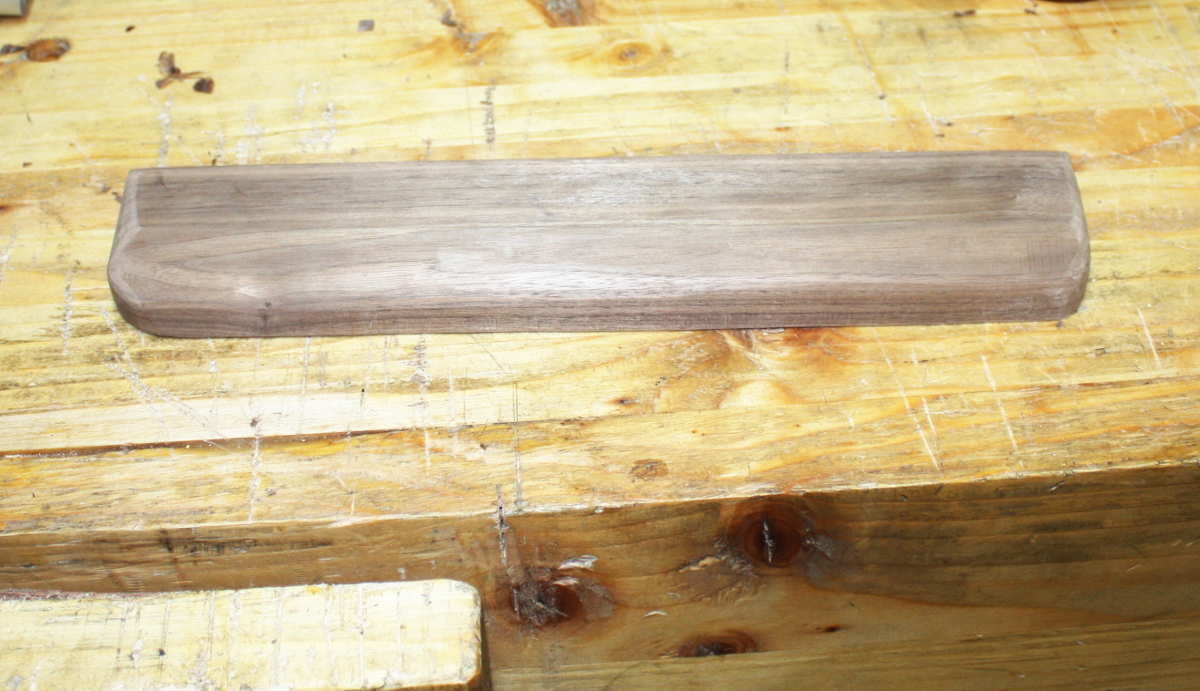
And from there, I get out the spokeshave and round over edges and I use the jack plane to cut a quick chamfer on the front edge and then go over everything with the spokeshave again to get it all nice and smooth, and I hit the ends with some sandpaper for a few seconds to get the last little bits around that knot on the left front side.

Total time from start to here was about 25 minutes or so (I was faffing about a bit with the new fretsaw). With machines, that’s two tablesaw cuts, two mitre saw cuts and a run-around on a router table, so maybe three minutes?

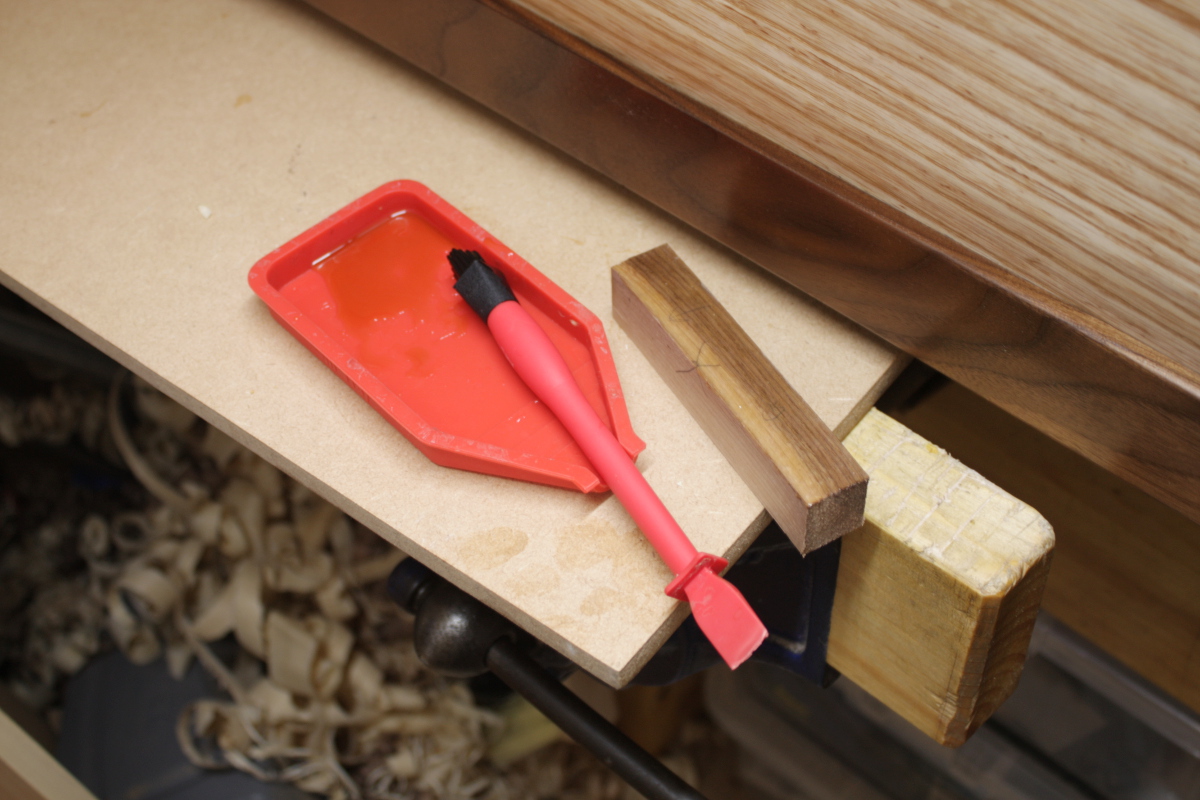
It needed a little finish and I had the dregs at the bottom of the shellac jar to hand so…

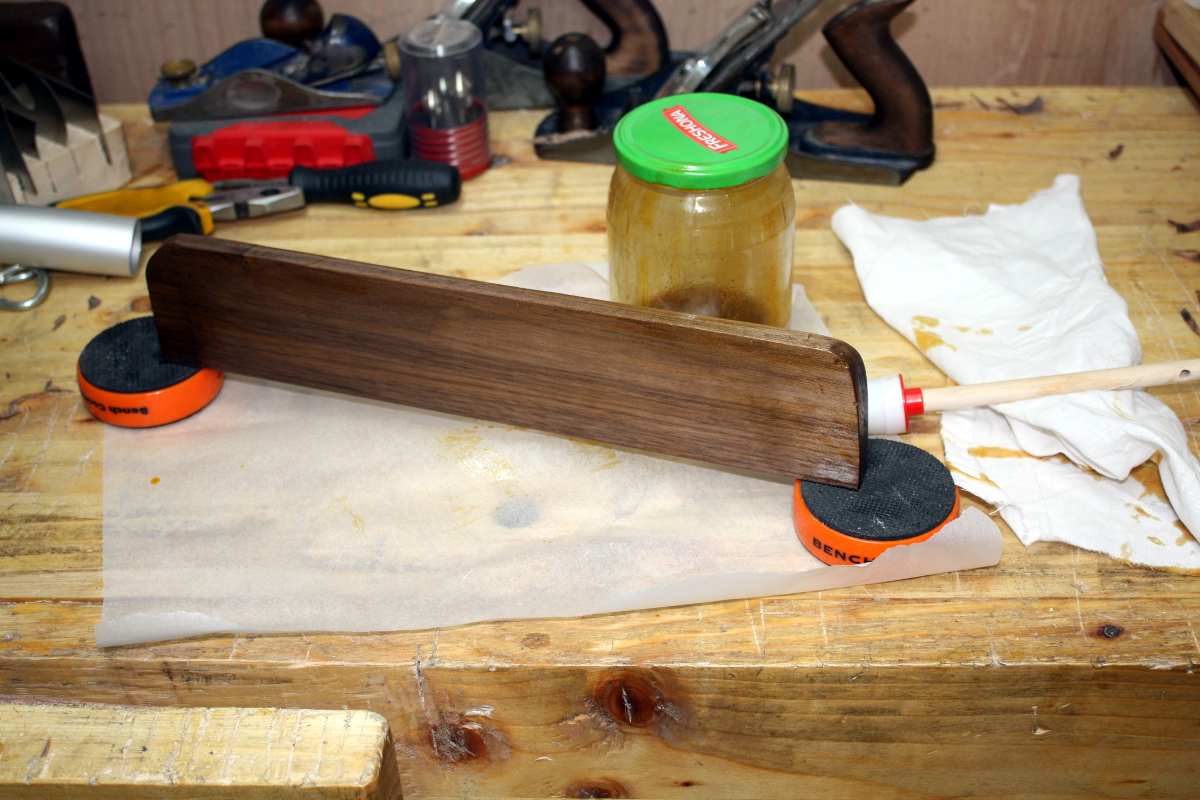
One coat on by brush, then in for a cup of tea and a bit of Richard Maguire’s latest sharpening video while it dried. Then out to the shed again, some steel wool to knock back the first coat of shellac and rag on a second. Back to the house for more tea and Maguire, and half an hour later I take the offcut piece of felt I had from lining the cot drawer and cut a small piece out of that and spread it and the underside of the rest with contact cement from the end of a tube left over from putting leather on the bench vice jaws.

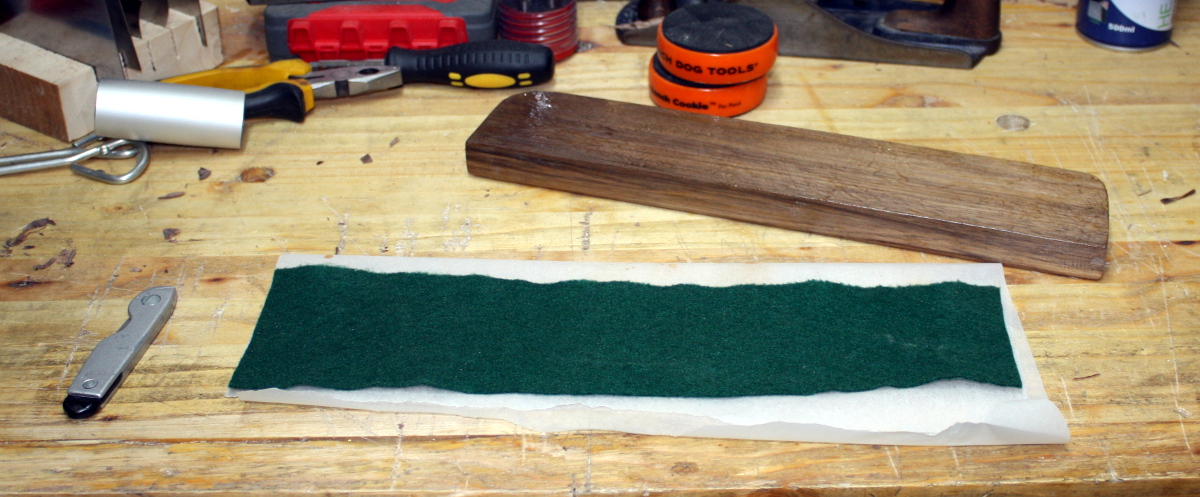
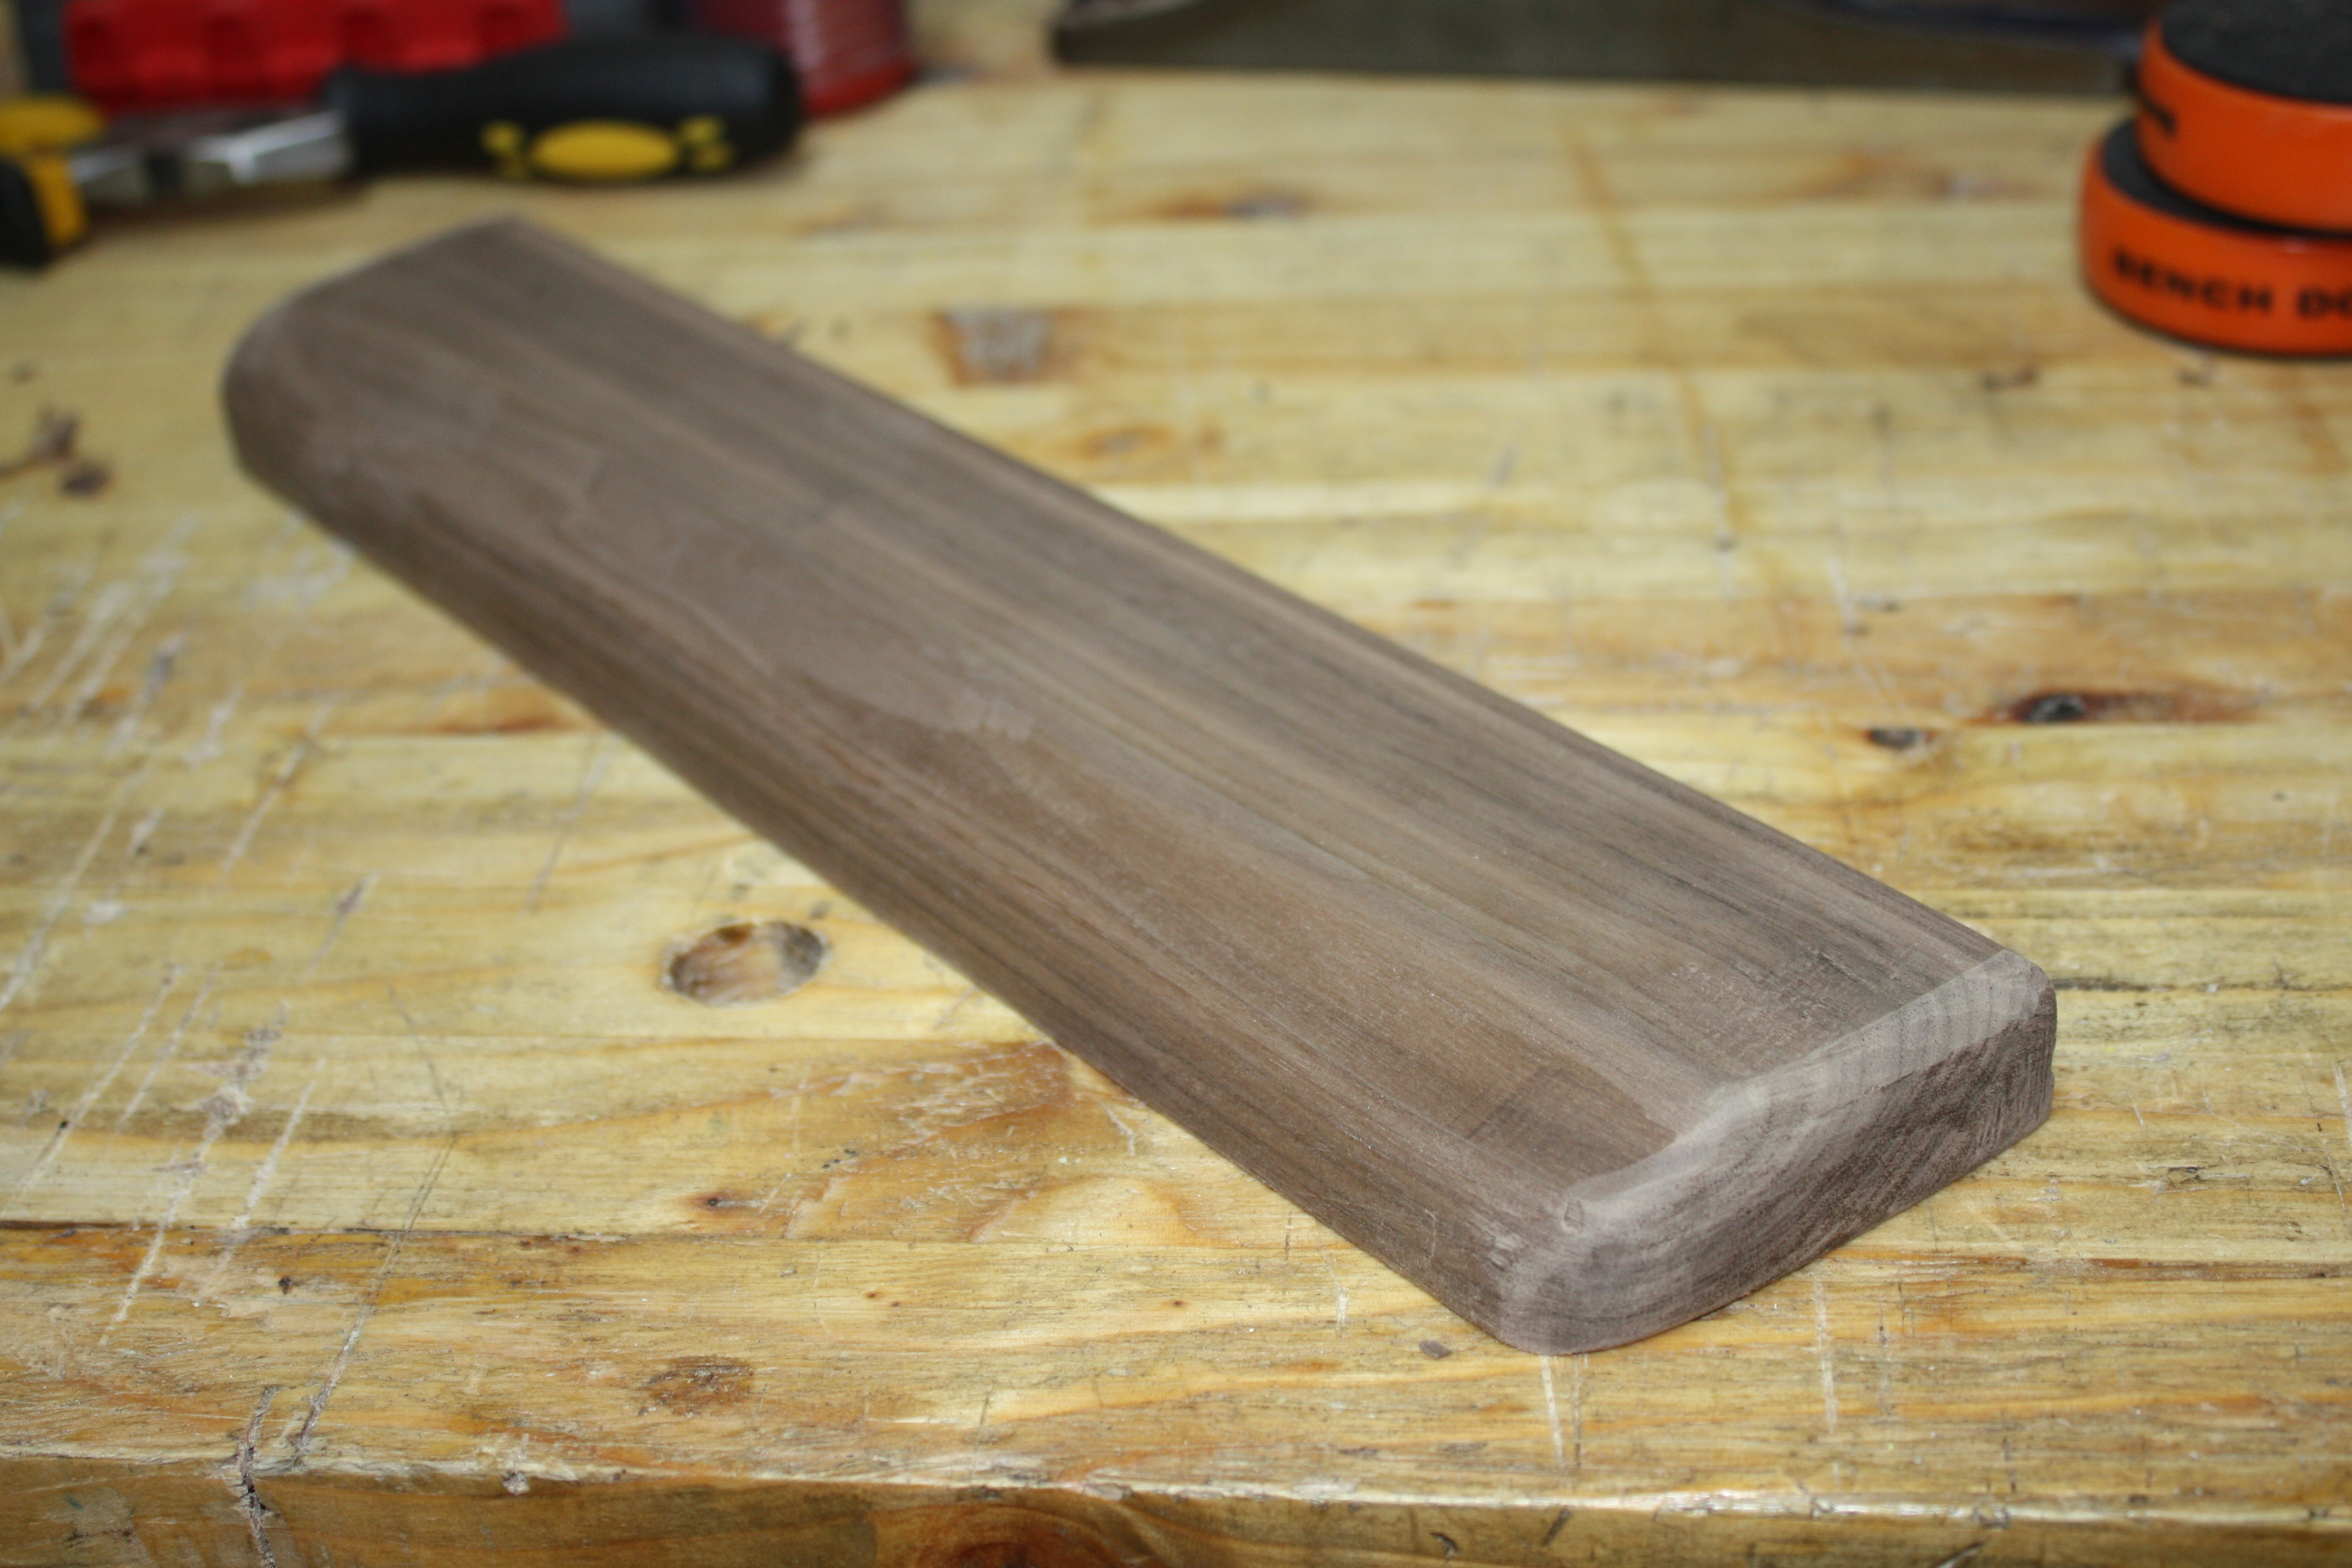
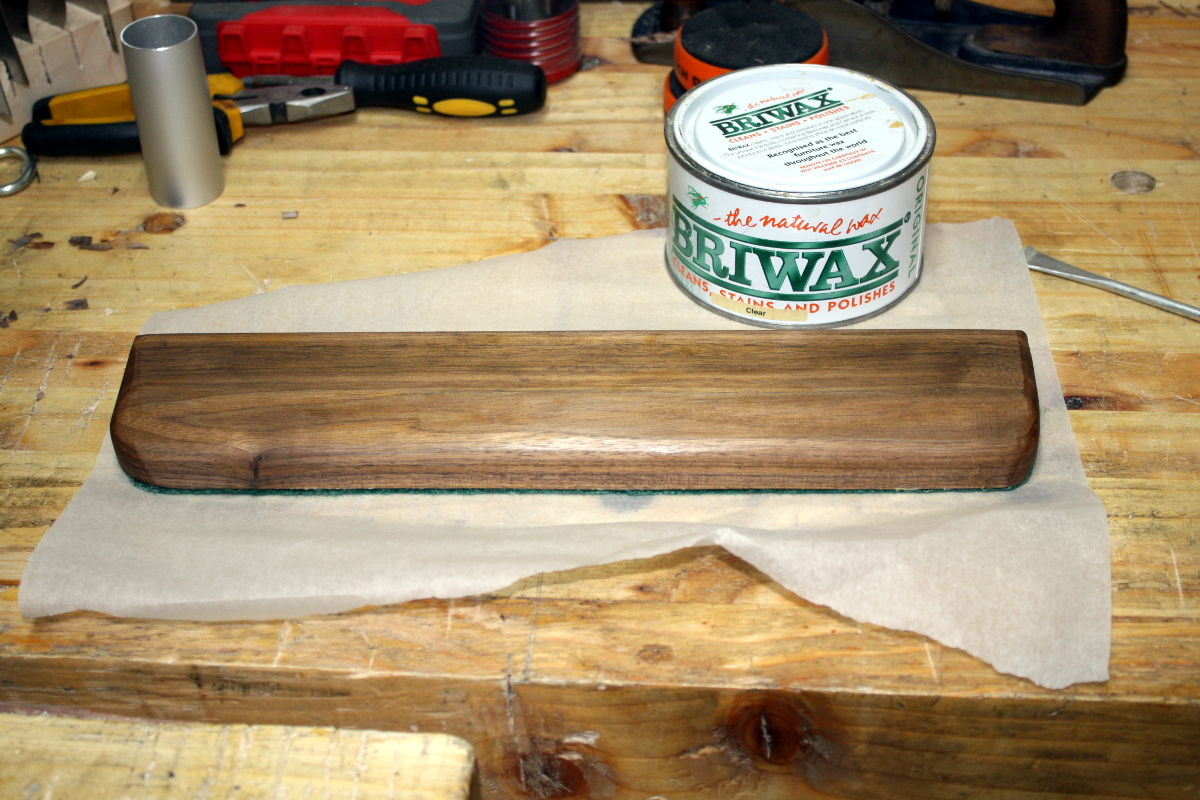
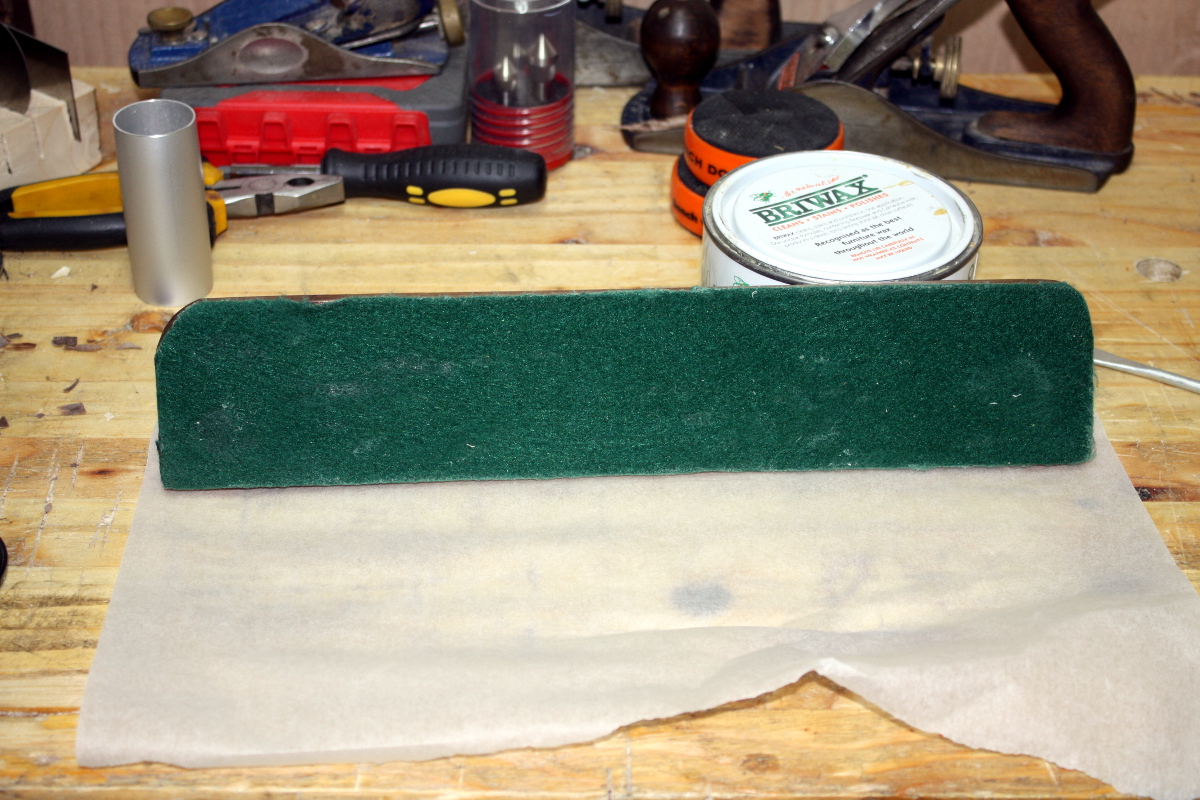
Let that get tacky for ten minutes, then press the two together and trim the excess. And then a final coat of briwax on top for the shiny.

By this point I realise I’m foostering so I draw a line under it and wander back in from the shed. Total work time is about 30-35 minutes (with something like 90 minutes of waiting on finishes while watching videos and drinking tea in there too). And the test fit worked:

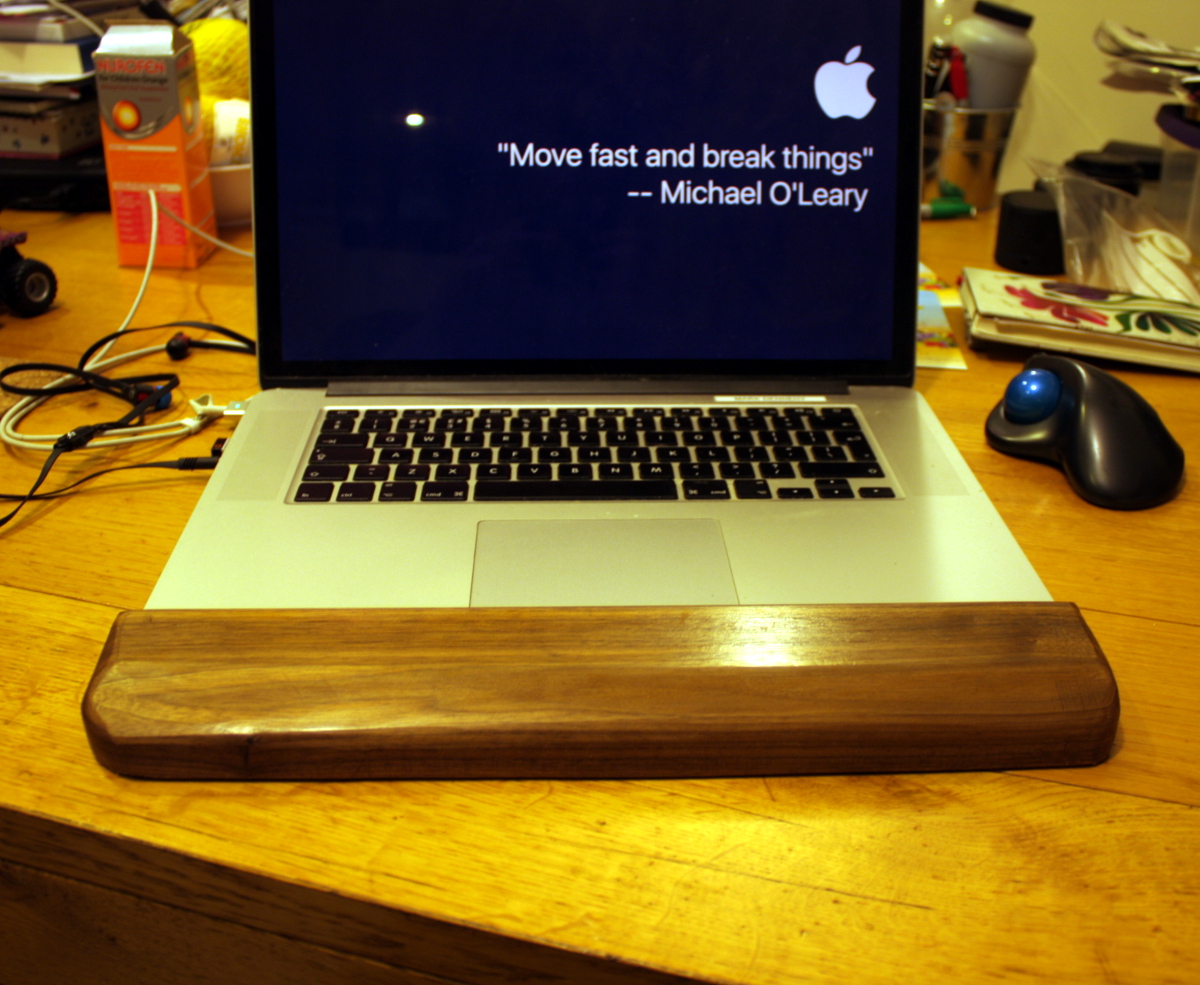
And it doesn’t just work on my laptop, it works in production*:

So $95 versus €2. Hell of an exchange rate, even when you count the three minutes it’d take to make with machines, labour, marketing and so on.


*That’s a joke for the other IT people btw. 


26
Feb 17

Foostering

Right, I just need one or two hours of calm dry weather and…

*sigh* Feck’s sakes. Fine.

But at least I can put in the glue blocks to support the top panel. Yesterday I trued up a corner of a stick of walnut I had as an offcut from the drawer front and then cut it into four ~10cm lengths. Granted, this isn’t traditional, glue blocks are traditionally whatever cheap softwood was lying around, but I had this as an offcut so why not.

Then today I had a few minutes of trying to figure out how to clamp them in place because I didn’t know how this was done traditionally. One quick internet search later and yup, you just paint the glue face with glue (hide glue is traditional but apparently any wood glue works), rub it on the spot where you want the glue block to stick to ensure both sides have glue and there’s no air in the glue joint, then hold it in place for a few seconds and there it sticks.

Don’t give it a knock until the glue cures, and there you go, glue blocks.

But eventually there were two or three dry hours in the late afternoon, so I moved the cot outside for the last time and started fettling the drawer. Which it turns out was necessary – when I was assembling it yesterday I had to stop half-way through glue-up to shave down the width of the plywood base, but obviously I didn’t shave enough and it had pushed out the sides of the drawer at the base by a few mm, so now I had to shave back the outside with planes in order to fettle it.

But eventually I got it to fit smoothly, and I’d cleaned up the glue and joints as well. Then it was a case of pushing it in flush, finding it was hanging up on the drawer rails, trimming them to give a rounded ramp type profile at the start so the drawer would go flush, then marking off its position on the rails with a pencil, and gluing a stop block in place on the rails with a cushioning pad. I clamped those in place for a half-hour or so just to be sure, then took off the clamps and glued the rails in place. That was the last bit of construction on the crib.

Yay!

Well, okay, I have to screw on the drawer pull, but I’m not counting that because.

I SAID BECAUSE.

And then it was time to finish the drawer, and I’m just going to go with shellac. I had thought of using milk paint and osmo over the top of that, but the more I thought of it, the less I liked the idea of a red drawer, even though it would have been funny. So just shellac.

And that’s the last of my shellac as well, so the whole drawer got three coats (sanding back after coat #2), and the front gets a final fourth coat.

Dovetail money shot, right there.

And in the meantime the cot got moved into the kitchen.

…and the thing rocks. The torsion the mis-bent steambent upright put on the frame torqued it out of square by about 3mm over the length of the piece, but the MDF assembly platform had gotten wet and had smushed enough to hide that. Sod. So tomorrow (I have a day off), I’ll take the drawer, put the pull in place, maybe line it because the plywood’s a bit unpleasant looking, put that into the frame and mount the mattress platform and basically put it all together, see how bad the rocking is and trim the feet to stabilise it.

And that’ll be it. It’ll finally be done.


Shit, this thing won’t fit in the car, how the hell do I deliver it?

To-Do List:

  • Make a drawer
    • Maybe add runners underneath the drawer?
    • Finish drawer with shellac.
  • Glue the drawer supports into the frame.
  • Even more last minute fettling and foostering (panel support blocks, drawer stop blocks)
  • EVEN MORE last minute fettling (levelling the legs, screwing on the drawer pull, lining the drawer)
  • Close door of shed, lock it, walk away and never do another project with a deadline ever again.

19
Feb 17

Drying day.

My original plan was to make the drawer today, but that plan didn’t take into account things like drying time on glues given the current low temperatures. Titebond PVA glue would be grand, but hide glue is something I’m still figuring out, so I’m giving it lots of margin for error. Especially as I found today that I almost had a major error during the glue-up; the use of a mallet to drive the top crossbar and back support into the mortice put torsion stress on the two end joints, as I knew it would (stupid mis-steam-bent upright) but I thought it’d be safe enough.

Nope. Small (1.5cm long) crack right there. Not critical; the wood is now stabilised by the glue and it’s holding well; but enough to give me a moment of thinking “wow, that nearly destroyed a week or so of work without the raw material available to do it over…”

I might just try to get a little glue in there and clamp it closed tomorrow, just to be safe.

Meanwhile, the rest of today went on getting the frame out of the shed onto the assembly table in the late afternoon, getting all the clamps off and holding my breath to see if the glue had cured (it had), and doing the last bits of trimming on drawbore pegs and the like. And then the last coat of shellac got touched on in a few places to cover some scratches and once that had dried (it dries fast outdoors), I moved it back into the shed as it was dark outside by now, and got the first coat of osmo going.

Just ragging on a thickish first coat here, in two parts (you can see the contrast here between the untreated side panel and the just-treated top panel). The plan was, on with the first ragging, leave for 30 minutes, rag off the excess and immediately on with another ragging, wait 30 more minutes, then rag off the excess again and leave to cure until tomorrow evening. Then tomorrow, I’ll take 400grit paper or wire wool to it, and rag on a thinner coat, leave for 30 minutes, then rag off the excess, then leave to dry until the next day, and we’ll do at least four coats of that.

In the meantime, I’ve a drawer to make up as well.

Also, this is WAY TOO BIG to be doing in this shed…

To-Do List (stuff in progress in blue:

  • Make a drawer
    • Thickness the boards for the drawer.
    • Cut the drawer front to size.
    • Cut the drawer back and sides to size.
    • Cut dovetails for drawer.
    • Groove drawer with #43 for plywood base.
    • Maybe add runners underneath the drawer?
    • Finish plane drawer front
    • Finish drawer front with shellac.
    • Paint drawer sides with milk paint.
    • Assemble drawer.
  • Last minute fettling and foostering.
  • Finish entire assembly with several coats of Osmo wood wax.
  • Close door of shed, lock it, walk away and never do another project with a deadline ever again.