15
Feb 17

Getting wedged

So after the ten-hour out-of-hours callout over the weekend, I had a day’s time in lieu on tuesday, and I had great plans to get almost everything done.

These plans did not allow for the day being composed of 70% being inside a cloud and 20% horizontal freezing rain.

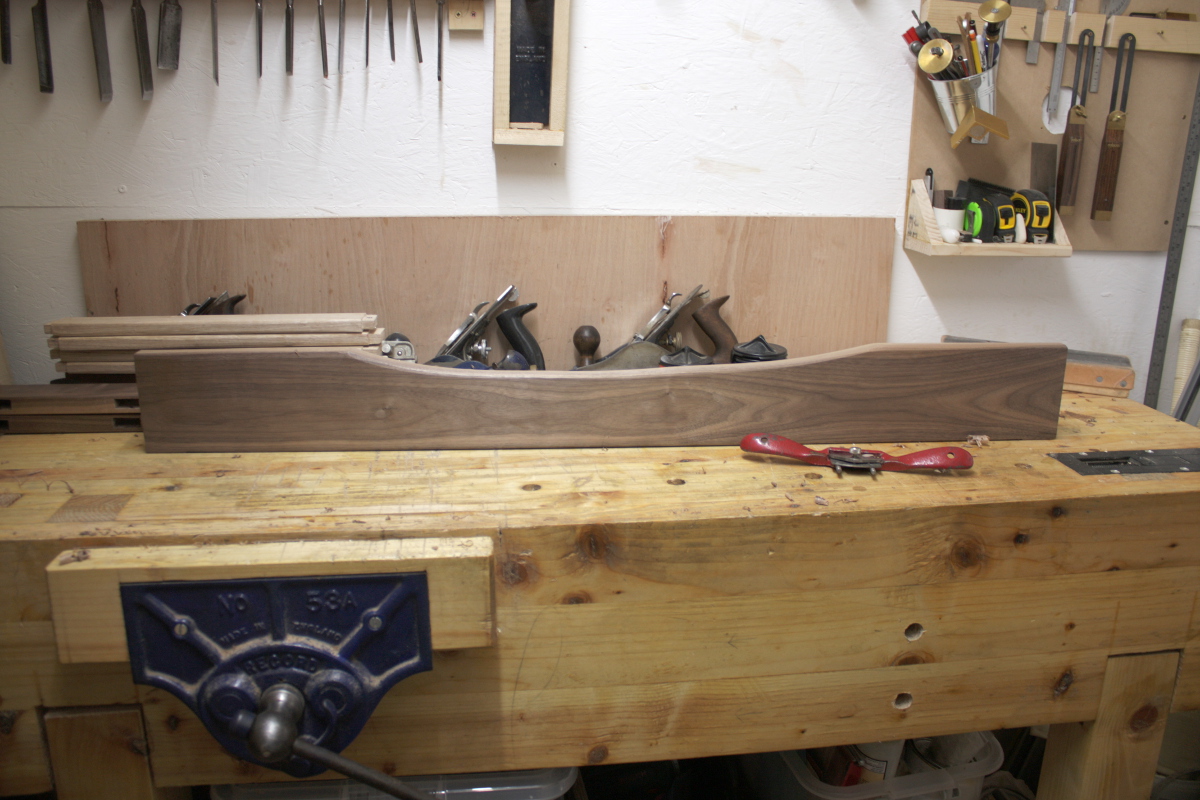
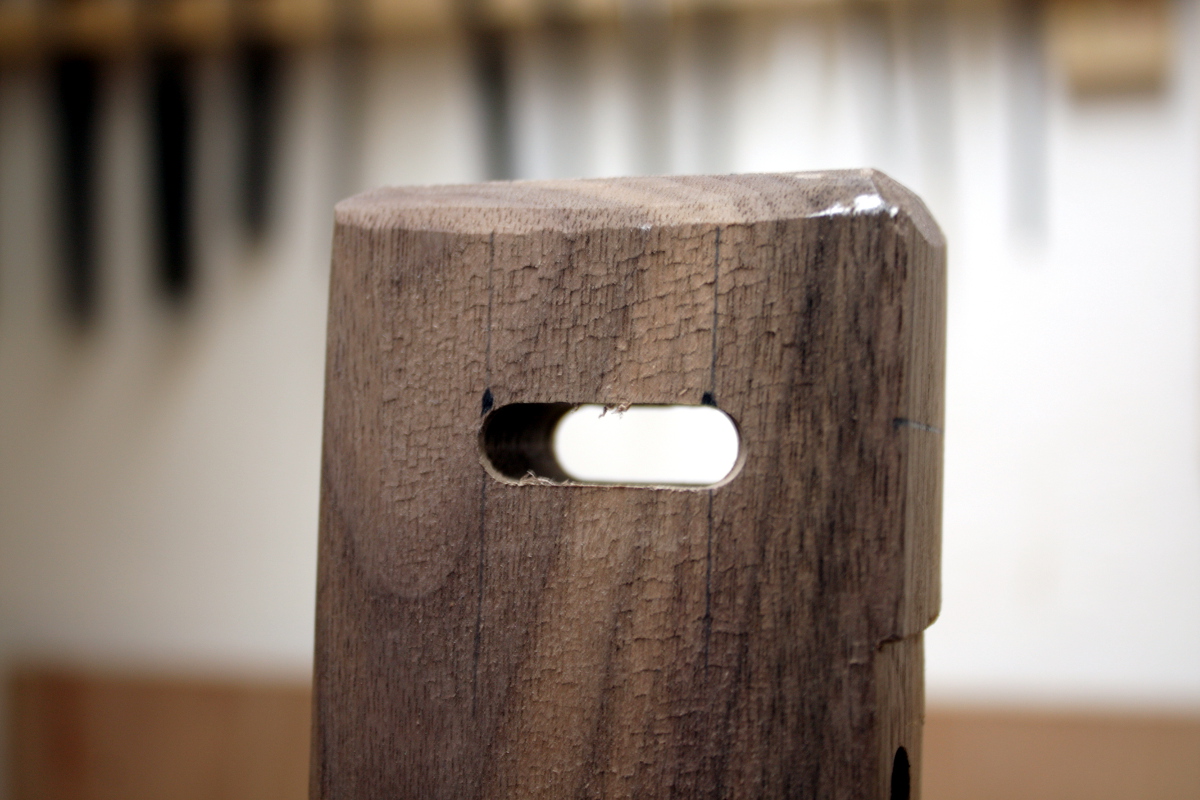
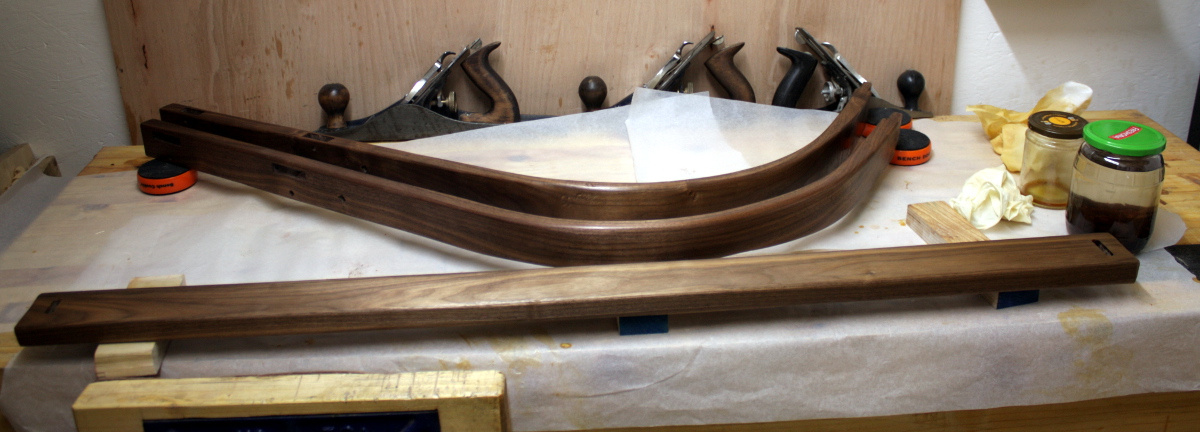
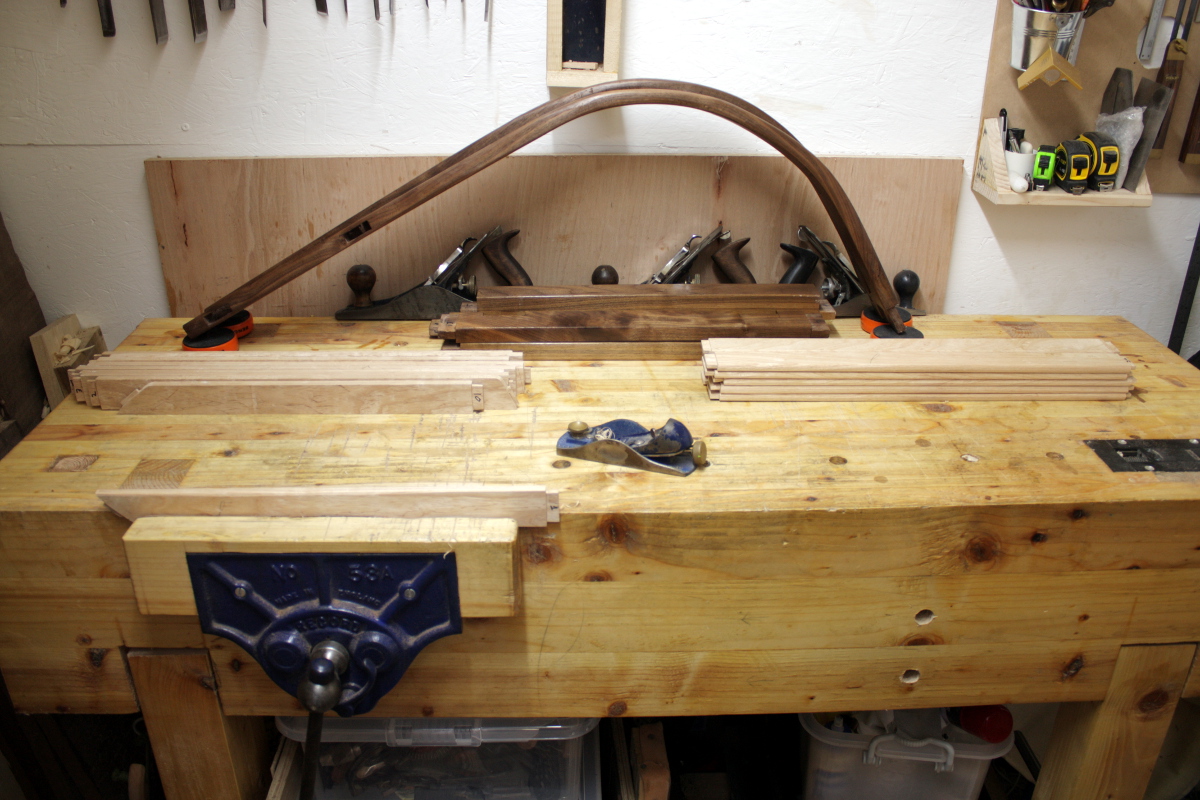
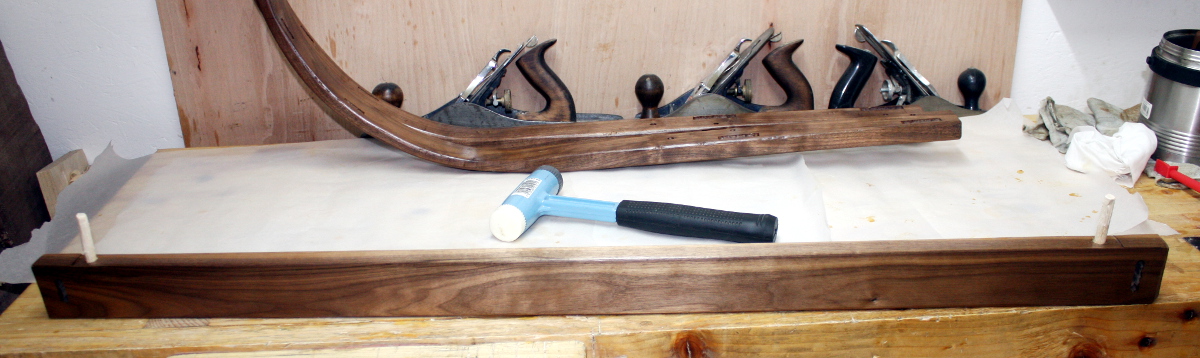
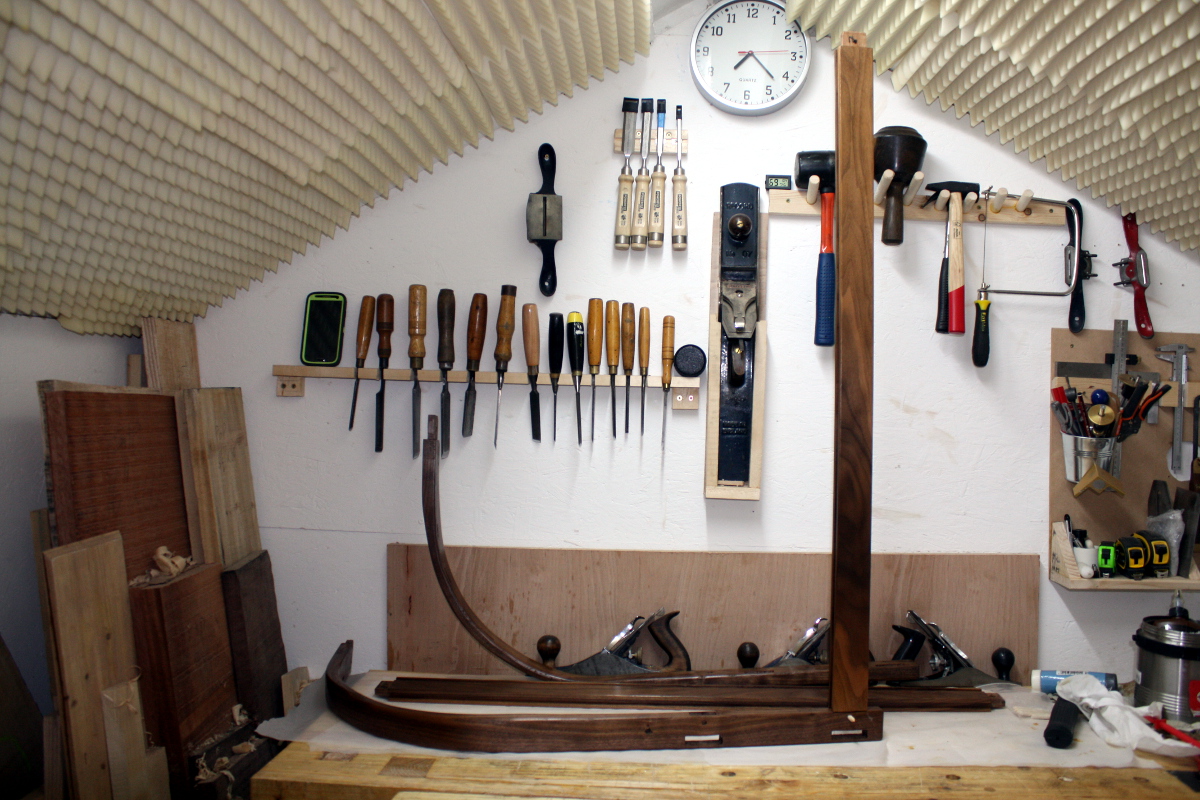
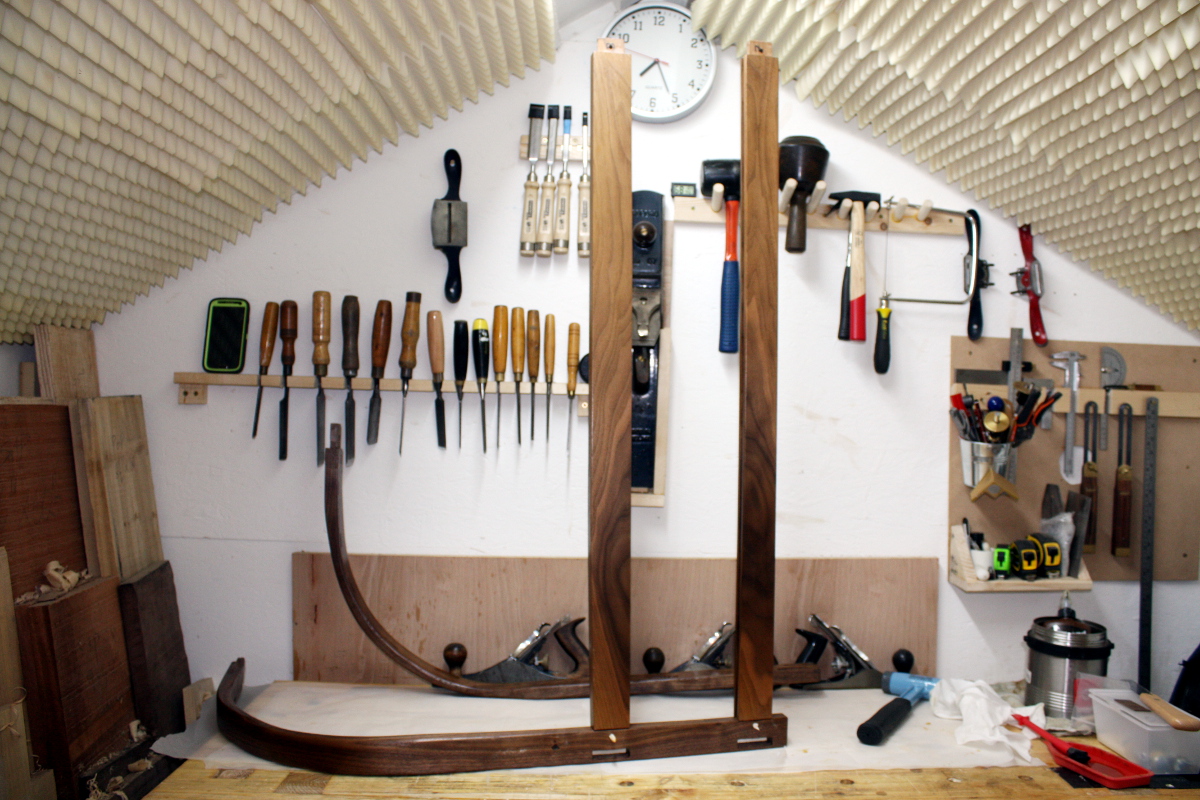
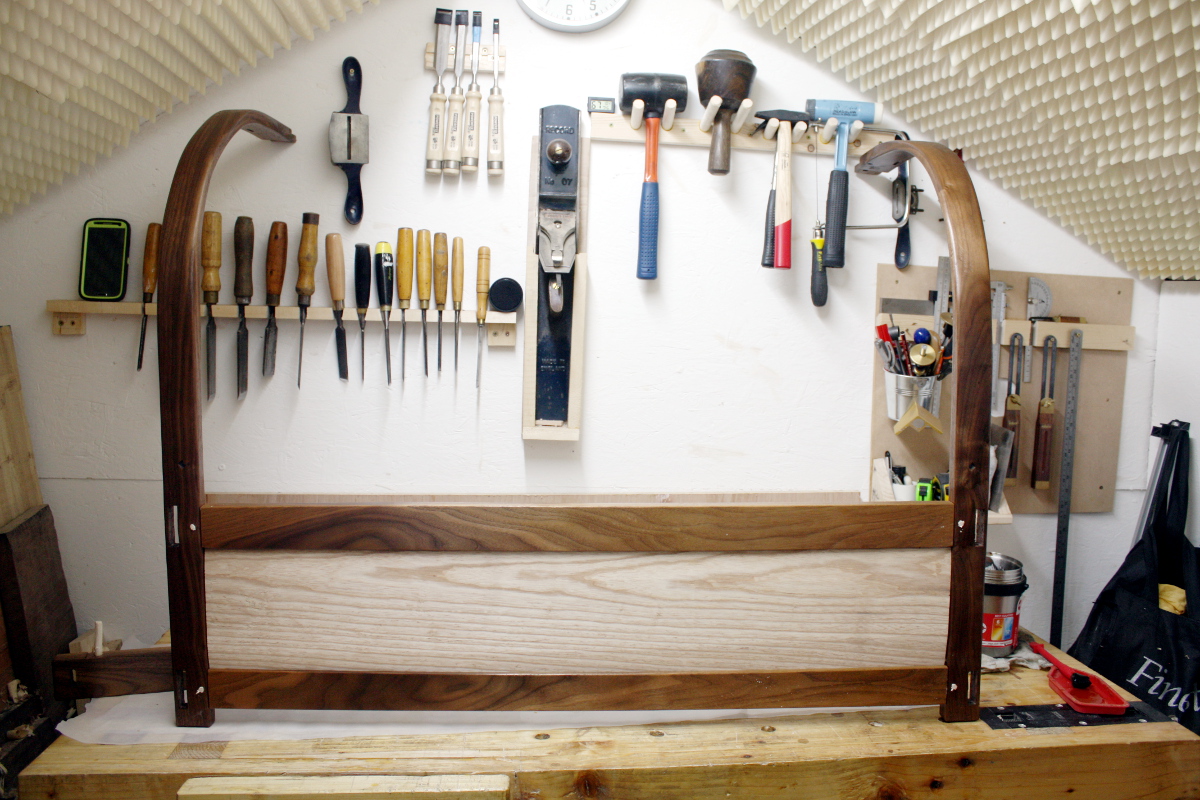
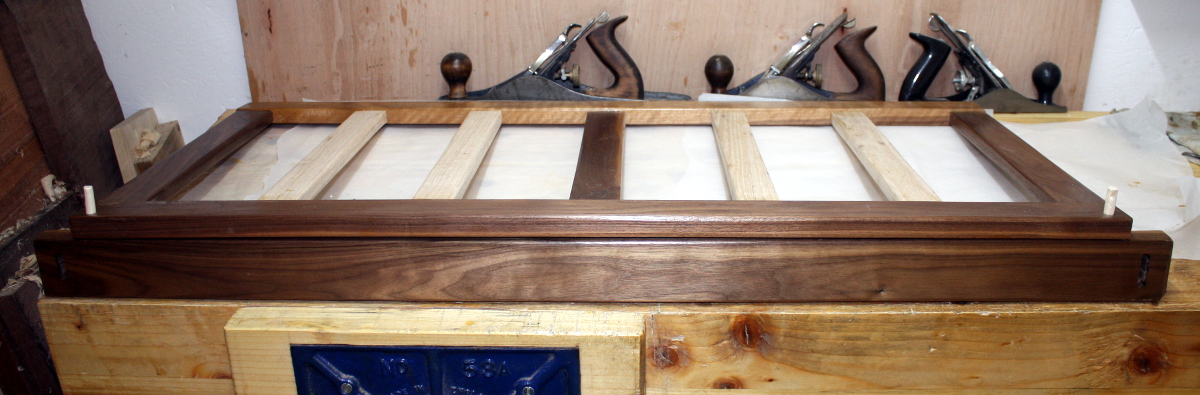
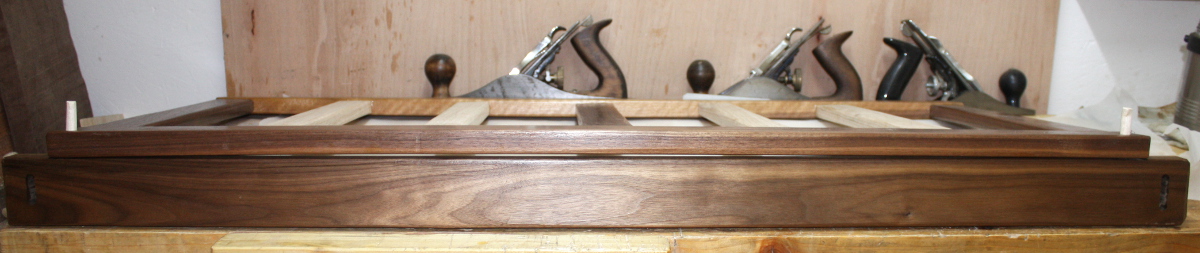
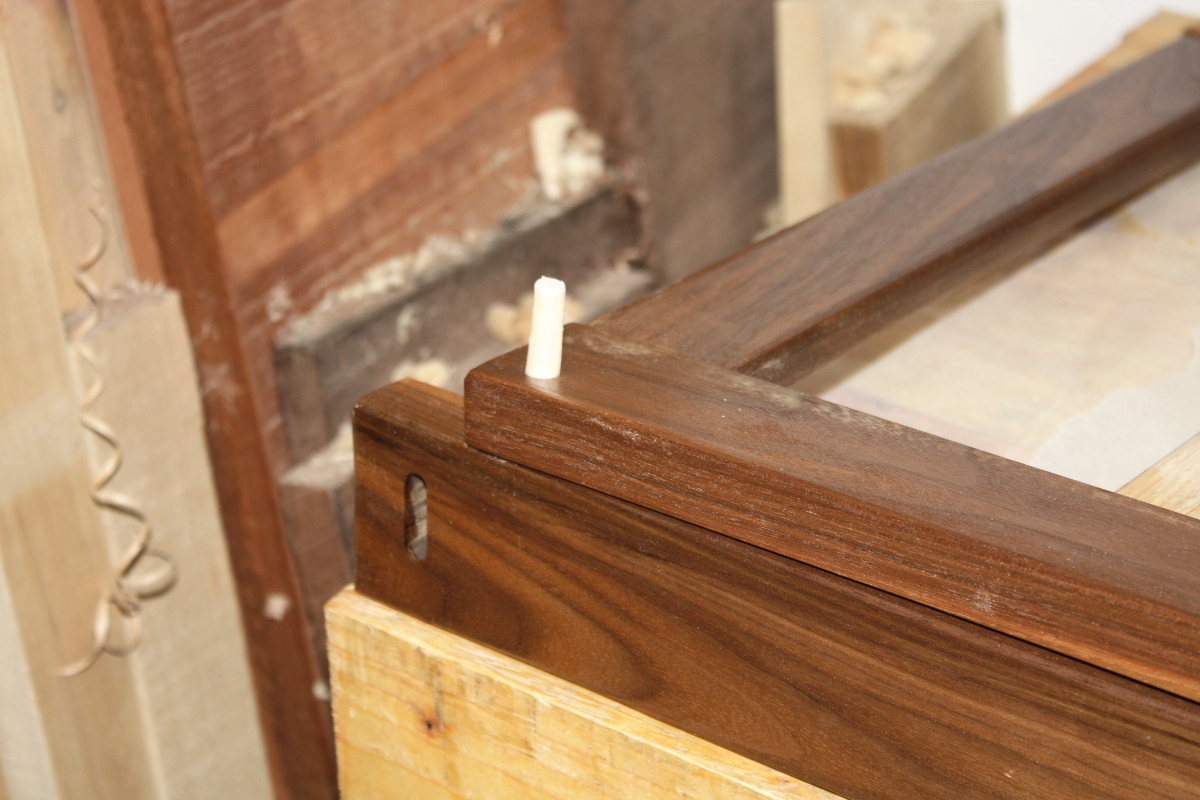
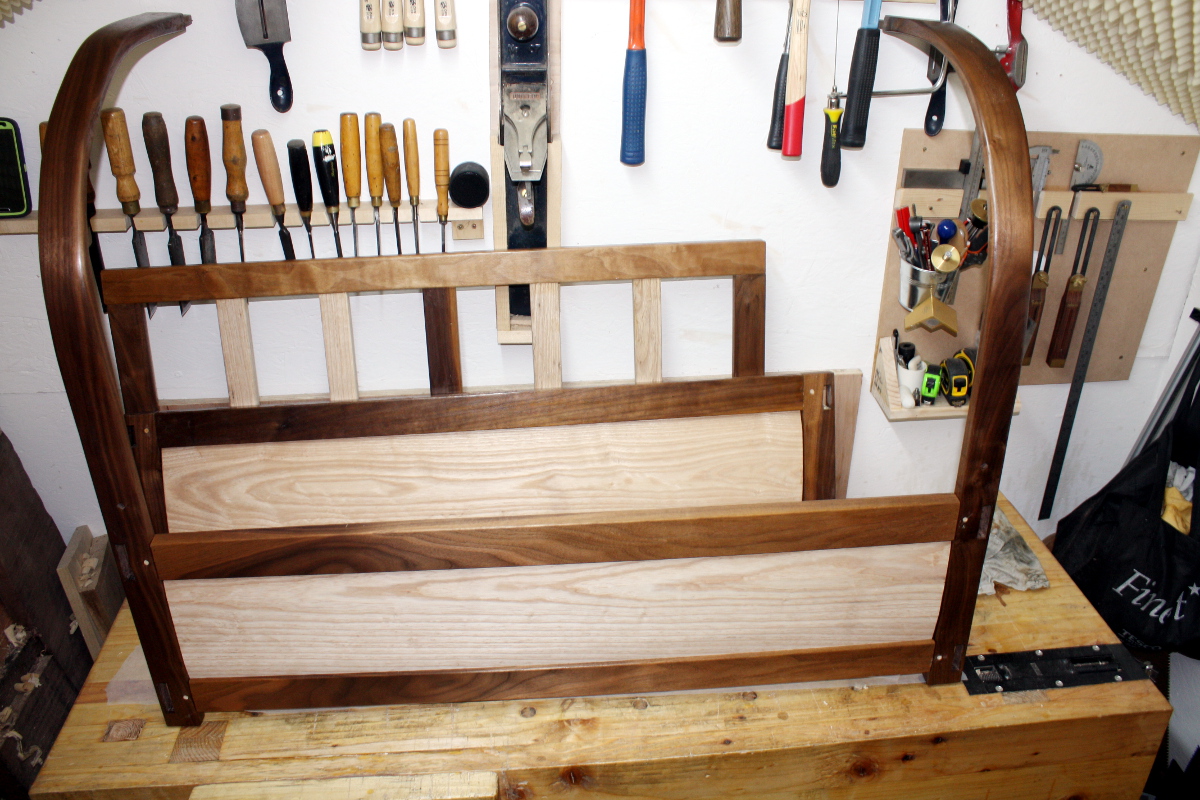
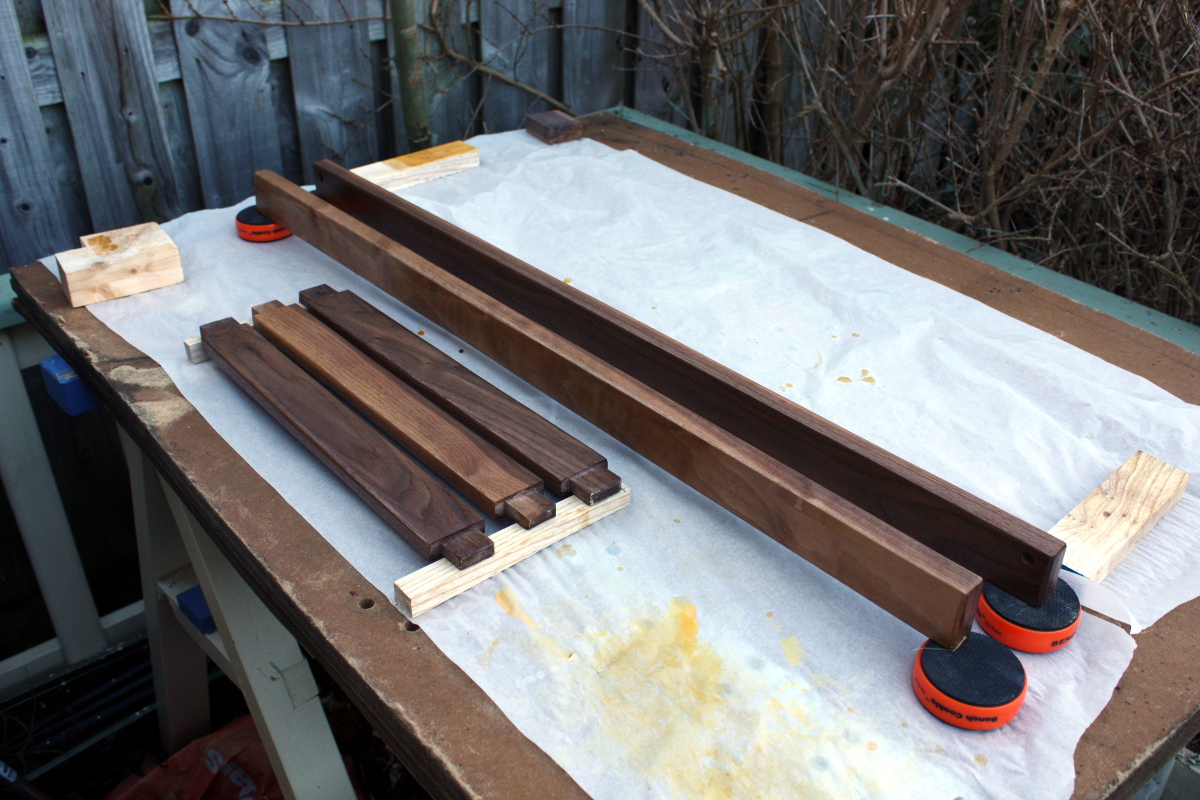
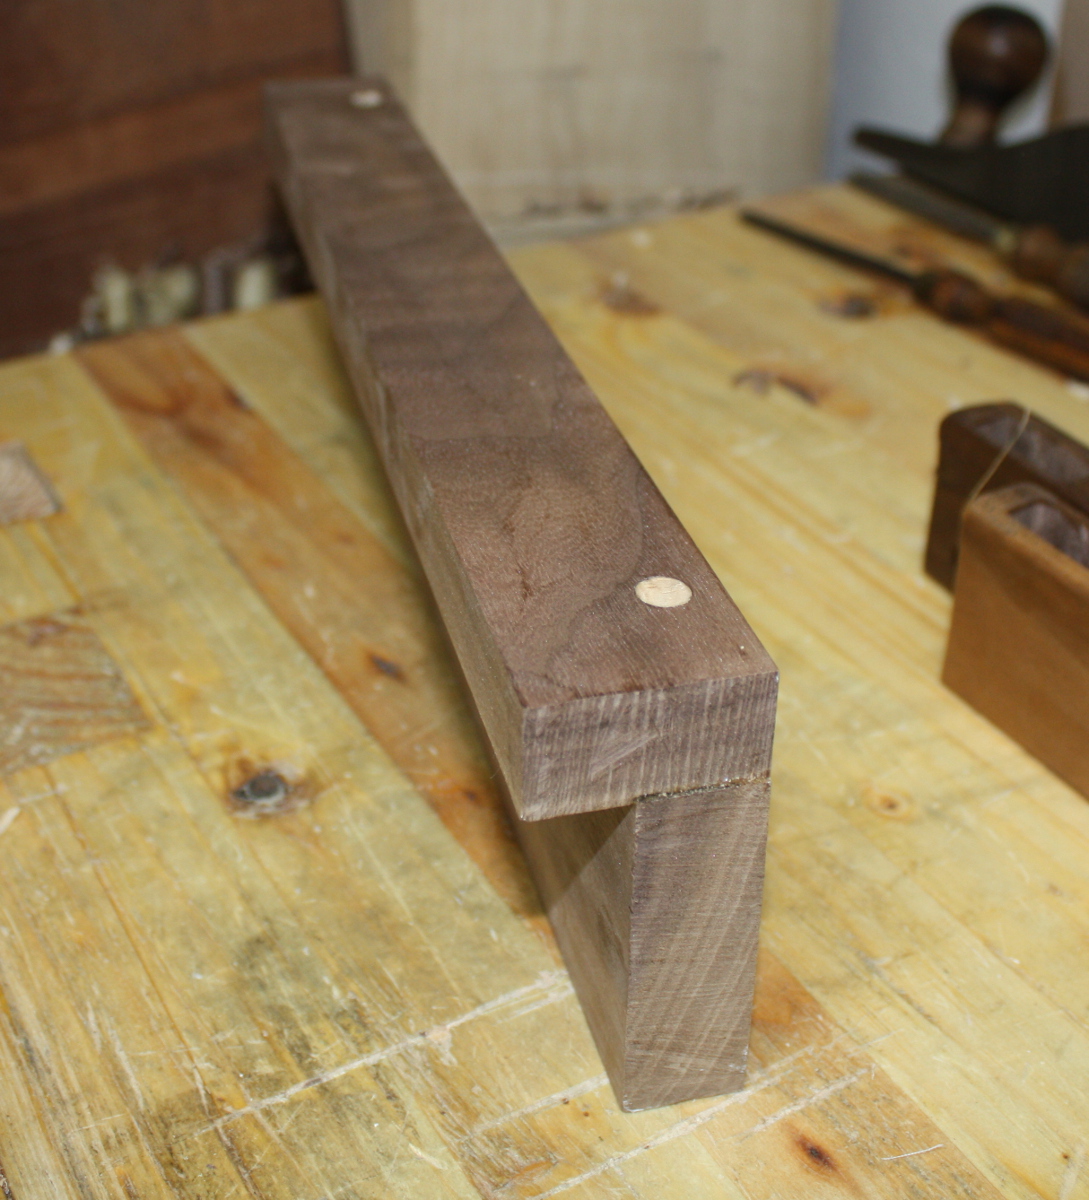
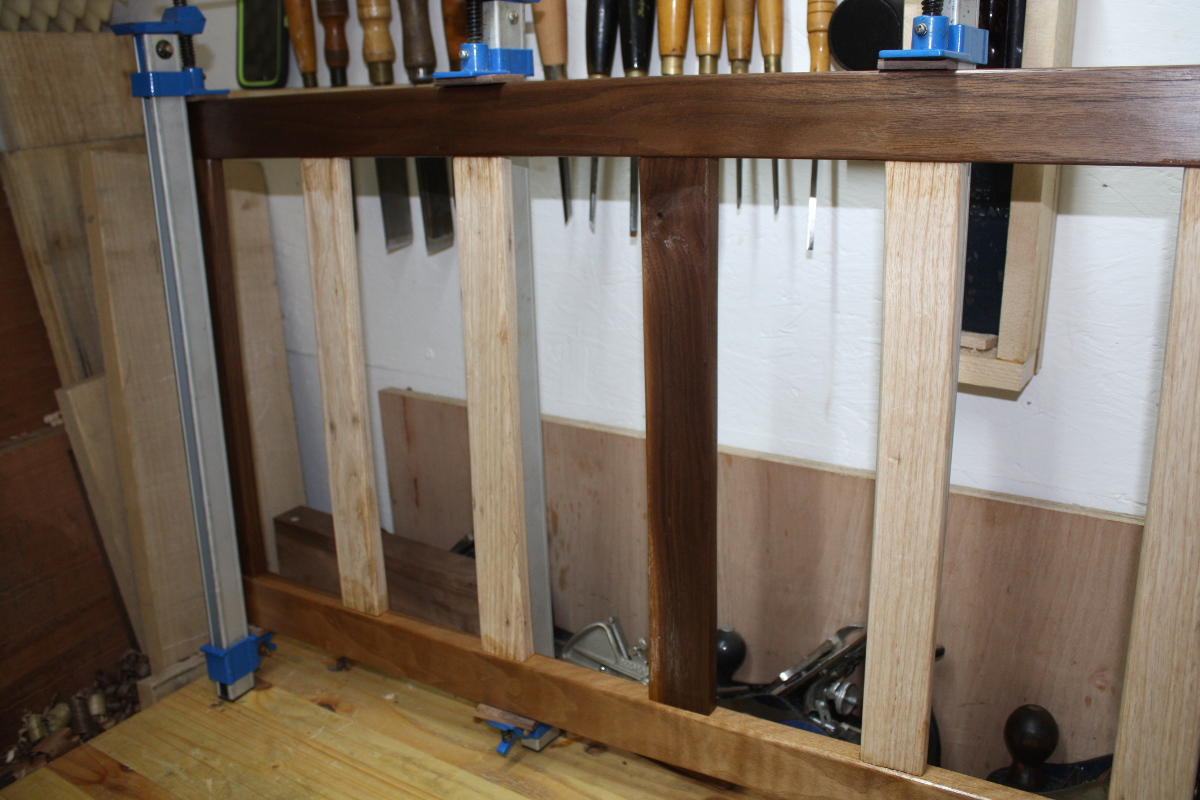
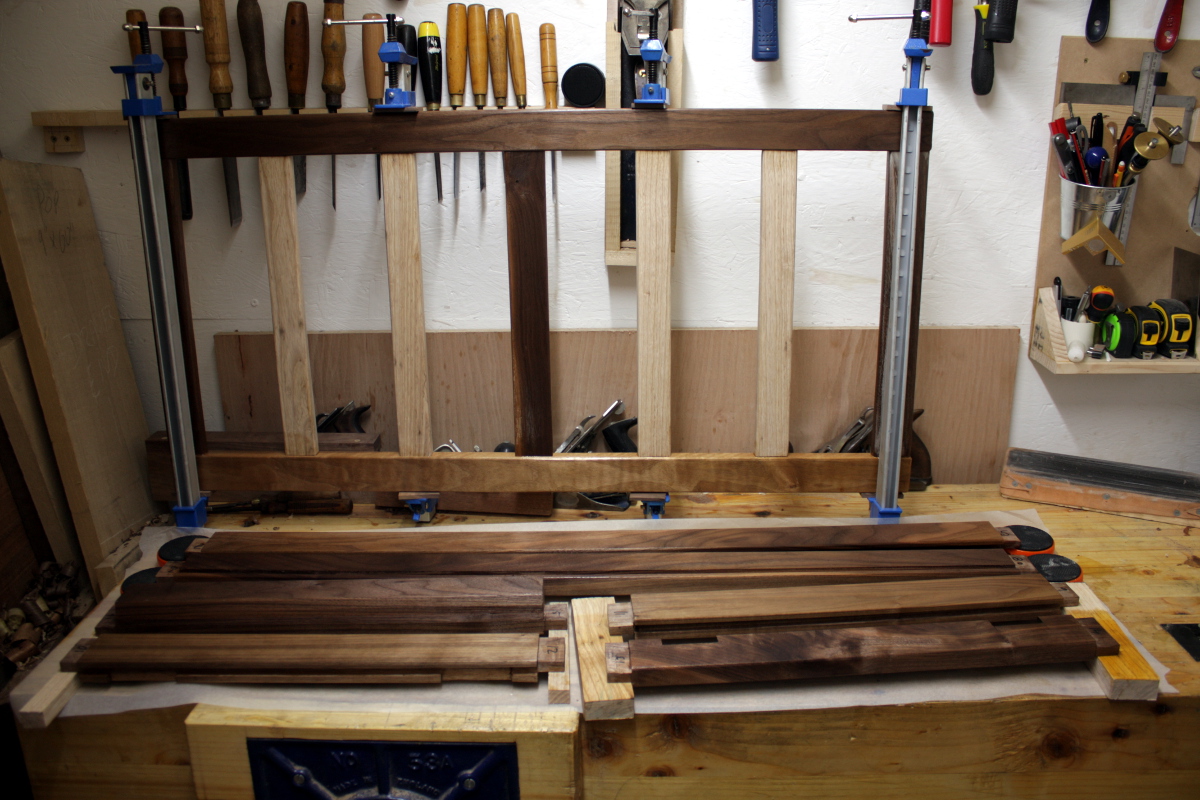
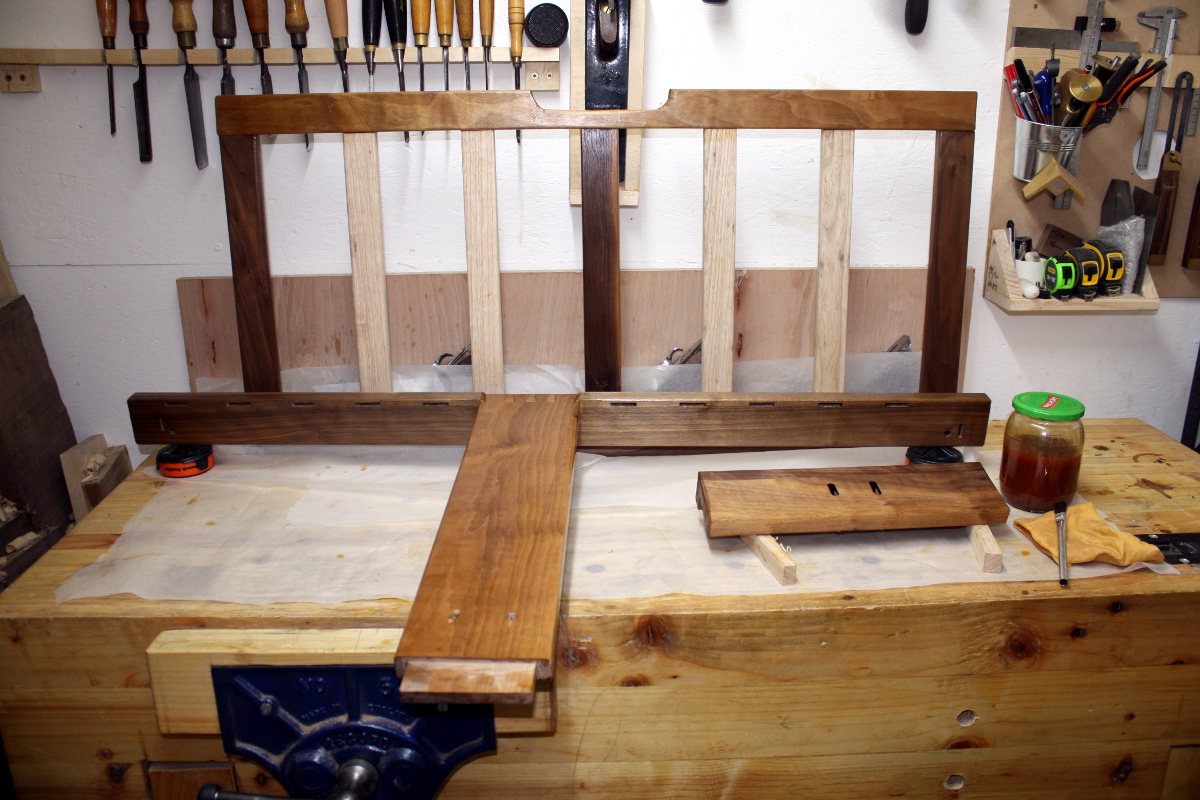
However, I did manage to get an all-up dry fit assembly, so I was able to get the holes and slots cut for the mattress platform’s rear support, so that’s done at least. I did discover that the mattress support platform didn’t want to fit; I knew there was some interference with the rear upright, but I thought it was 1-2mm and a few swipes of a plane would fix it.
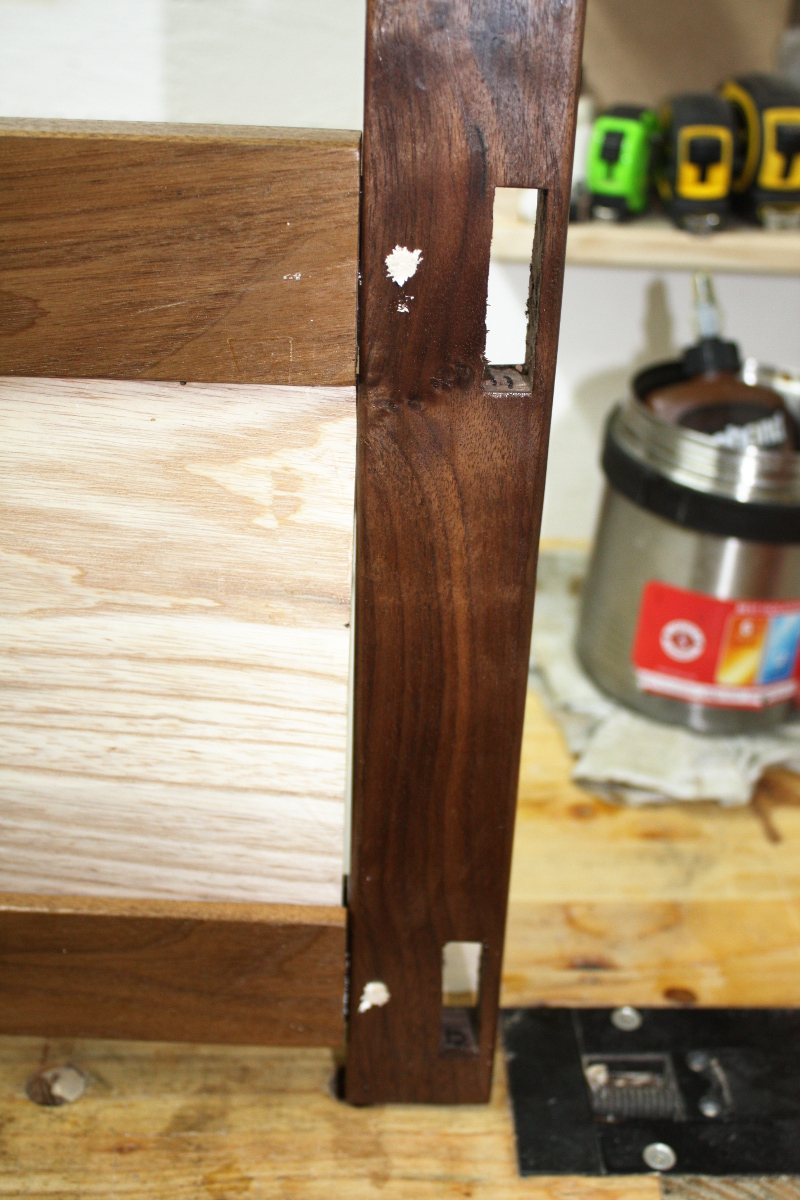
Nope.

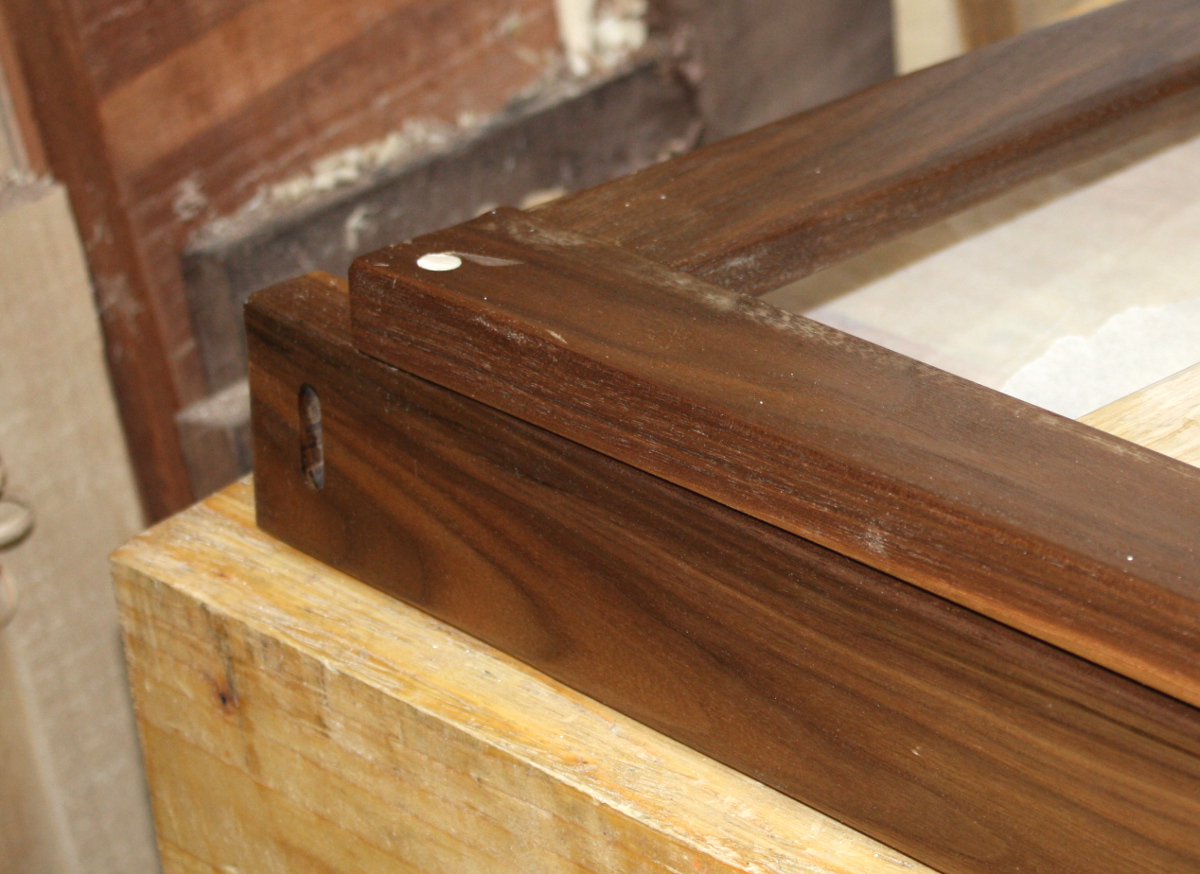
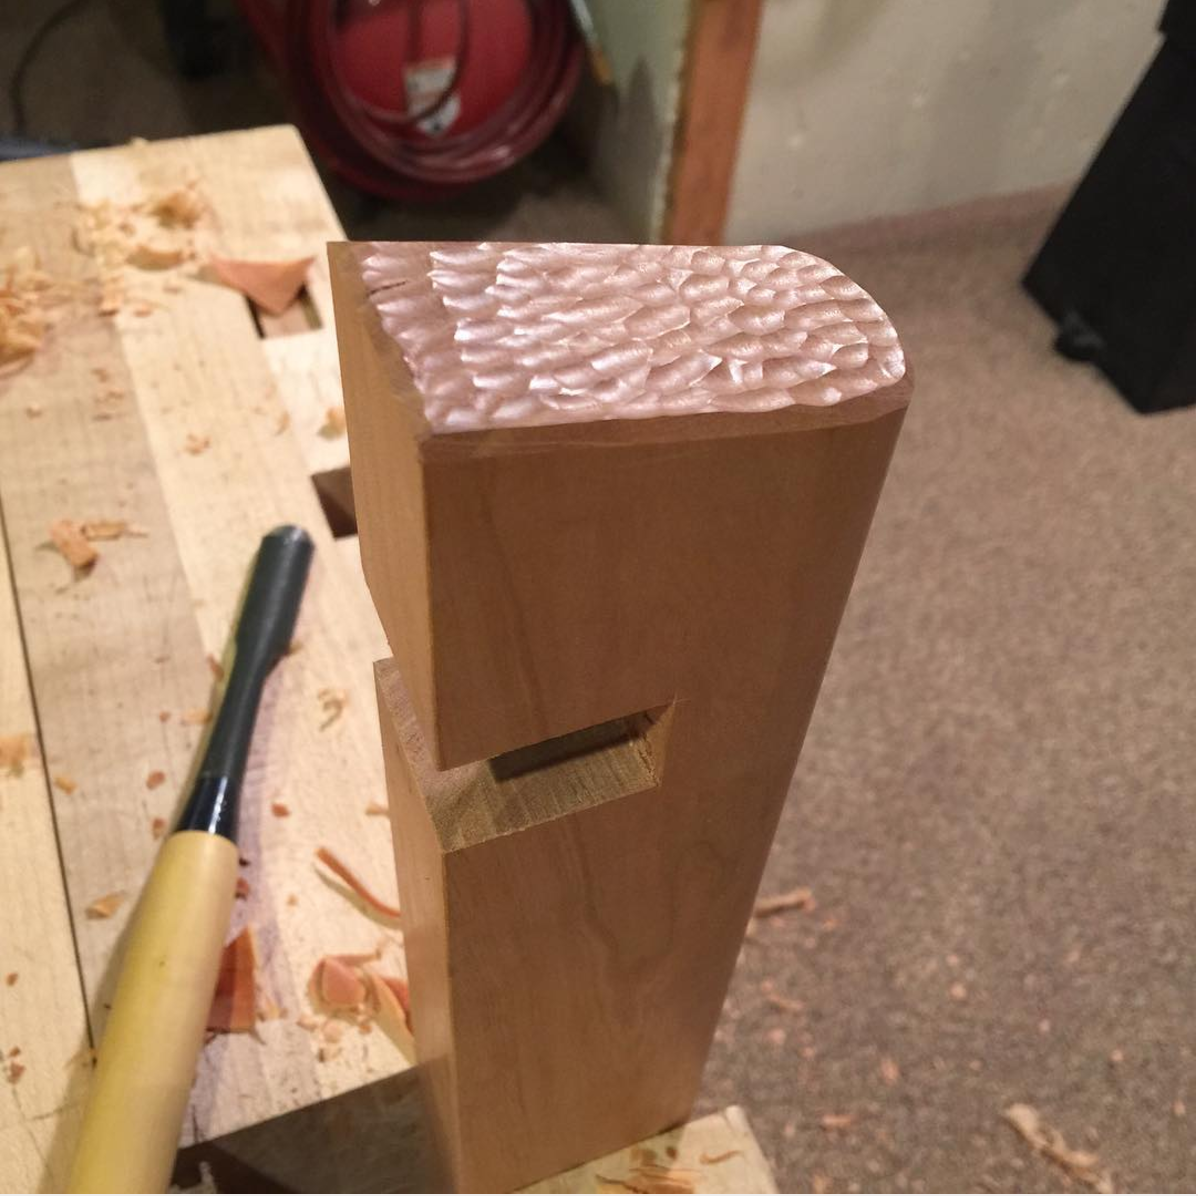
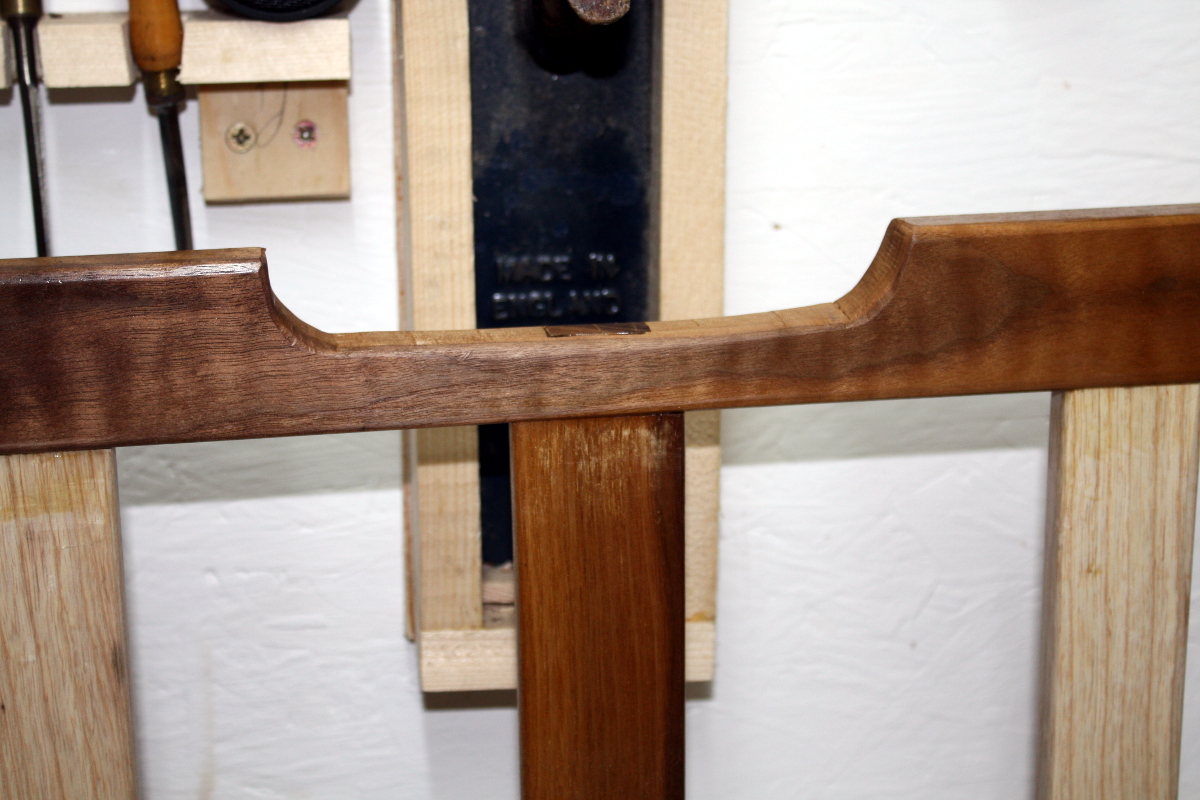
Well, that’s disappointing. But at least it’ll be at the back and under a mattress and there’s still enough strength there to hold (there’s a wide support right under that when this is in use). Still not getting much love for round-bottomed spokeshaves btw, that tight radius was what I thought would be perfect for them, but nope, still no joy. Used a rasp and chisels and sandpaper instead, then reapplied shellac (that’s coat #2).

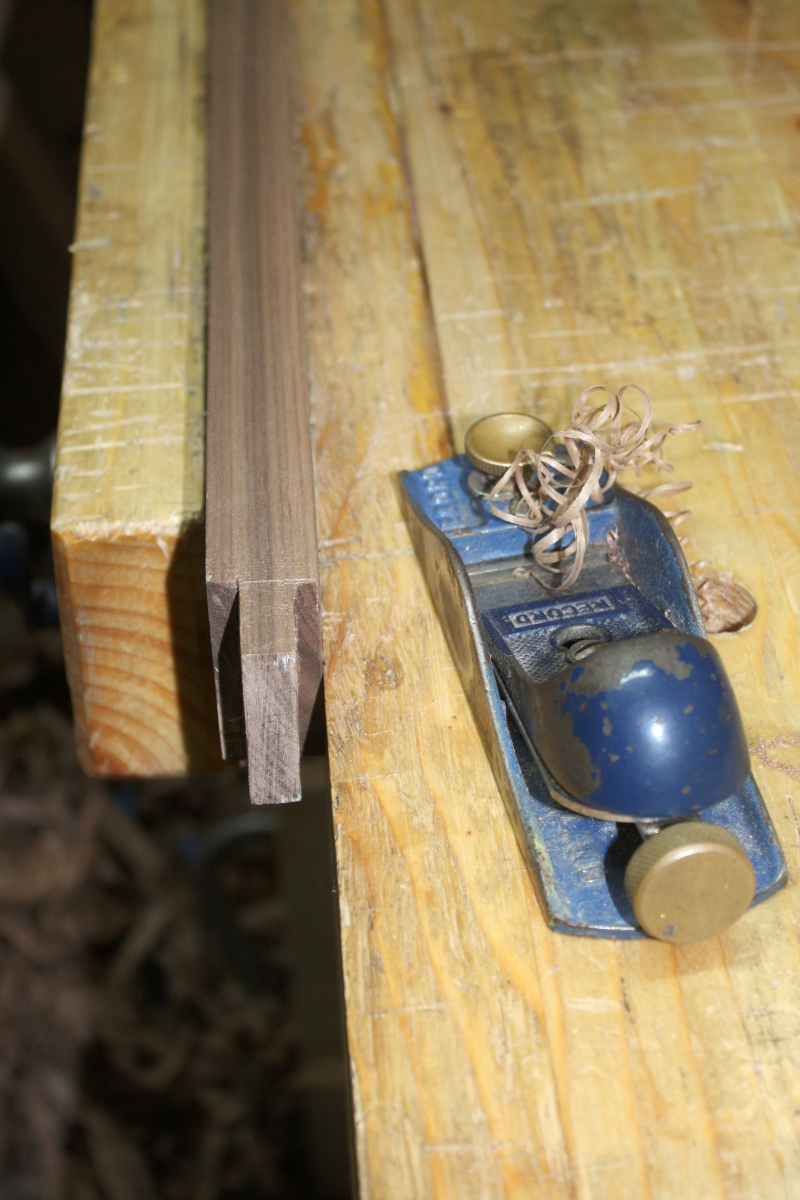
I also noticed that all my working clamps are about a centimeter too short to use for the crossrail glue-up, so I decided to go with wedged tenons there. So today was prepping for that.

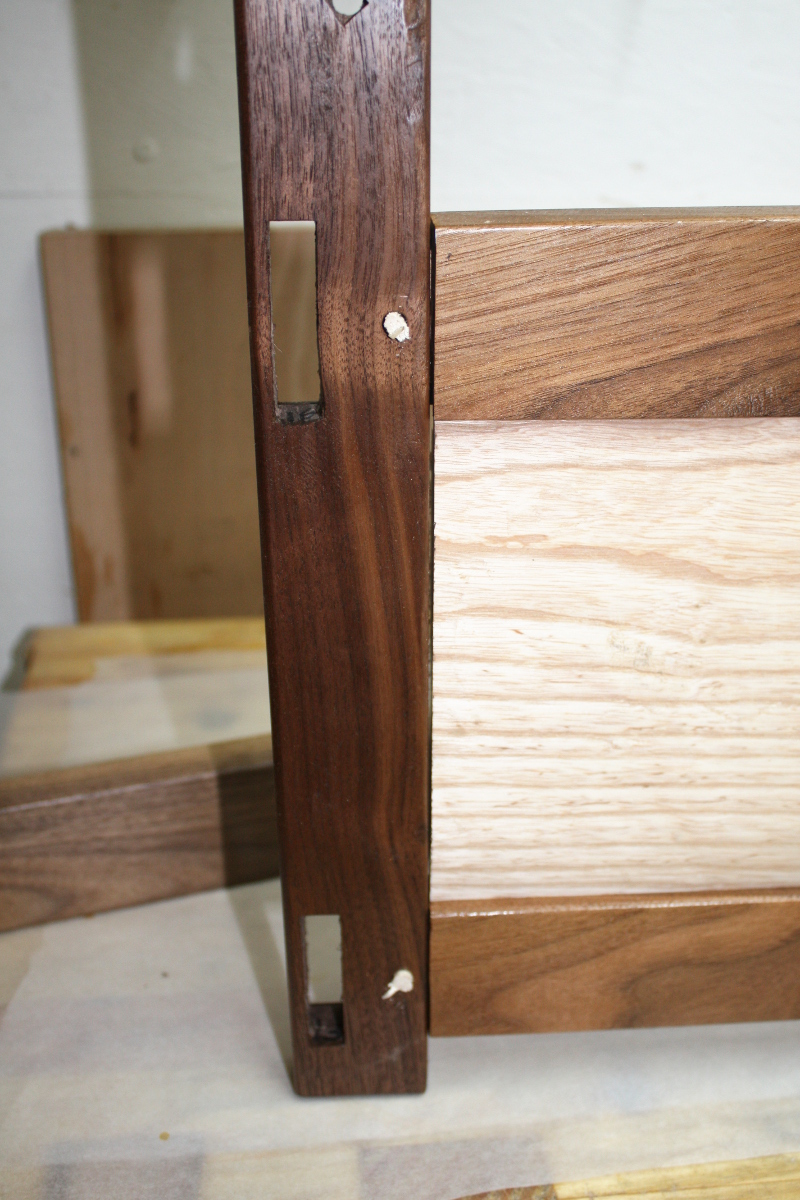
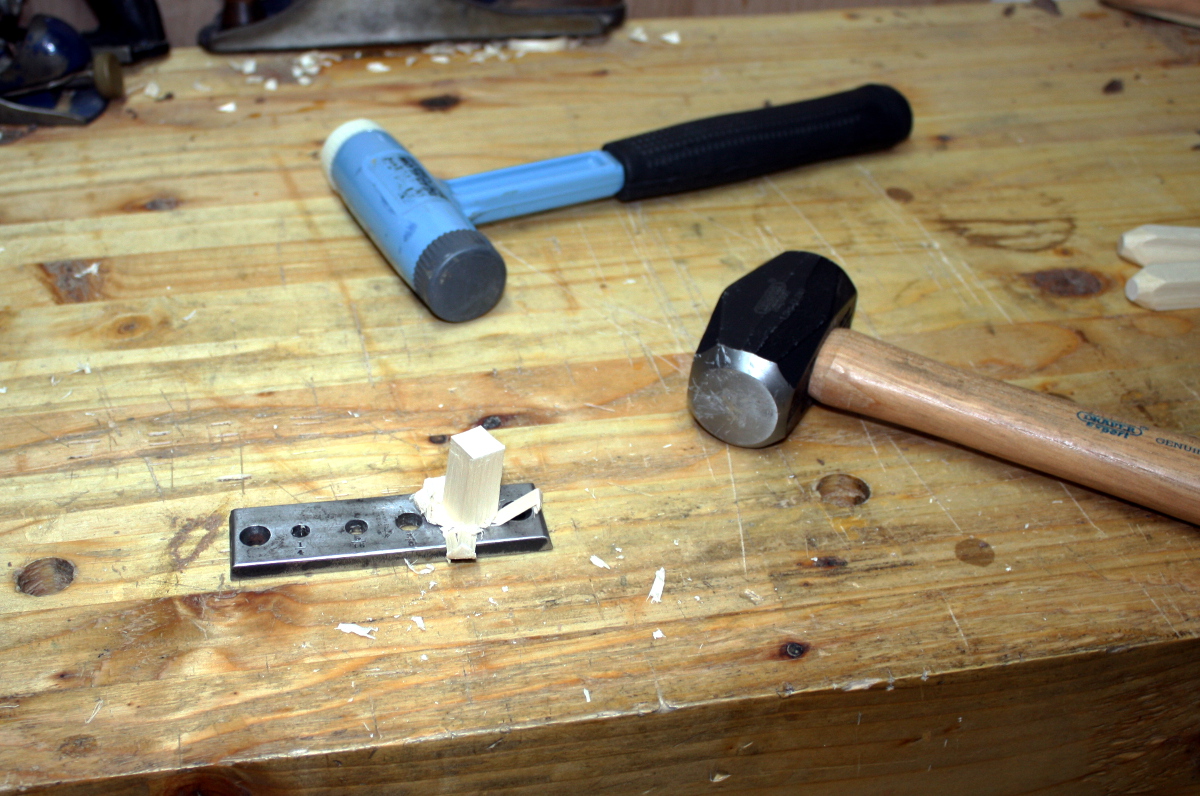
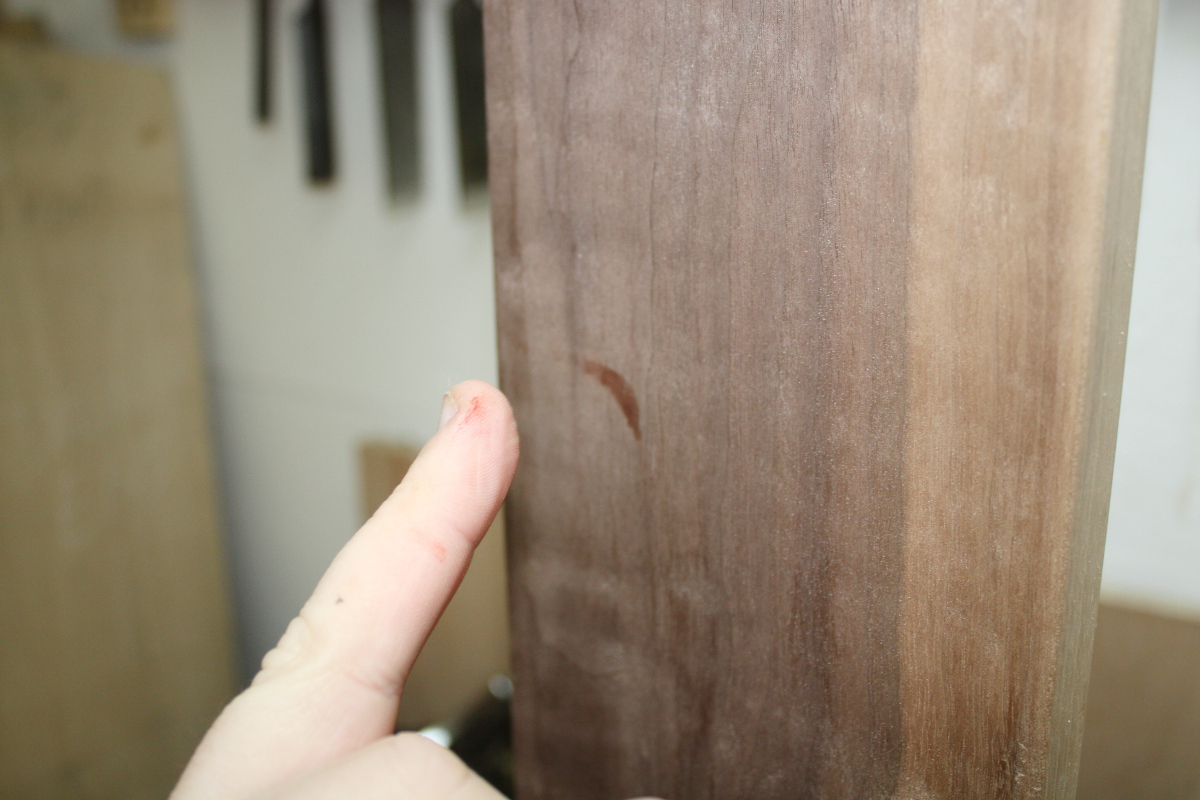
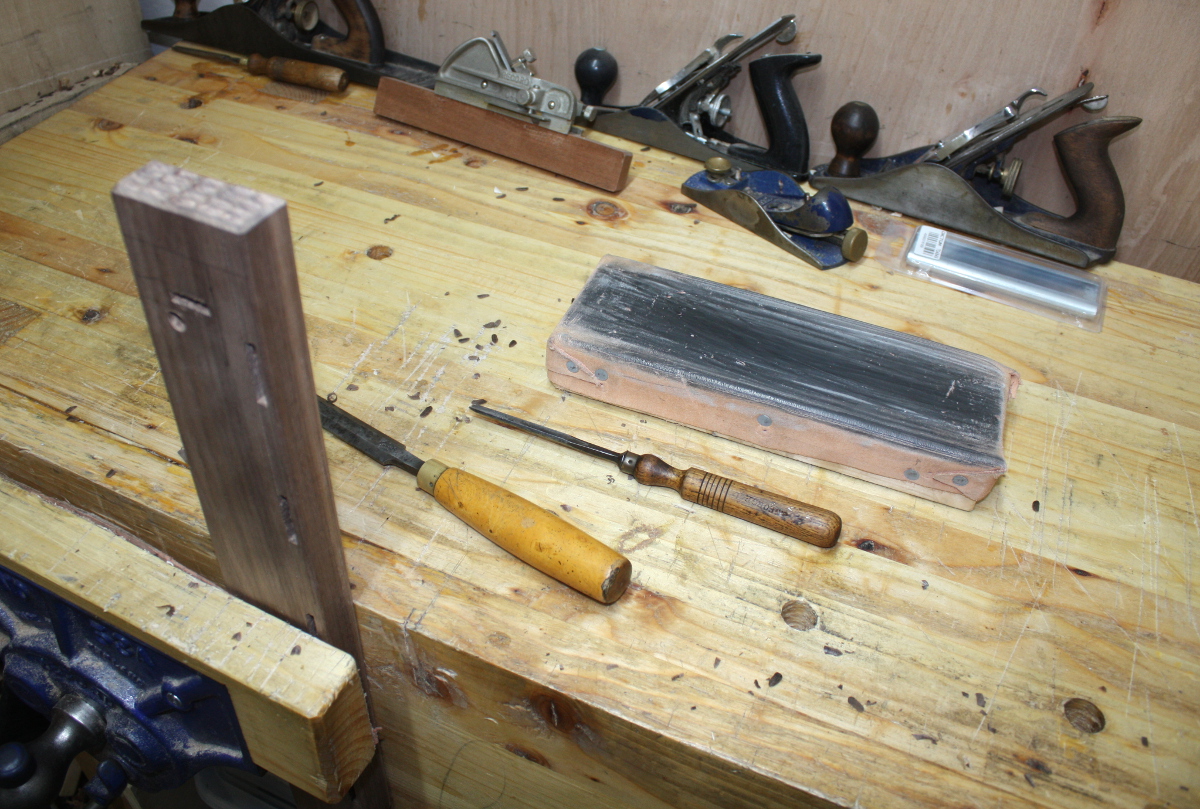
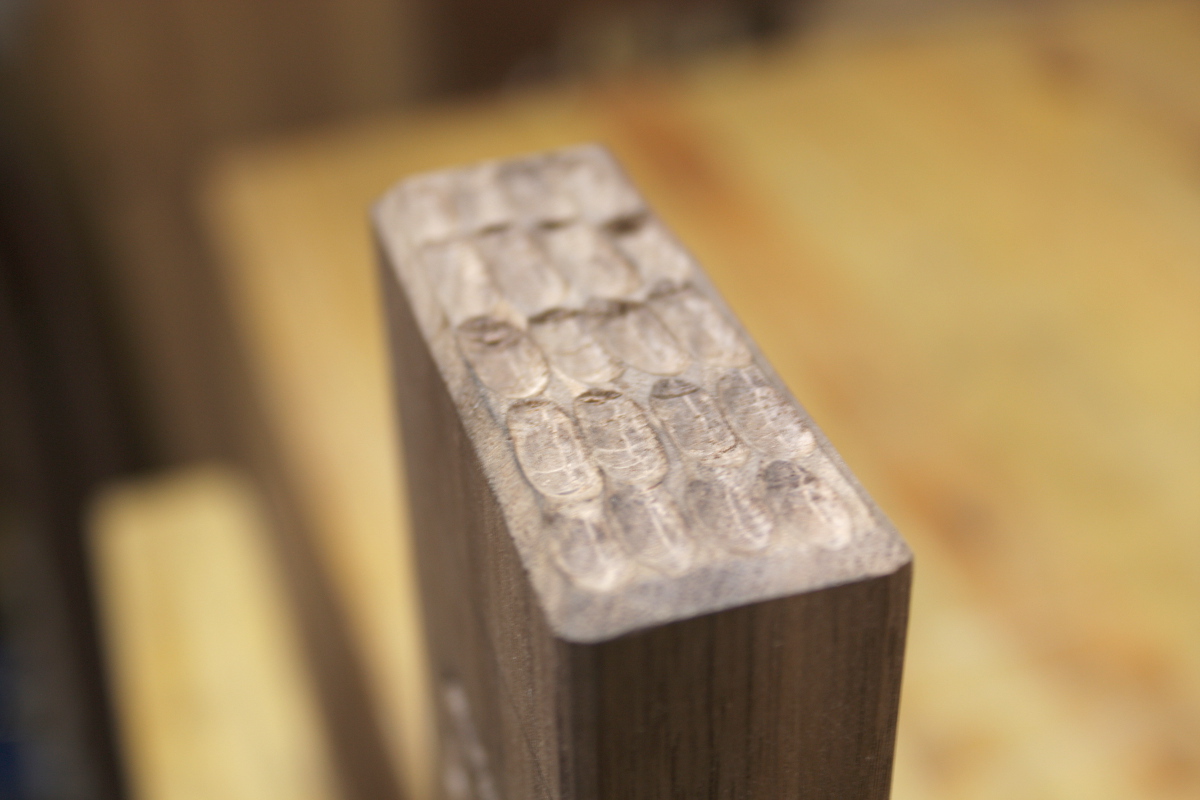
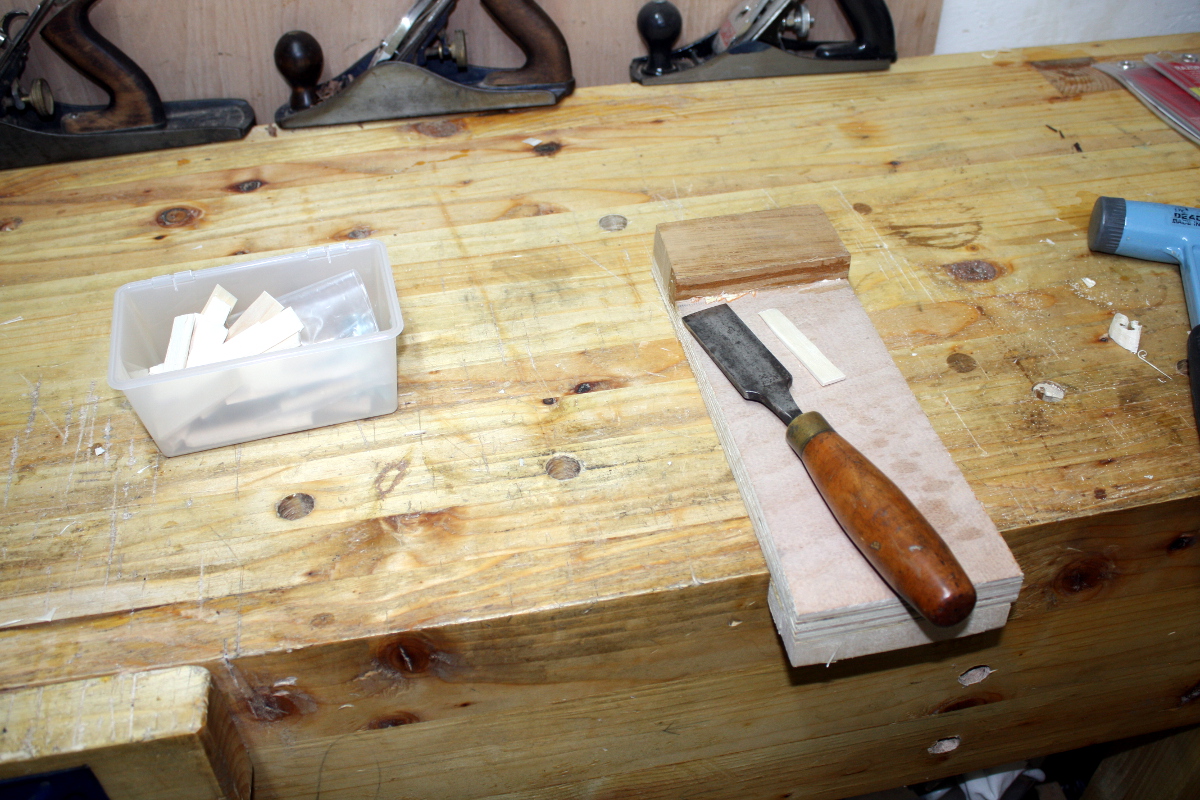
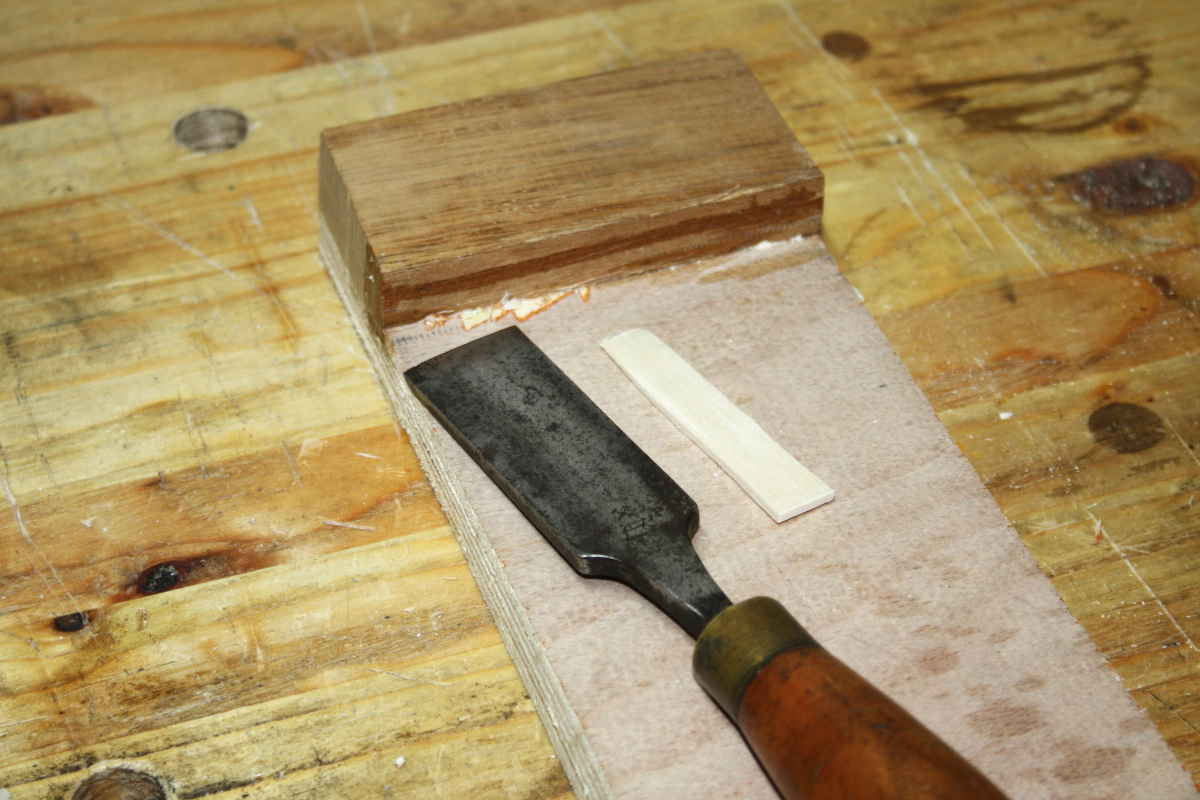
First off, a quick jig – take one piece of walnut with a square end that’s 50mm long, and plane down to a line going from the square corner to a point 2.5mm in from the adjacent corner. That gives you a 87 degree angle. Now slide the chisel down that angled face, and that’s how far to pare the mortice walls to flare them out on the face side.

(For those who don’t know, a wedged tenon has to have room to expand as you drive in the wedges, otherwise you’d just pop the top of the mortice clean out of the wood by shearing along the grain lines).

Next, make wedges. Rive out more of that lovely white sycamore stock, cut about 2-3mm thick and the width of the tenon wide, then put the end of the rived piece into the bench hook’s block and pare it to a point with a wide chisel.

Do that about twenty times or so and you’ve enough wedges even allowing for breakage. Grand.

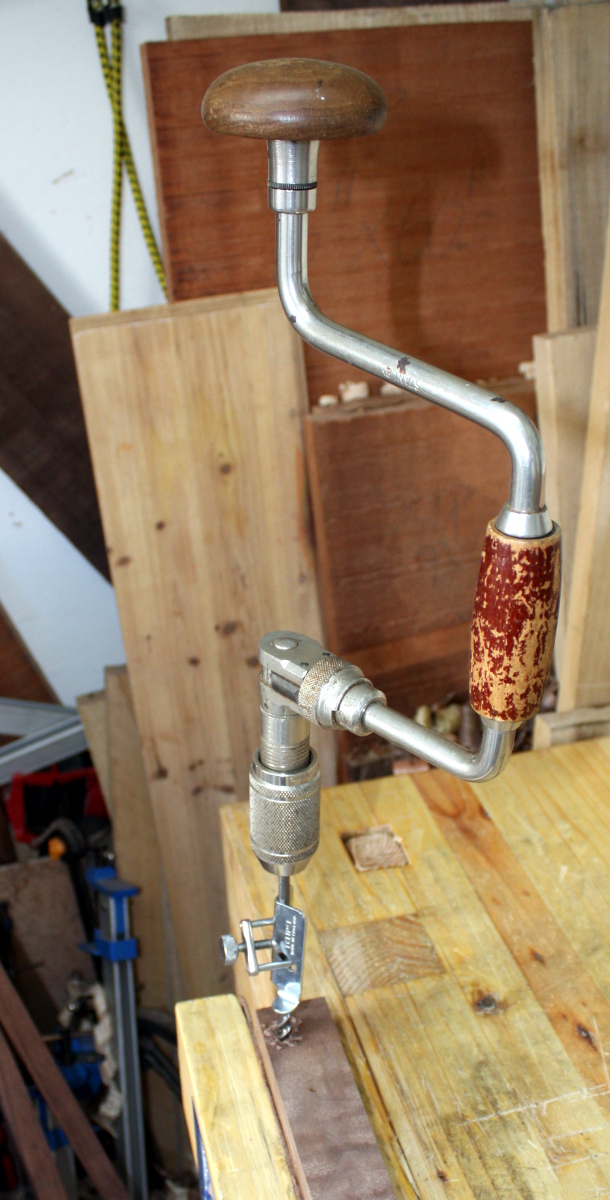
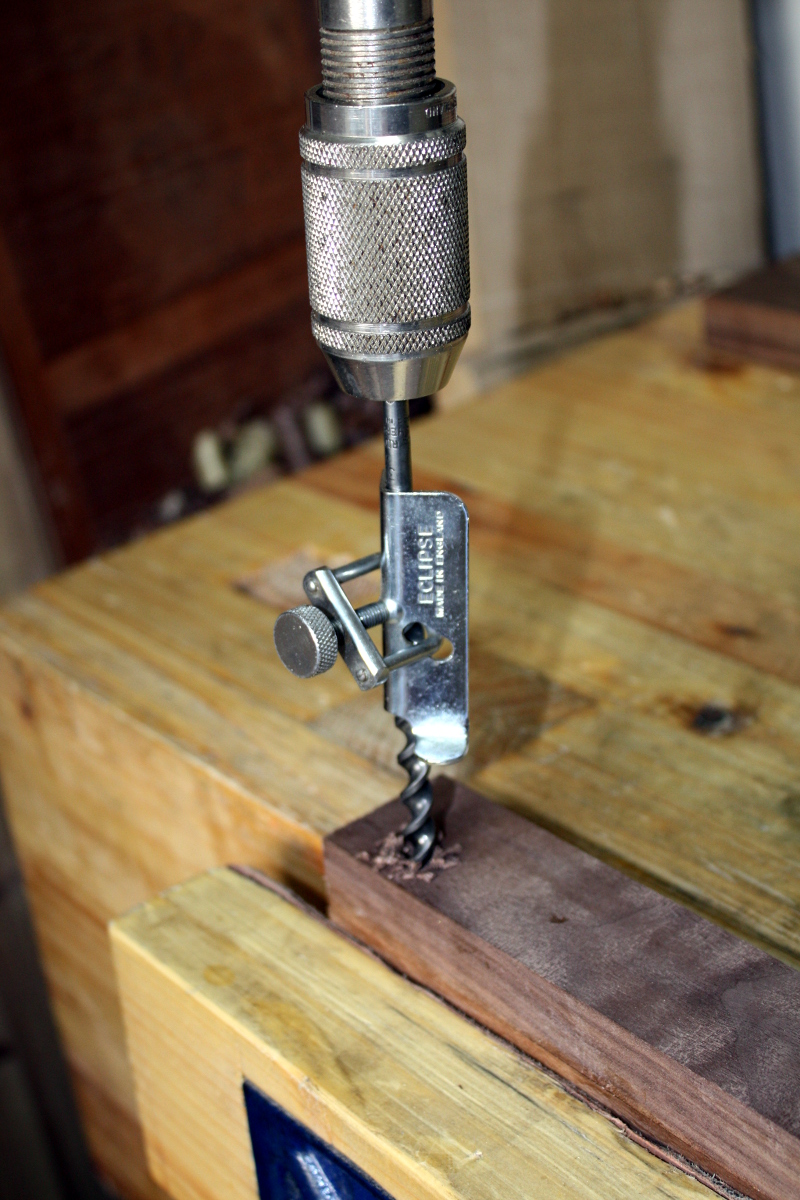
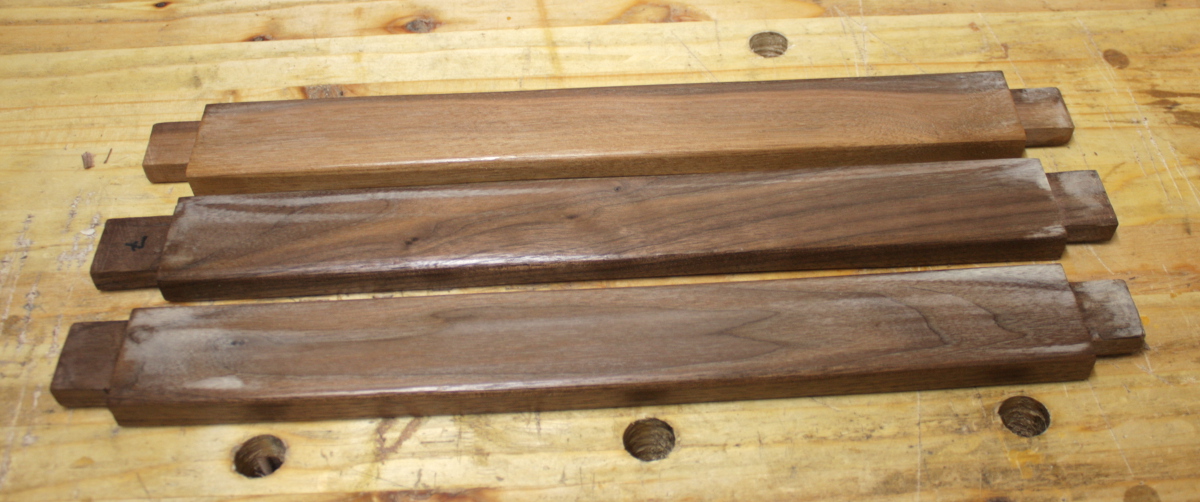
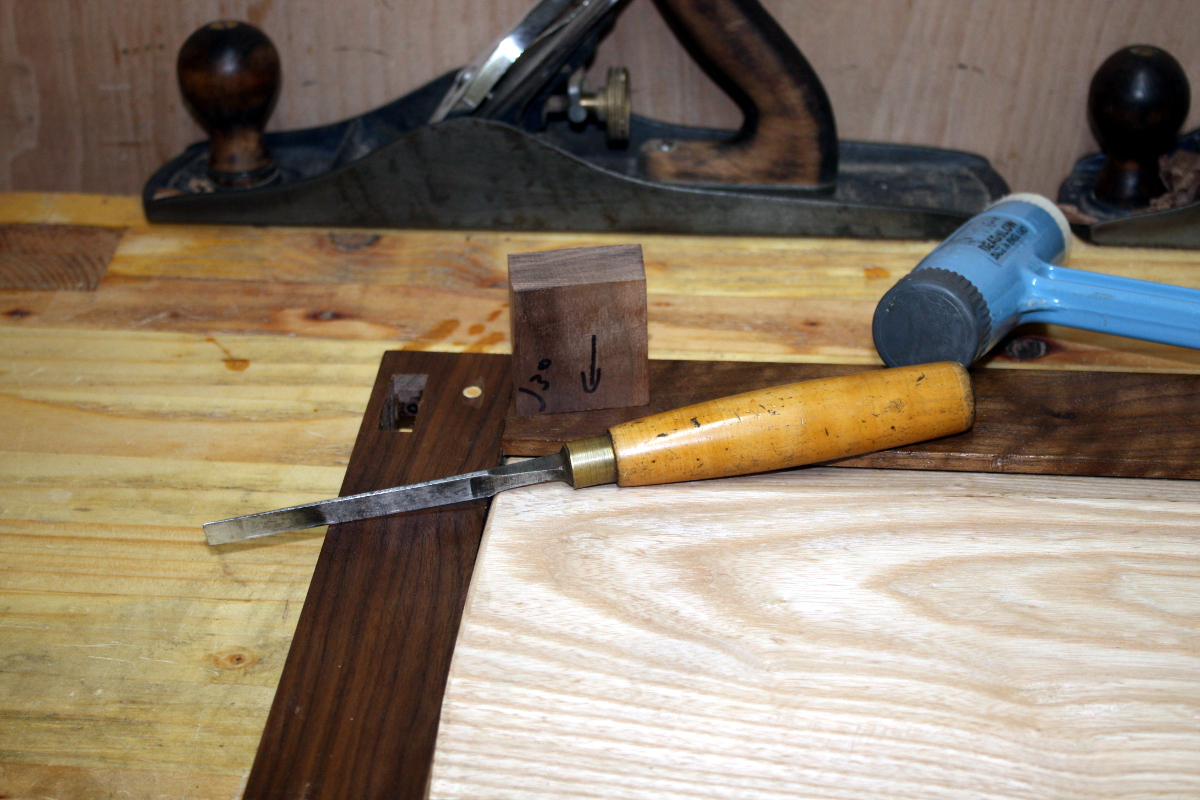
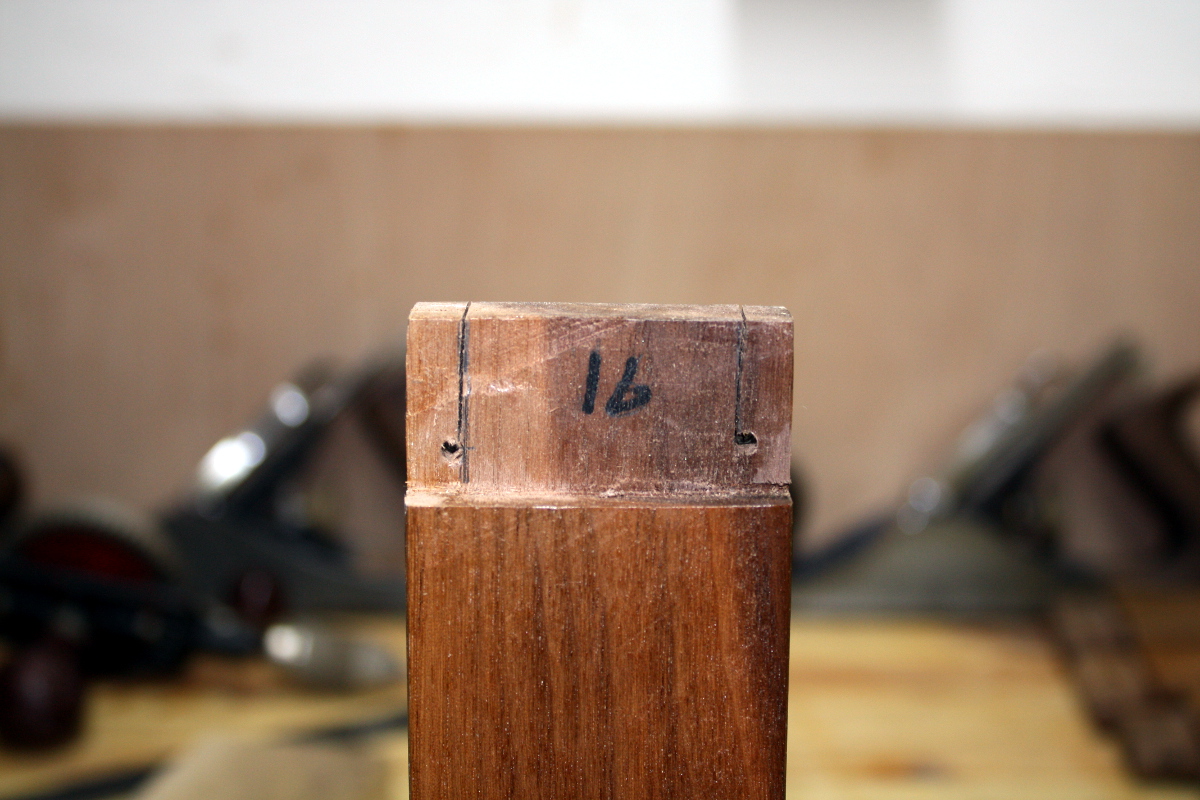
Next, take a 3mm drill bit, and drill two strain relieve holes in each tenon, about 6mm in from the edge and up from the shoulder. Now cut down a line from the end of the tenon to meet the inside tangent of each circle and you have a tenon with two end pieces that can flex outwards slightly.

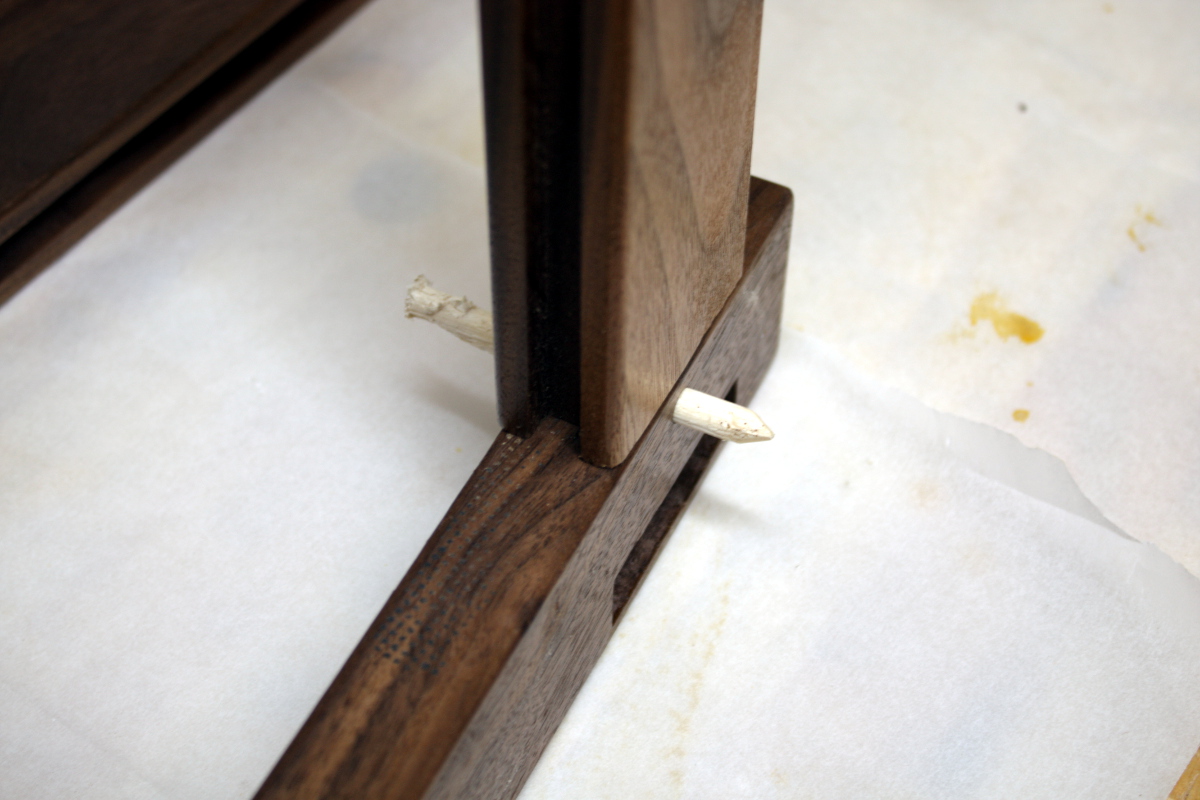
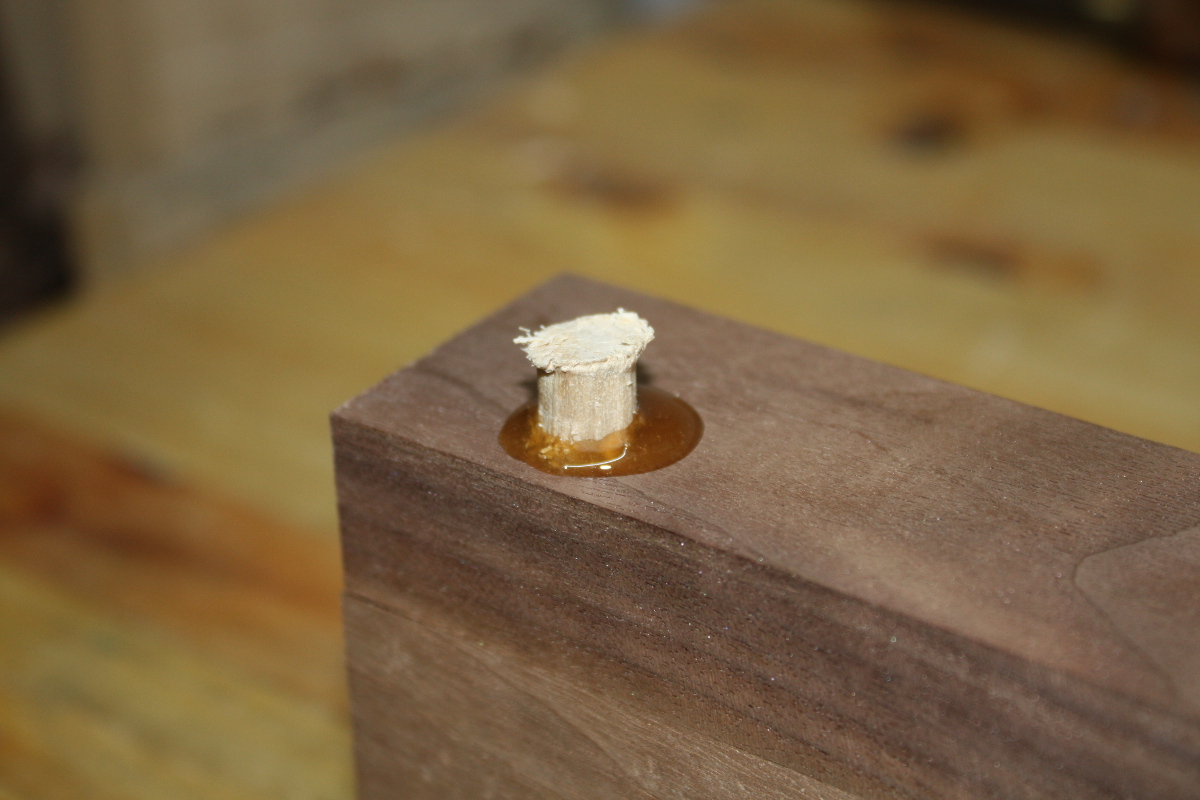
And now when you go to glue up for final assembly, put the joint together, (glued up and everything) then take two wedges, paint with a light coating of glue, and tap them just home into each cut.

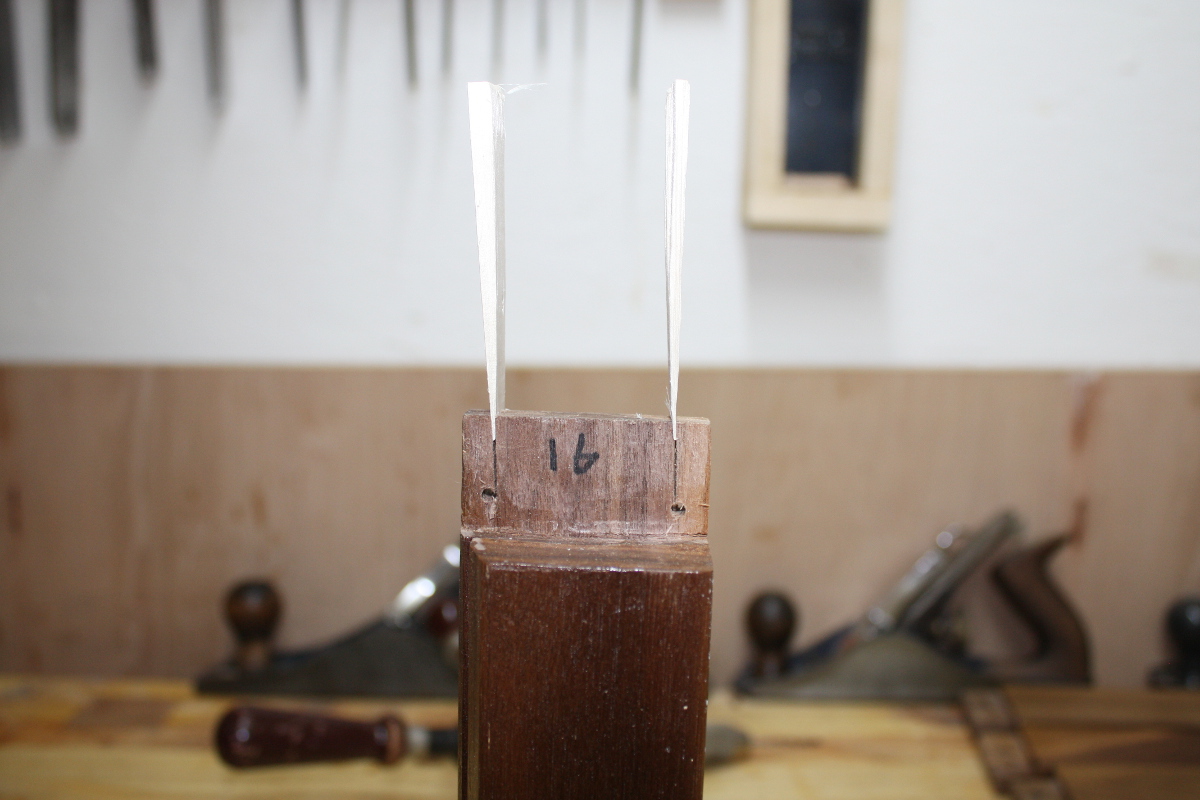
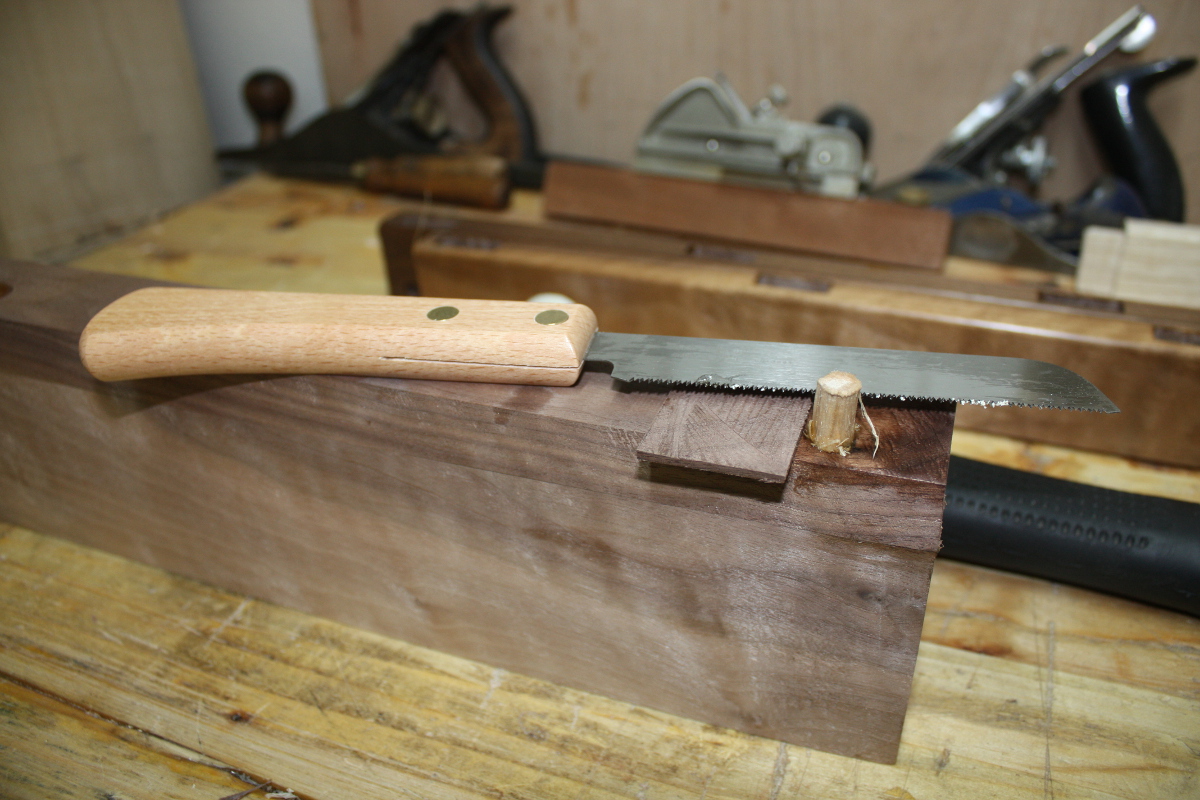
And now take your hammer and drive them home. They may not go down all the way, they might bottom out before that; but either way you now have a wedged tenon M&T joint that doesn’t need clamps to hold for glue-up and which has a mechanical aspect to lock the joint as well as the glue. And with the contrasting woods, they’ll be decorative as well, hopefully.

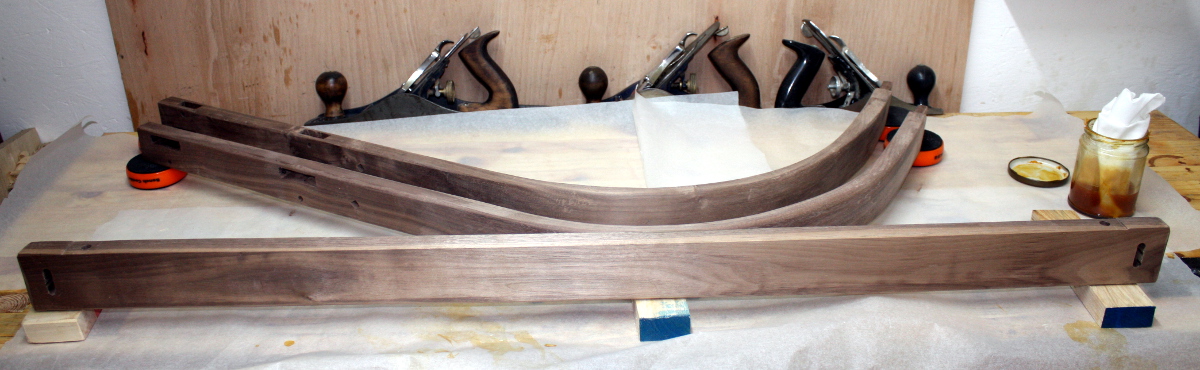
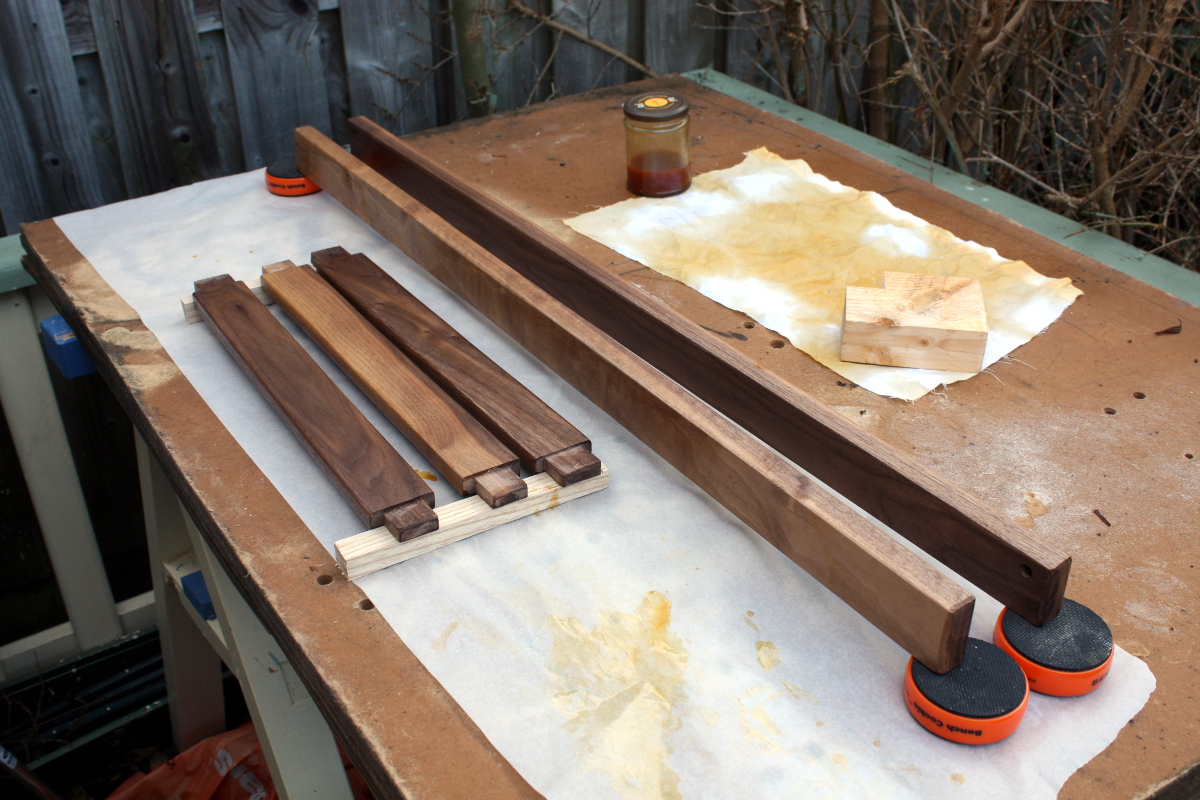
With that all done, I sanded down the back support and the mattress platform and its rear support and gave them coat #3 of shellac…

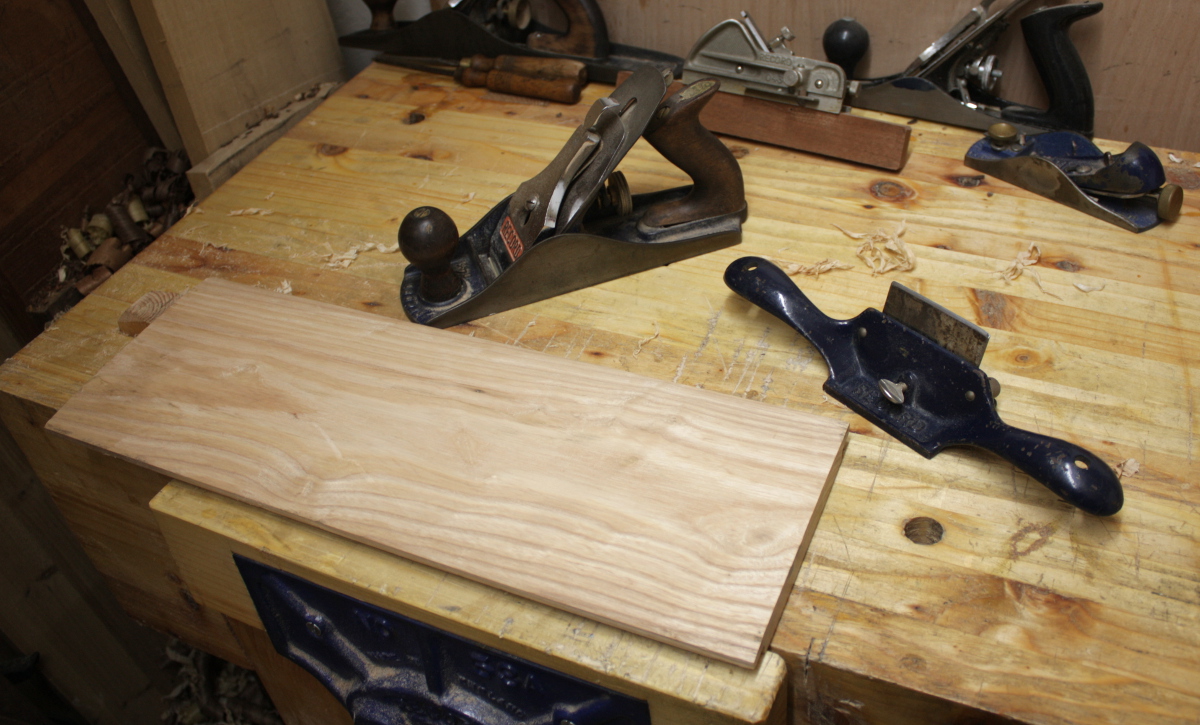
Tomorrow it’s time to sharpen the scrub plane and get that drawer side thicknessing finished so I can get on with making the drawer. I’ll get the last coat of shellac on things as well, and that’ll let me do the final assembly of the frame as soon as I complete finish planing the top panel.

To-Do List (stuff in progress in blue:

  • Finish plane top panel
  • Make a drawer
    • Thickness the boards for the drawer.
    • Cut the drawer front to size.
    • Cut the drawer back and sides to size.
    • Cut dovetails for drawer.
    • Groove drawer with #43 for plywood base.
    • Maybe add runners underneath the drawer?
    • Finish plane drawer front
    • Finish drawer front with shellac.
    • Paint drawer sides with milk paint.
    • Assemble drawer.
  • Assemble and glue-up and drawboring of everything.
  • Finish entire assembly with several coats of Osmo wood wax.
  • Close door of shed, lock it, walk away and never do another project with a deadline ever again.

12
Feb 17

Sous vide woodworking

I *had* hoped to get everything done this weekend. However, I’m on-call this week and something went sideways on saturday evening and took ten hours to fix, so no dice there. But I’ll get some time in lieu and that’ll let me get the assembly finished this week (I hope) and the crib should be completed by next weekend (or over next weekend). It depends on what goes wrong and how many coats of wax I put on it.

That was the beautiful carved mattress platform support. Then I did a dry-fit test to see where to carve slots in it for the bolts and discovered that that lovely curved bit would be inside the top panel. Well. Drat. I had to rip the board down the middle, cutting off that lovely profile. Oh well.

Once I had it ripped down and planed and rounded over, I had to cut the slots for the bolts. And I tried to think of a way to do this without using power tools, but nothing came to mind that would do the job very well (drilling lots of holes in a straight line being harder than you think with an eggbeater or a brace and bit). So out with the router, some faffing about with adding a wooden fence to the metal fence attachment because it was guiding along three inches of endgrain and the metal fence bit for some reason has an inch-sized hole in the middle, and then even more faffing about with workholding.

I get that a lot of people like these things but they mostly just annoy me. Maybe they’re more fun when mounted in a table. Or the smaller laminate hand-held ones, this one is a bit bulky to haul around lightly. And it’s so fecking loud, especially in an enclosed small space. And the dust, it’s basically fines it’s so small. You wind up wearing a metric buttload of protective gear.

It’s a total pain is what I’m saying. And all that faffing about for two of these:

Gah. But at least it’s done. Then I dry-fitted the slot to the hole through the front upright…

Yeah, M8x50s just ain’t cutting it. Had to get some M8x60s at woodie’s later on.

Then I set up to start shellac’ing the uprights and the platform support now that I had the last of the cutting done on those; and this is where the phone rang and I had to abandon things for the rest of the night. I did manage to rag on the first coat of shellac before legging it so at least that got done. Then at the end of the night (somewhere around 2am) I took a break while debugging stuff to clear my head and I got the second coat of shellac on.

I used up the last of the shellac I had on hand for that coat, so that large jar on the right there is the last of the shellac buttons I had (need to order more flakes soon) and some isopropyl alcohol (it’s a 2lb cut, or in metric, a 24g per 100ml cut, or in a more useful form, a 24g per 80g cut 😀 ).

The problem is, when I made up the last batch, it took the guts of a week to dissolve and that was during the summer; at -1C, this was going to take a fortnight to fully dissolve and I really wanted shellac tomorrow. And I didn’t want to go buy a different shade of ready-made shellac in woodies or something equally desperate. A few of the finishing forums online talked about putting the jar somewhere warm in the house to speed it along but not to heat it (ever boiled isopropyl alcohol on a gas hob? Think crêpe suzette only you’re probably the one on fire and there’s burning resin everwhere). And then I had a thought…

Sous vide shellac. Eat your heart out chefsteps 😀

And the next morning it had worked! 🙂

First though, time to finish the slats. They all needed to be finish planed, and the side slats needed to be rounded over, and all the edges got a light sanding as well (because kiln-dried ash is a bit like planing a cream cracker and the only way to get it really smooth was sandpaper). And three of the slats had somehow not had their tenons cut so that got done as well. And then I stacked them all on a bit of scrap MDF to protect them, wrapped them in a bungee cord and set them to one side until I need them later, along with the finished cross-rails.

Next up, gluing in the alignment pins on the mattress support.

These get glued into the support, but not into the platform itself; that can be removed if required.

It was much prettier with the curve. Oh well. Time to get on with assembling the front part of the cot now.

This proved… awkward. Hide glue and drawbores, so no clamps needed, but the roof and the walls were getting in the way. That’s a sign your shed’s not big enough 😀

Drawboring went reasonably well; no unpleasant snapping noises, though more gaps on one side than I’d like.

It was awkward enough with one rail in place, with two it was downright difficult. But managed it, then lowered the whole thing to the floor, slid in the panel, glued on the other upright, wrestled it back onto the table and drawbored those joints and viola!

It’s not bad really. Not perfect though – there are gaps at the joints 🙁

Not so bad on the left; not so hot on the right. Oh well. Next up, I figured I’d put the mattress platform on the support.

You’ll notice there’s a gap in the middle there between the two. That’s deliberate (well, to be more honest, when I saw it I went with it instead of getting rid of it). The idea is to have a little spring in the build for when you put a load (or a baby) on the crib’s mattress.

I mean, that much is probably overkill, but still.

Trimmed off the pegs flush with the platform (again, they’re not glued in, so the platform can freely flex). And that was about all I could do for now. The glue on the front half has to cure before I can do the next step, which is to assemble everything and get the level for the rear support for the mattress platform. Then I can drill the holes for the rear bolts and cut their corresponding slots, and then shellac the last two pieces of the frame and do the final assembly.
And then build the drawer of course. The back and sides of that are currently roughly cut to size and halfway through thicknessing, and the front is also roughly cut to size but won’t need thicknessing. I do need to have the whole thing assembled before cutting it to size though, which is why I’ve not done it ahead of time.

Still. Nearly there now…

To-Do List (stuff in progress in blue:

  • Cut grooves in platform supports and matching holes for bolts in the curved uprights and the rear support upright
  • Finish plane the curved uprights
  • Shellac the supports and the curved uprights
  • Thickness the boards for the drawer.
  • Cut the drawer front to size.
  • Cut the drawer back and sides to size.
  • Cut dovetails for drawer.
  • Groove drawer with #43 for plywood base.
  • Maybe add runners underneath the drawer?
  • Assemble drawer.
  • Finish plane all parts.
  • Finish walnut pieces with a few coats of shellac.
  • Paint drawer with milk paint.
  • Assemble and glue-up and drawboring of everything.
  • Finish entire assembly with several coats of Osmo wood wax.
  • Close door of shed, lock it, walk away and never do another project with a deadline ever again.

06
Feb 17

More assembly…

Started off the day with the second coat of shellac on the mattress platform pieces.

Left that to dry and started working on the rear support for the mattress platform. It’s basically an inverted ‘L’ shape made with a simple rabbeted butt joint, and while it’s probably overkill, I decided to put some wooden nails into it just for a little extra strength. So out with the bit and brace…

And that funky looking thing on the bit is a nifty eclipse depth stop that I’ve not had much excuse to use up till now…

Much nicer than just marking off with a sharpie or messing about with tape. With those holes predrilled, I planed off the glue lines and smoothed the outside faces and then set that aside while I drilled the holes for drawboring the front panel and the joints between the curved uprights and the top crossbar. By the time I got through that, the second coat on the platform pieces was done, so I sanded that down and gave them another coat of shellac.

Then I rived more stock to make up the drawboring pins and the wooden nails and the locating pins for the front support for the mattress platform.

It’s a fast process, but good grief is it loud, especially in an 8’x6′ shed, even with the echo-damping soundproofing foam on the ceiling. I have to wear ear defenders when doing this. And of course, you have to hit your thumb at least twice during the process (happily with the deadblow hammer rather than the lump hammer; that one would delay typing up a blog post for a few weeks while the finger bones healed).

The weekend’s shopping and dinner intervened in the process here, and afterwards, I finished off the nails and then used two of them on the rear platform support.

Hide glue again to bind it all together. Smelly stuff, and almost instantly tacky in the 10C temperature in the shed, so after wiping off the excess with a damp rag, I had to step back out to the kitchen to wash my hands before the next step, cutting the tops of the nails off with a flush-cut saw and a spacer.

Why do you need the spacer on a flush-cut saw? You shouldn’t is the answer, but whomever made this flush-cut saw decided to set the teeth on both sides, so if you use it like you’re meant to, with the blade pressed up against the surface, you’ll scratch the surface like a severely-pissed-off hedgehog. So first the saw with a spacer, then the rest gets taken off by chisel, and then the entire surface gets planed down.

And now that gets set aside. The ends still need to be planed flush and I need to use the router to cut grooves for the bolts in this, so no shellac for it today (same for the front support and for the curved uprights because they’re going to take a bit of work for finish planing due to the curve).

By now the fourth coat of shellac on the platform pieces was dry, so I brought those into the shed, and a minor disaster:

All three pieces have bloom on the underside. I’m not sure where the moisture that causes that came from, this side was facing down on the table so it wasn’t rain; they were elevated off the table at either end so it wasn’t contact with surface water; maybe it was just that the table was damp and that made the air just above it more moist? I’m not sure. Regardless, the fix is straightforward – brush either another coat of shellac on the top or just a swipe of isopropyl alcohol. Either one dissolves the top coat and lets the moisture evaporate, leaving a bloom-free surface behind.

I’ll still assemble the platform today though. But first, some finish planing on the ash panels. The front panel was very straightforward, just a few swipes with the #4½; but the side panel was a bit of a bugger, with the grain swirling around the place. In the end, the #80 saved the day. Damn glad I got it now, the card scraper would have been a fair amount of work for what the #80 did in a minute or three.

Now, on to the top crossbar. I’d left this over-long on both ends for strength while morticing, but now I’ve cut it back, leaving an inch on either end from the mortice outwards. So there are still some “wings” at the ends, and I would cut those into graceful curves if I had a bandsaw or a decent fretsaw (the Stanley FatMax coping saw… well, it can’t cope, is about the kindest you can say about it. I’m going to have to get myself a Knew Concepts fretsaw. And a bandsaw 😀 ). But I don’t have one yet, so I have a plan for something decorative. Meanwhile, I managed to stab myself in the finger without noticing it while chamfering the edges, and now the finish has some blood in it too. Well, why not…

This piece will need holes drilled in it yet for the rear platform mount to attach to, so no shellac for this piece today either.

So, as I mentioned a little while back, the plan for something decorative is to steal this idea from Brian Halcombe:

But my testing showed I needed a narrower, sharper gouge. So I got two off ebay in smaller sizes than the ones I had, and sharpened them up today and started digging away into the crossbar’s endgrain.

The ⅜” gouge I got was still too wide to be easily controlled in the endgrain (I used another test piece) but the ¼” one was usable with slightly more care than I normally have 😀

Brian Halcombe’s is way better, but that’s a few decades of experience and practice for you. This will look nice enough when shellac’d and waxed though, so that’ll do.

At this point, I was closing in on the end of the day, so I got the hide glue into some hot water to heat up (it’s about 8C and falling in the shed at this point even with the heater – we’re due a cold snap tonight to below freezing), and prep some clamps and cauls and I get the platform pieces ready for glue-up. The clamps are only just big enough by about a half-inch, but they suffice, and the gaps all close up nicely with only mild pressure.

I’m rather happy with that. Then last job of the night, I take some of the frame pieces that need no further cuts or major work, which is everything bar the curved uprights, and I finish plane them and then use the block plane to round over the arises.

For pieces like this, I think this method’s faster than the spokeshave. But not by a huge amount. Still, if you have a #60½ that you’ve worked to sharpen, why not use it? I really must fix the paint on that when this project’s done, along with the twelve million other jobs to do in the shed bringing tools back up to spec…

Anyway, with everything finish planed (and various notes to match mortices and tenons back up made in sharpie on the tenons and in the mortices themselves), it was time for more shellac.

I’m really starting to like the look of the walnut when shellac’d. Second coat tomorrow, and hopefully it’ll dry fast enough to be able to sand it tomorrow as well and put on the third coat. The end is in sight now. One finicky bit with the router to cut three or four grooves (I’ve not decided yet on having one or two bolts in the rear platform); and a bit of work to build a drawer; and then final assembly and finishing with osmo.

And then I’ll find it won’t fit in the car for delivery…

To-Do List (stuff in progress in blue:

  • Cut grooves in platform supports and matching holes for bolts in the curved uprights and the rear support upright
  • Finish plane the curved uprights
  • Shellac the supports and the curved uprights
  • Thickness the boards for the drawer.
  • Cut the drawer front to size.
  • Cut the drawer back and sides to size.
  • Cut dovetails for drawer.
  • Groove drawer with #43 for plywood base.
  • Maybe add runners underneath the drawer?
  • Assemble drawer.
  • Drill for drawboring on the M&T joints that I’ll be drawboring (the long rail to upright ones and probably the back support and top crossbar joints).
  • Make drawbore pegs.
  • Finish plane all parts.
  • Finish walnut pieces with a few coats of shellac.
  • Paint drawer with milk paint.
  • Assemble and glue-up and drawboring of everything.
  • Finish entire assembly with several coats of Osmo wood wax.
  • Close door of shed, lock it, walk away and never do another project with a deadline ever again.