Tonight was mostly cleaning down from the weekend. I broke down the jig, saving the screws and while the sharp hammer blow took care of the glued on blocks, it did it by removing the block and the top millimeter of the MDF. Oh well. Have to rebuild it anyway. Need taller blocks and I’ll probably cut a bit of the MDF base off to make a drying form as well (the idea is you bend it on the bending form, let it on that, then take it off, remove the bag and the strap and all that, and then clamp it to the drying form and leave it there for a week to dry and set fully).
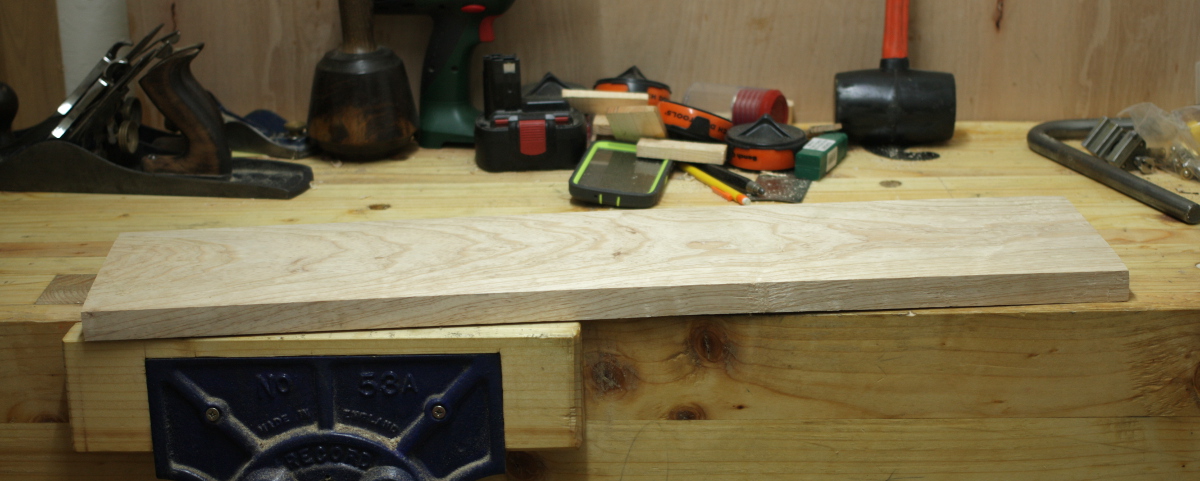
Then it was time to start in on the next eight slats for the cot. I got the remaining half of the 72″ ash board I got the last eight from and cut 31″ off that (the ends were a bit ragged so I left room to trim it back to 30″), and brushed off the muck.
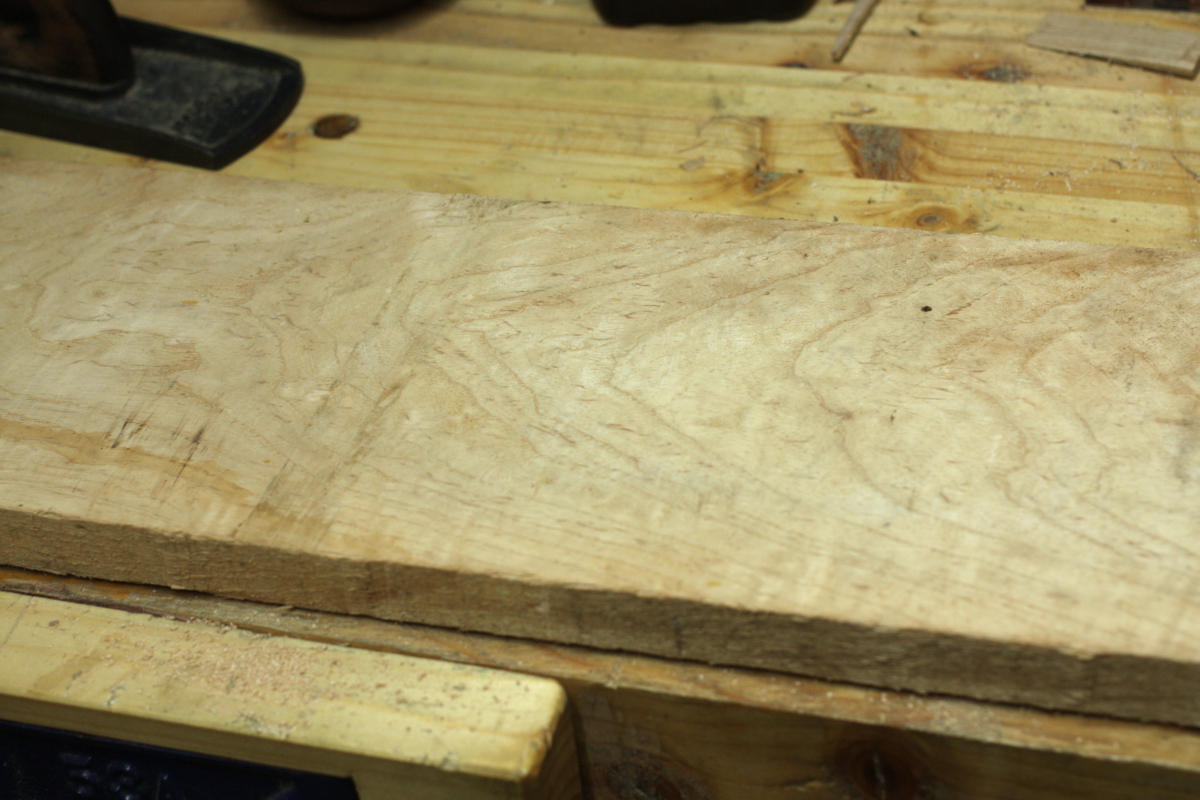
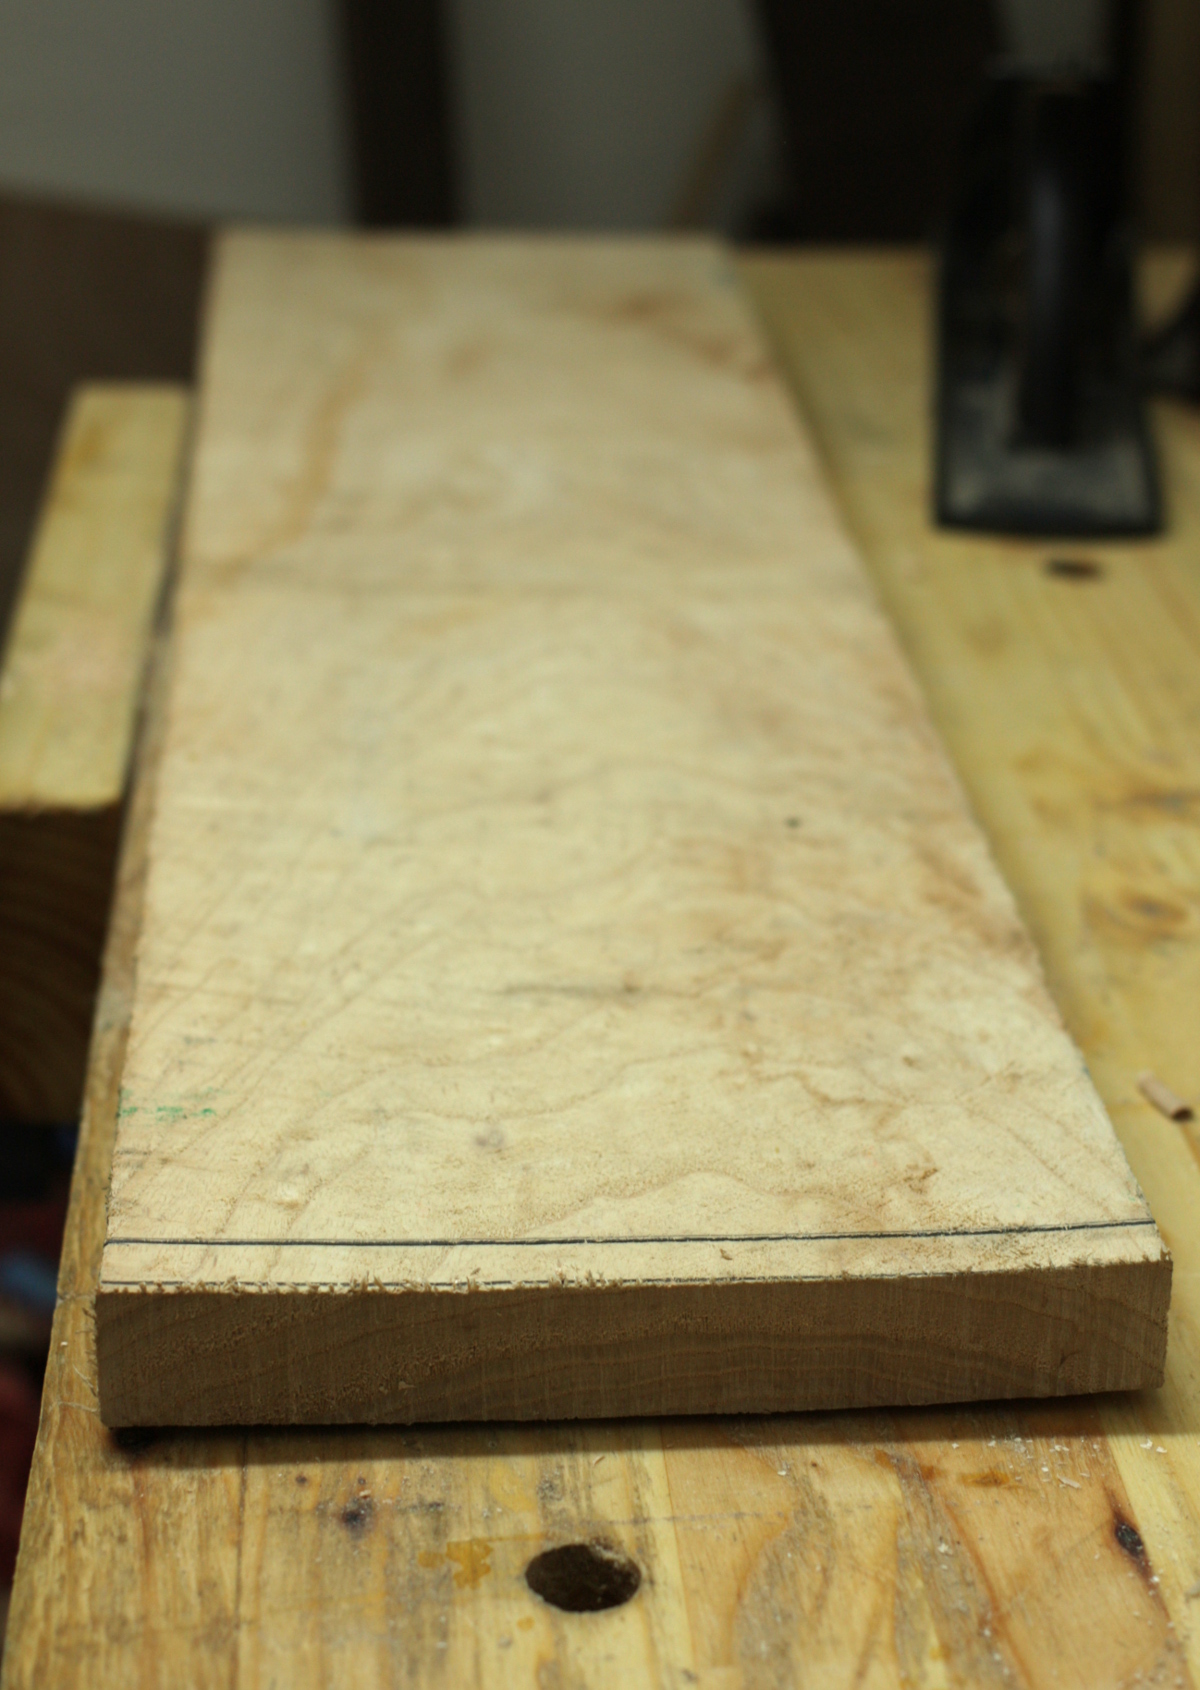
Kindof mucky still really, but that’s what you get if you sit about in a timber yard for ages and then a shed. But fifteen minutes with a jack plane on the faces, edges and on the ends with a shooting board later…
It’s just lovely. It feels like slightly textured glass, there’s lovely grain in it, it’s just downright pretty. It cleans up well 🙂 It was almost painful to mark it up, but it needs to be broken down so I set the gauge to 46mm (it’s 189mm wide) and marked off the first lath. I’ll rip that out tomorrow, then plane a fresh clean edge and mark the next and so on. Ash is pretty. I need to buy more of it 🙂
There was some experimentation this weekend, some of which didn’t work and the rest of which were… learning opportunities. I got the last slat planed to thickness, but lost one along the way because I couldn’t get it to thickness, there was a split in it from poor resawing that was diving down below the minimum line and it wasn’t recoverable. So next week I’ll take another 30″ off the ash board I have, plane it flat, hack it into 2″ wide laths, and resaw them down and wow does this ever teach you why we invented bandsaws.
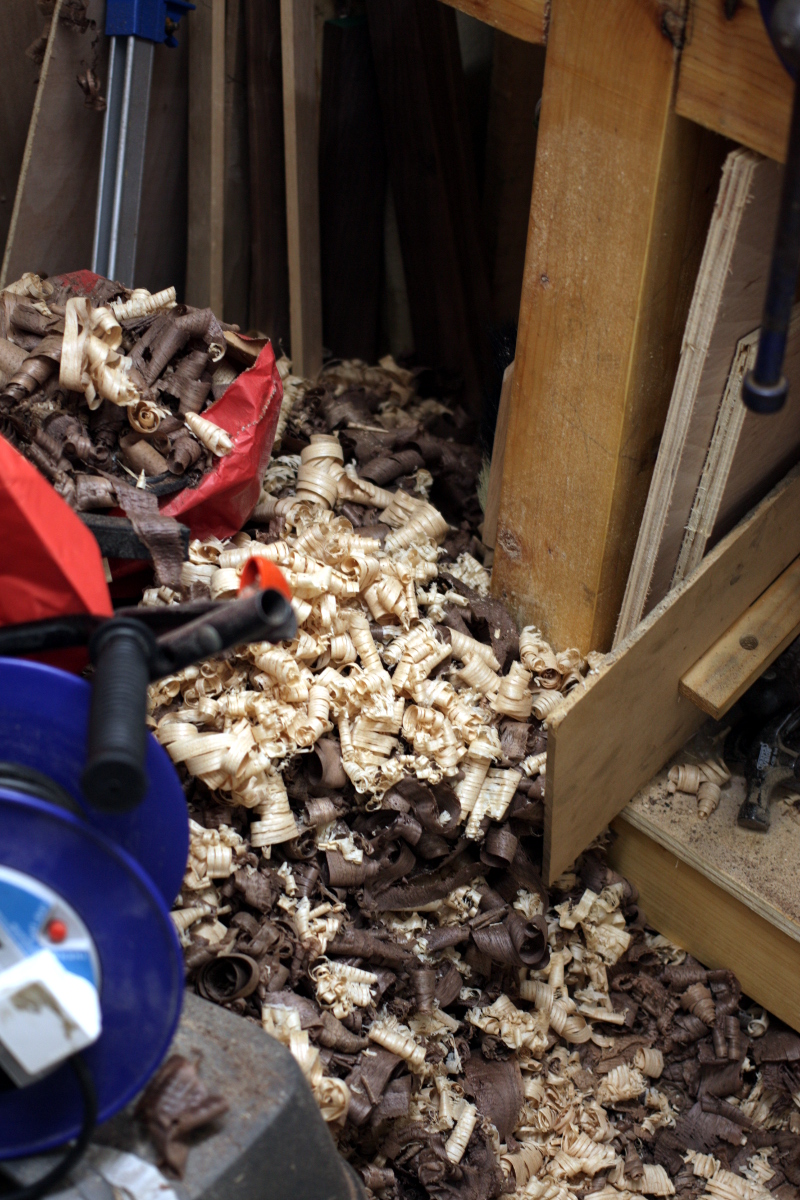
Meanwhile, I had two experiments to run. One was to try to avoid drowning in the growing mound of shavings I’m generating…
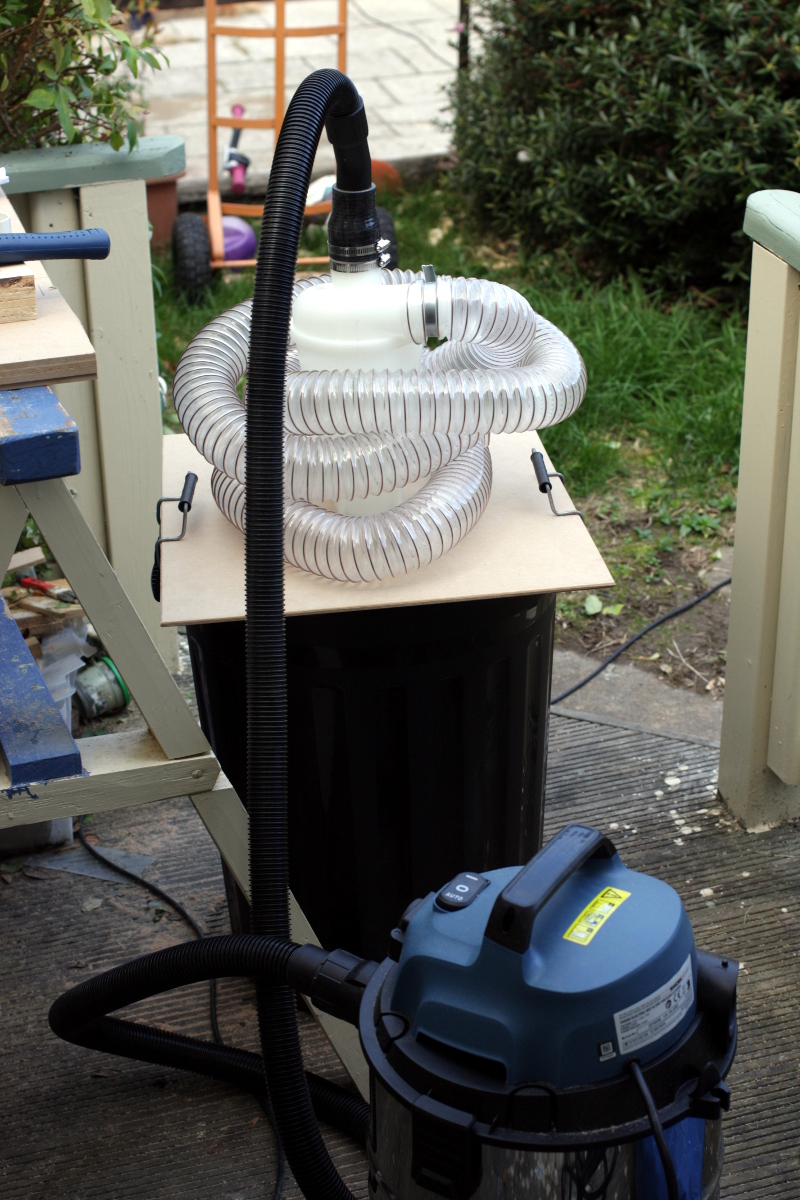
Honestly, it’s getting silly now. I’ve lost two clamps to it. Seriously, somewhere under there is a sash clamp, a lidl F-clamp, four boxes of lawn seed and a container of round-up. And normally you’d just use a broom, but the space is so small and restricted that a broom would honestly be more hassle than help. So I got an aldi wet-and-dry shop vac and tried that, but while it could grab the dust and some shavings, the shavings clogged it up pretty fast. Well, there’s a solution to that – it’s a thing called a cyclone seperator. Think of a conical funnel with a lid on it. The vacuum connects to the lid, and you connect another hose to the side of the funnel angled to cause the incoming stream of stuff to spin, whereupon is slows down and drops to the bottom of the funnel and into a barrel mounted there.
And there it is…
…but it doesn’t work. There’s very little suction, because it leaks air everywhere. Normally the barrel underneath would be air-tight (they’re normally used to store liquids after all), with a seal in place around the lid. Here, it’s a bin and the lid is a chunk of mdf clipped in place by the handles. I suppose it was asking a lot of physics 😀 I’ll have to find a proper barrel, pay more attention to seals, and try again. The bin will go to waste, as in, I’ll use it as a bin for garden waste, but I foresee a trip to somewhere that sells barrels soon. Which, oddly enough, is a very short list it seems. I’m a bit hesitant to order one off amazon because who the hell posts a barrel? I’d never be able to look the postman in the eye again. Not to mention the point that if the Firearms Unit hears I’m getting barrels posted to me, they might take it up the wrong way…
The other experiment, which went slightly better, was to test steambending walnut. The idea is simple – wood is stiff because of a (fairly complex) chemical called lignin. It melts around 150C (well, there are several melting temperatures because your average tree will have lots of slightly different lignins – apparently it’s a challange for people studying the stuff to seperate them out, there are so many), but it will soften around 100C which is a nice convenient temperature as you just have to generate steam and that’s fairly easy.
So the theory is, take the wood, expose it to steam for a time (the rule of thumb is one hour per inch of thickness), then clamp it into a jig and bend it to the desired curve. This is normally done with a sealed box of some kind (either made from wood or PVC pipe or whatever) and then you pull the wood from the box with big thick gloves and as quickly as you can, clamp it into the jig and bend it before it cools. You have to bend it beyond the curvature you want, as it will spring back and how much overbending is needed is something you need to know by experience. Lots and lots of videos up on youtube show how to do this, but to be honest, they all looked like high-waste kinds of learning processes — especially because I only have kiln-dried walnut and this process really works best on something that’s never seen the inside of a kiln — and I didn’t feel like trying them at all as a result. And then I found this:
BTW, if you’ve not seen this guy’s channel, go there now, it’s fascinating stuff.
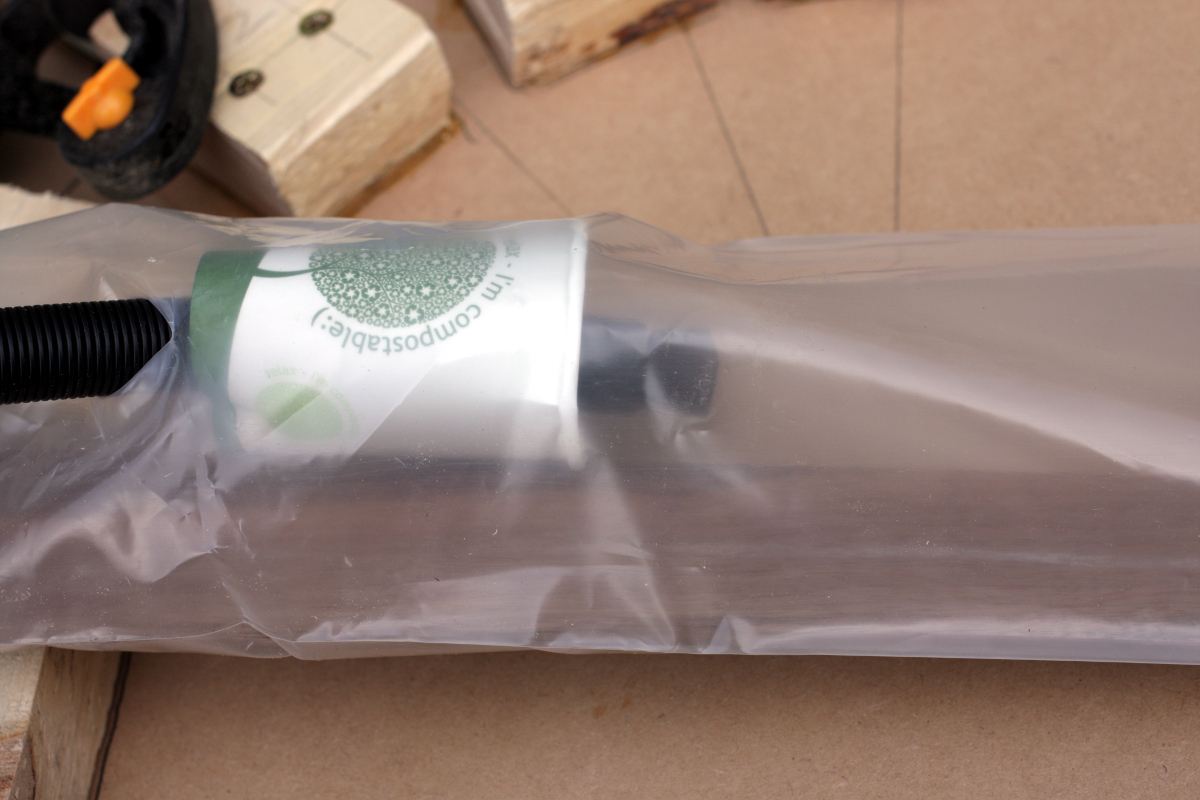
But anyway, his genius idea is to encase the wood in a plastic tube – specifically, the kind of continuous poly tube that you’d make smaller bags out of using a heat sealer – and pump the steam into that tube. That lets him put the wood in the jig, steam it for an hour, then bend it while still steaming it and hold it in the bent shape in the jig while still steaming it and then control the cooling-off process. Apart from the benefit of being able to work on long timbers for boat hulls, which is his thing, he gets lots of other bonuses, like being able to take his time doing the actual bending, controlling the temperature seperately from the bending process, and being able to keep the lignin softened even after the bend is done, and letting the stresses in the bent wood settle out before letting the lignin harden. This leads to far less spring-back to cope with.
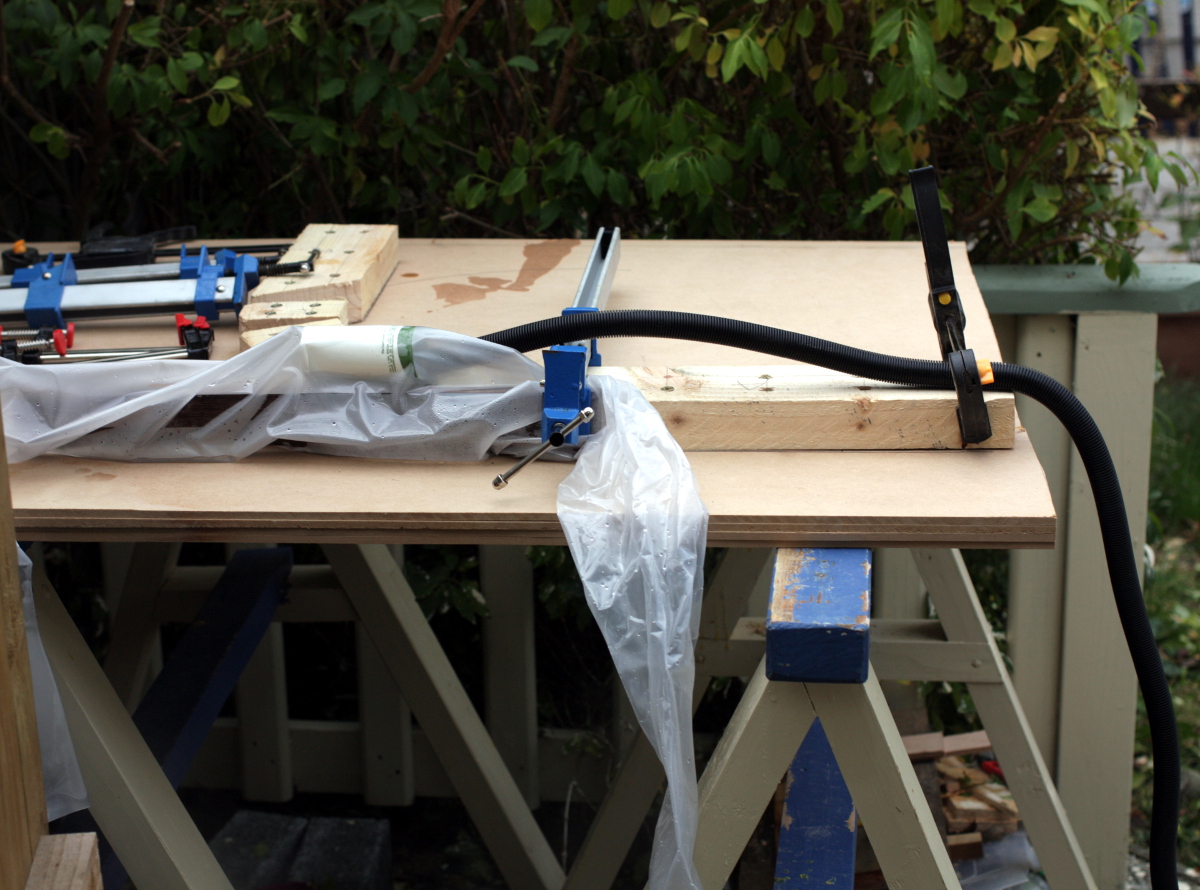
I took one look at this and thought that’ll do. So I get a wallpaper stripper, some poly tube (it’s very cheap on ebay) and some metal plumber’s steel strap and prep to get bending. The strap is needed to go around wood on the outside of the curve – the reason the wood is bending at all is that with the lignin softened, you can compress and collapse the inside of the curve. You can’t stretch wood y’see, it’ll snap and splinter if you try, so the strap keeps the outside from stretching and the inside in compression.
This was, incidentally, one of the mistakes I made – I forgot the strap until the wood had been steaming for a half-hour and had to make up and apply the strap while the wood was around 100C. That does not lead to fine tolerances and unrushed work.
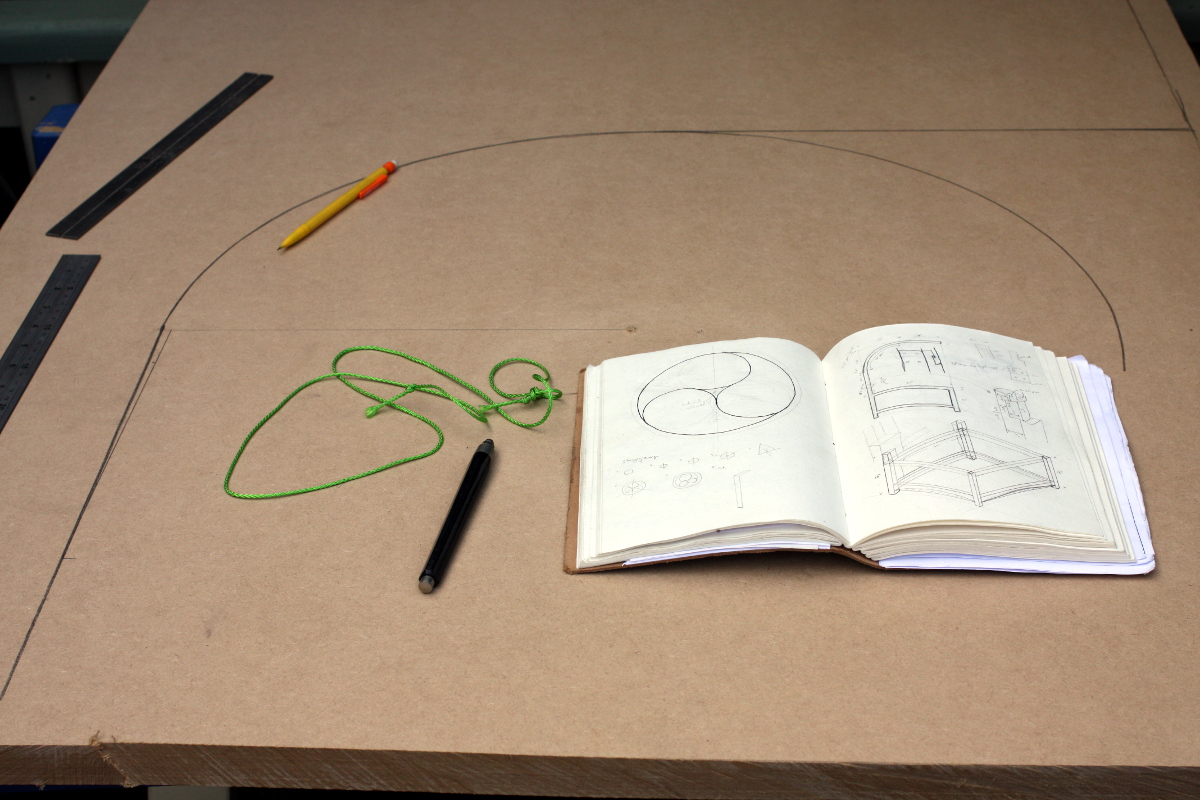
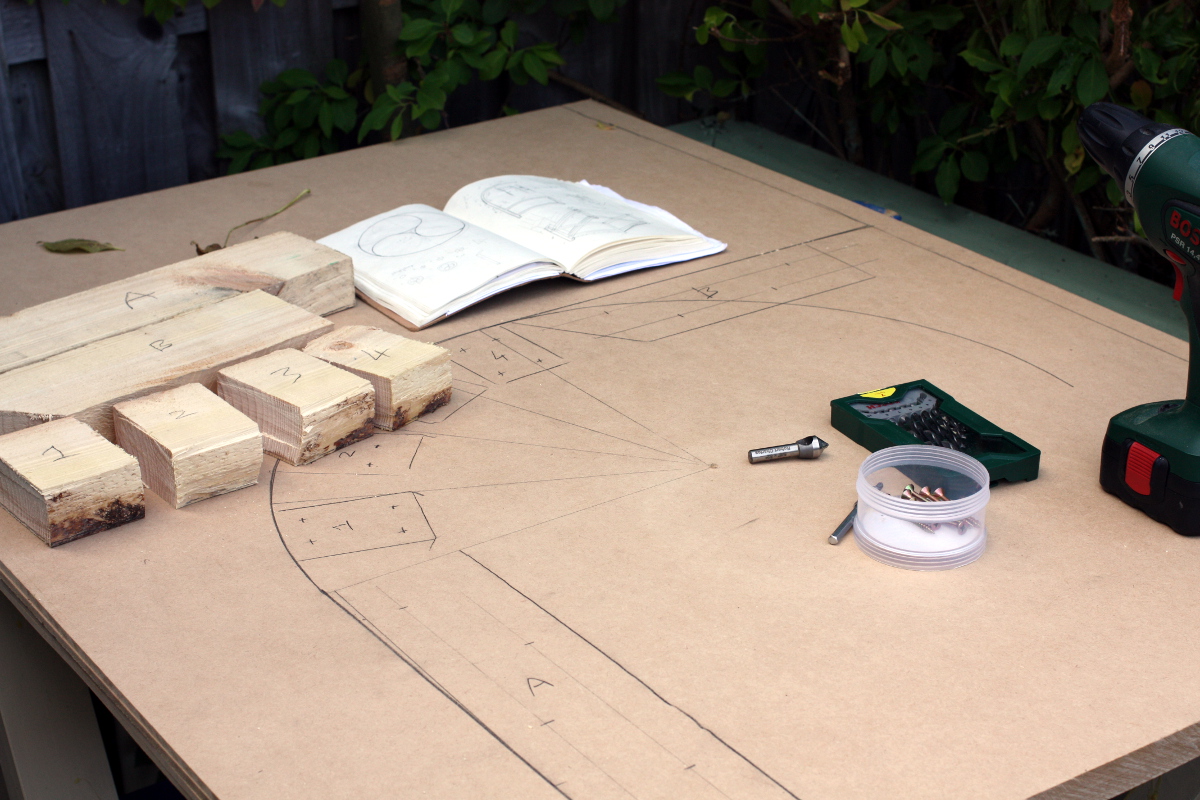
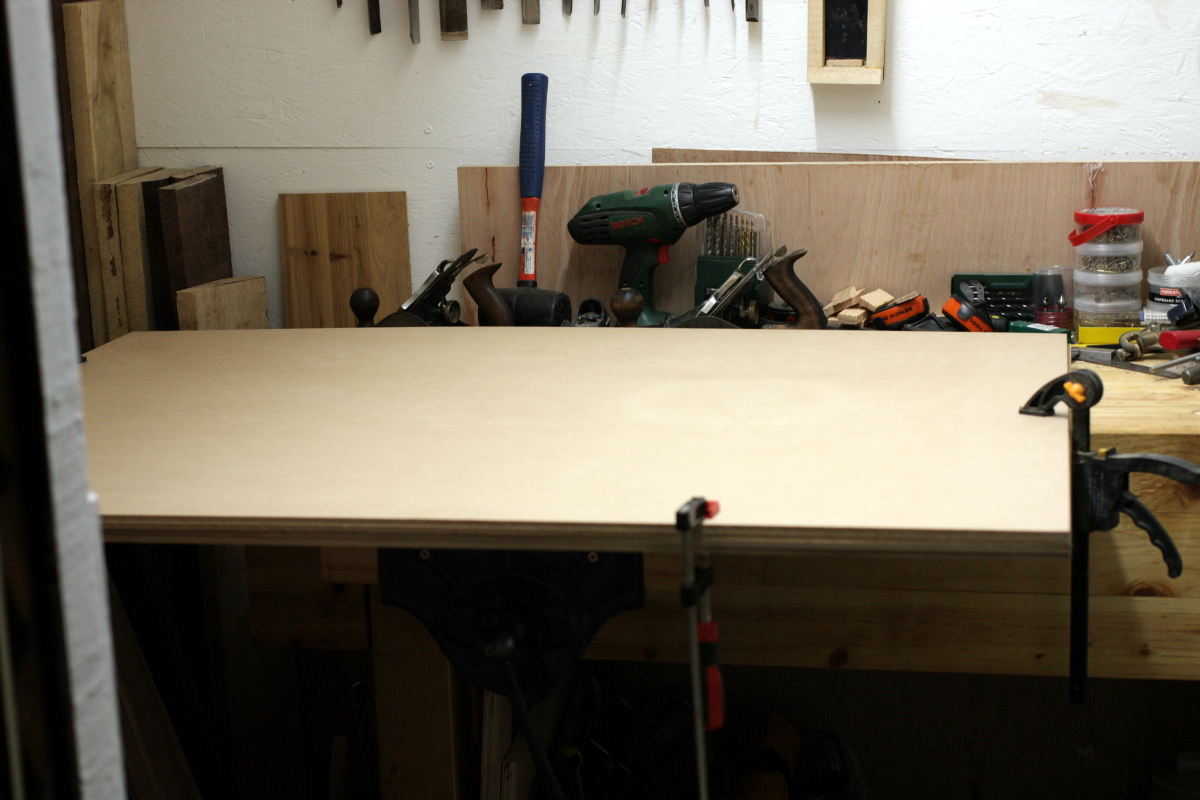
The first step though was to build the jig, so I needed a flat surface and some blocks around the curve to clamp to. I had a few sheets of MDF that I don’t really want to save for anything because honestly, MDF is awful. So I glued enough together to give me an inch-thick slab of MDF, and I started laying out where the blocks should go.
Then lots of drilling, a quick run to woodies because none of the screws I had were up to the job, and then screw&glue the blocks in place. That may have been a mistake, but not an unrecoverable one; I’ll need to disassemble the jig and rebuild it, but a solid belt of a hammer might fix that glue problem.
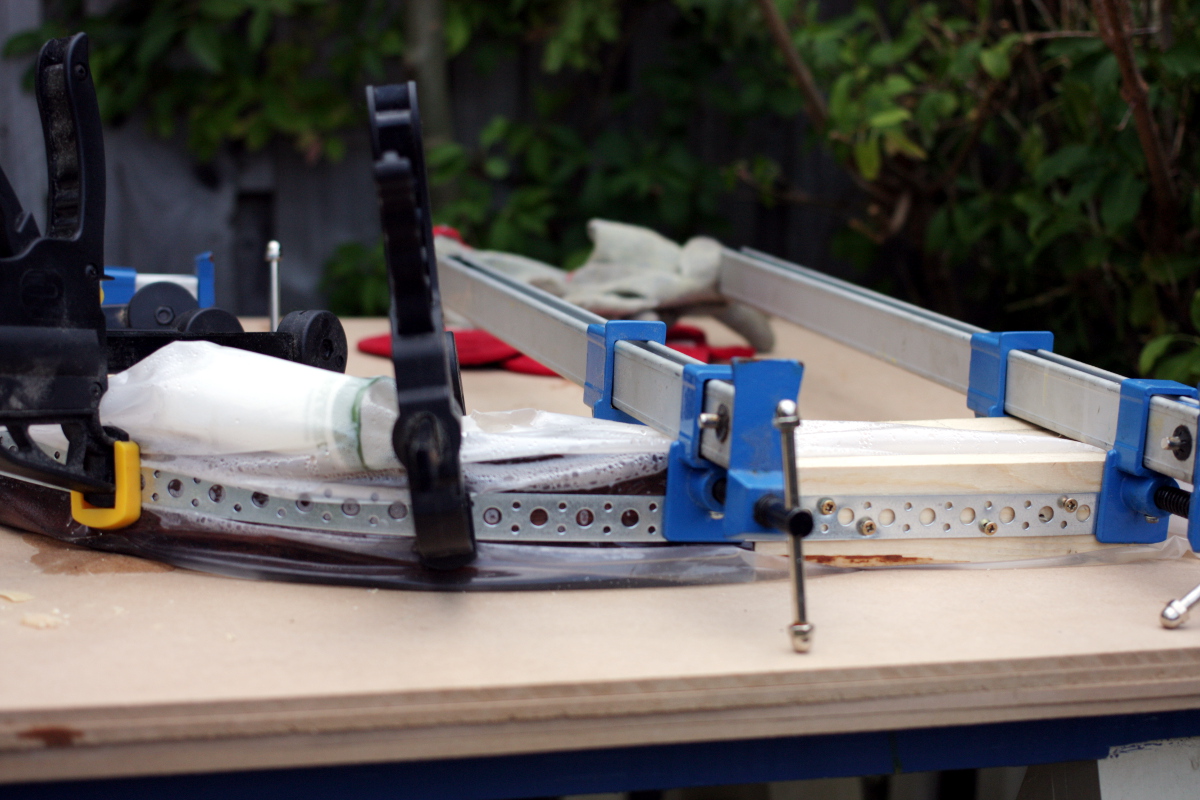
Then put the walnut offcut I’m testing with into the tube, being sure I had a half-meter off either end, and put in a spacer (in this case a paper cup) to stop the tube from collapsing on top of the steam pipe and melting because of a high concentration of moisture and heat.
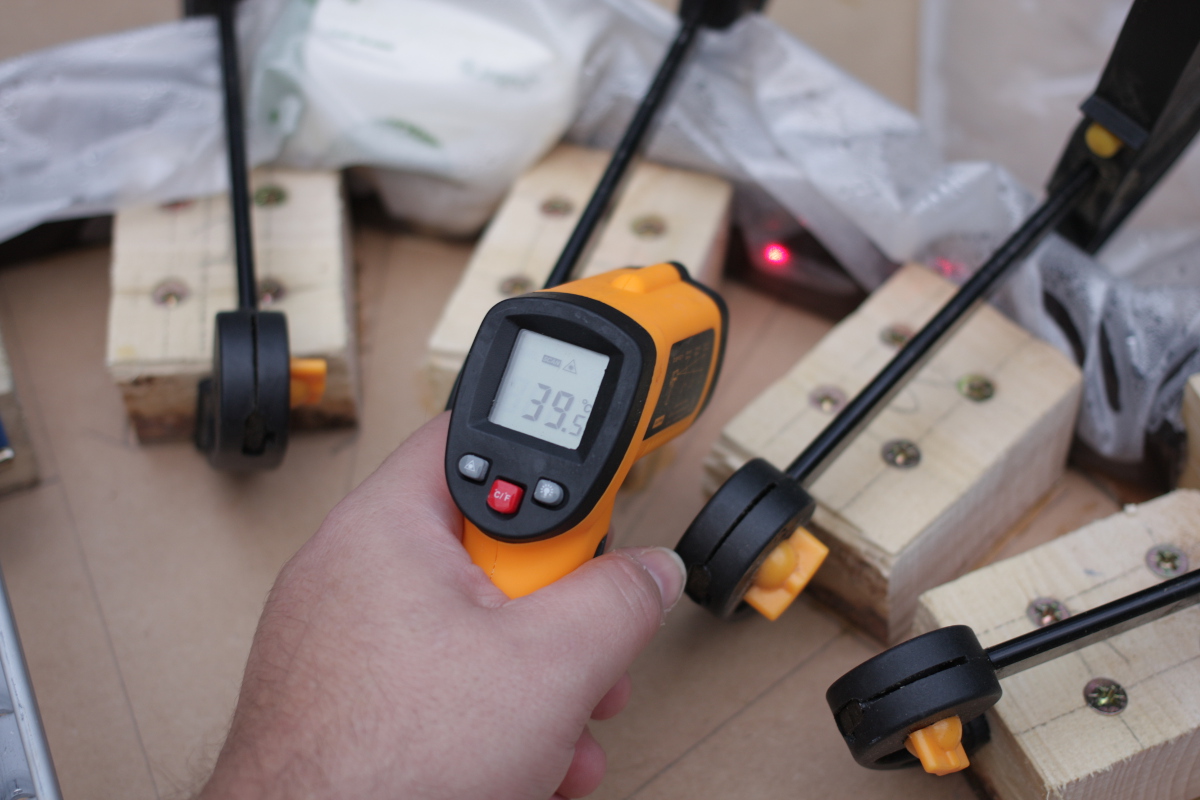
And then it’s just a case of clamping one end of the wood into the jig, filling the wallpaper stripper with water and plugging it in. It takes 20 minutes or so to get up to 100C and then start steaming, then I wait an hour (actually a little bit more because the steamer ran out of water before I was expecting it to and it took a few minutes to refill it so the temperature dropped for ten minutes), and then I start bending.
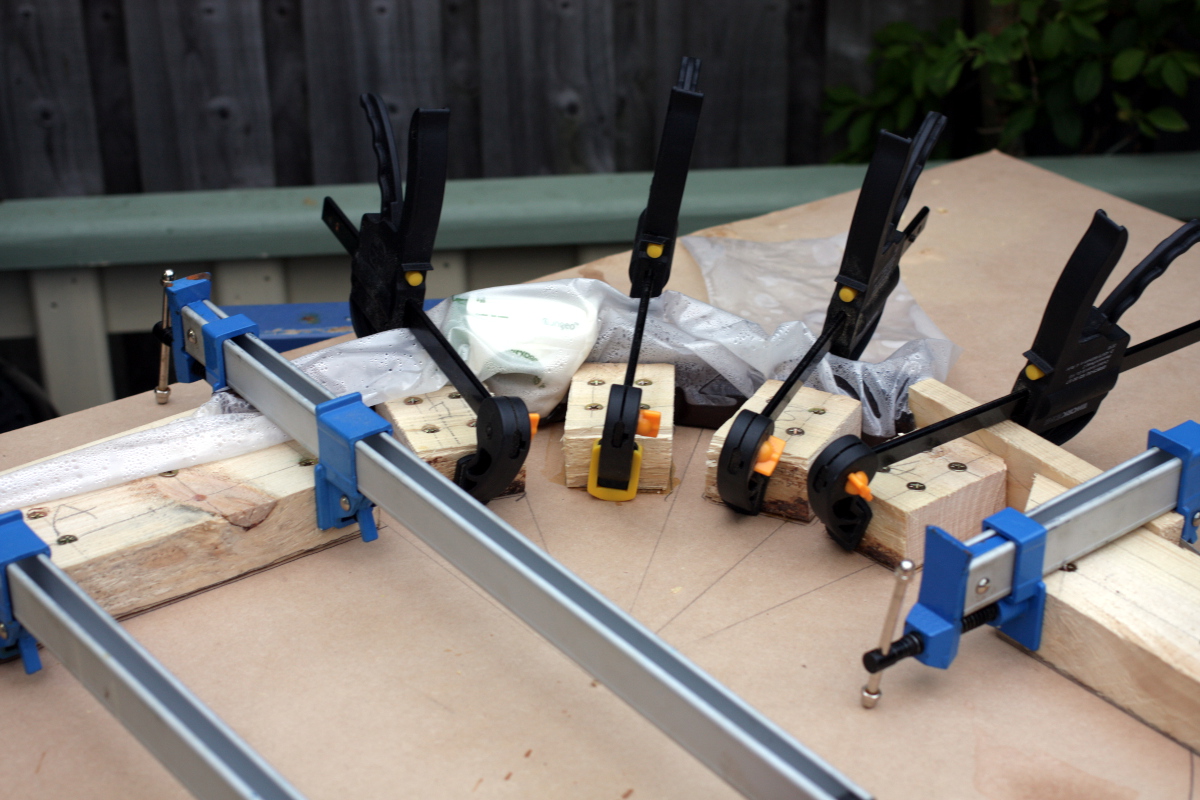
The bending itself is not exactly a delicate operation. You don’t quite get out the hammers, but you put on gloves and oven mitts, grab the wood and then it’s just muscle to pull it into the bend. You grab it with clamps as you go and then it’s a case of pull it to bend it a bit, tighten the clamps to hold that, then pull some more and pretty soon you’ve got the bend in. If you’ve not heard any loud splintering noises, you’re good.
Now leave the steamer finish off the last of the water that’s in it, so another half hour or so of steaming, and then unplug the steamer and start letting it cool down.
Now there are a few mistakes I’ve made here. For a start, I forgot the compression strap until half-way through the steaming and had to put it on outside the bag.
It’s also not the full width of the piece being bent, so a good bit of the wood is not supported. And then there’s the point that there’s no scrap bits of wood between the clamps and the wood being bent (and of course, as the wood is being softened, the clamps really dig in and deform the wood.
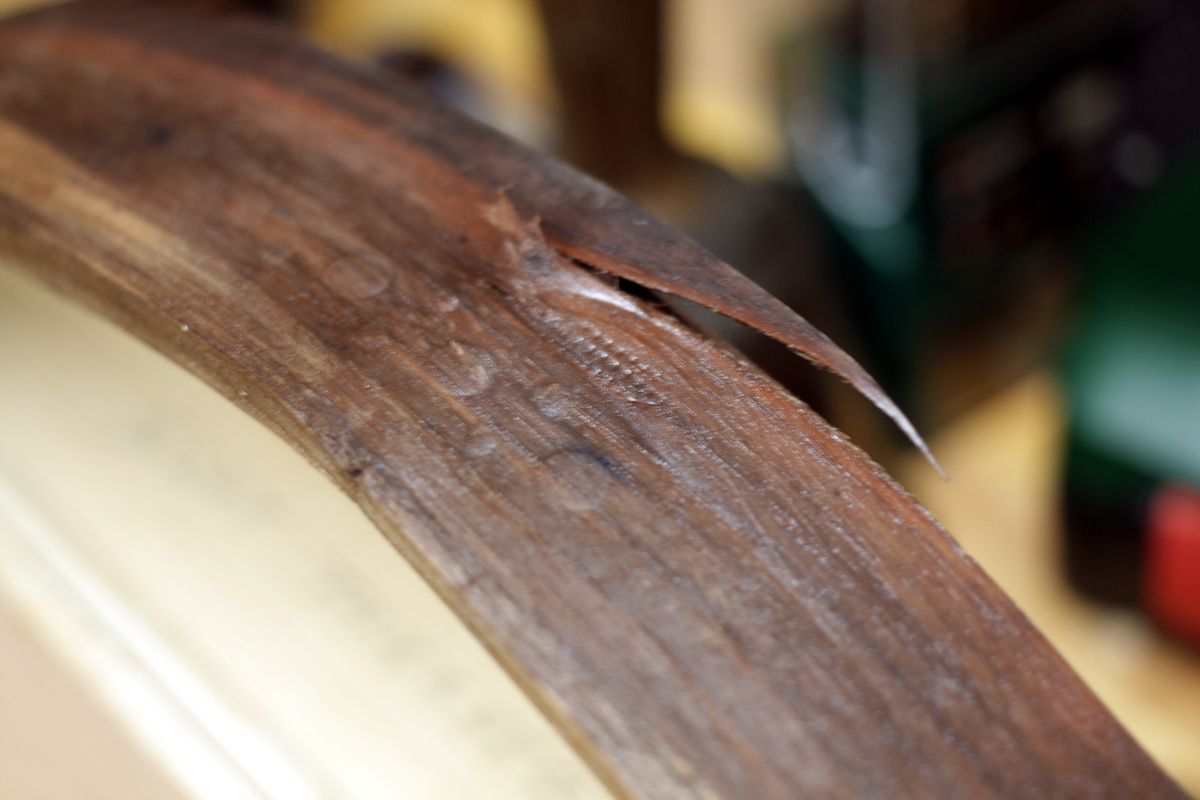
On the left, the supported and properly bent walnut (still quite damp); on the right, the unsupported part that split. Still though, I’m not too unhappy. I know what to do now for the real thing. But first, I want to watch that experimental bit for a few days to see how much it springs back and how much overbend I’ll need. I will need to rebuild the jig though – those blocks are not tall enough off the mdf to do the job and need to be redone. I’ll also want to make up a proper compression strap setup and some scrap bits to protect the walnut from the clamps.
And all that in the middle of being swallowed whole by a slow-moving avalanche of wood shavings as I resaw another 8″x30″x1″ ash board. And I want to get that all done before I go buy more wood on Friday…
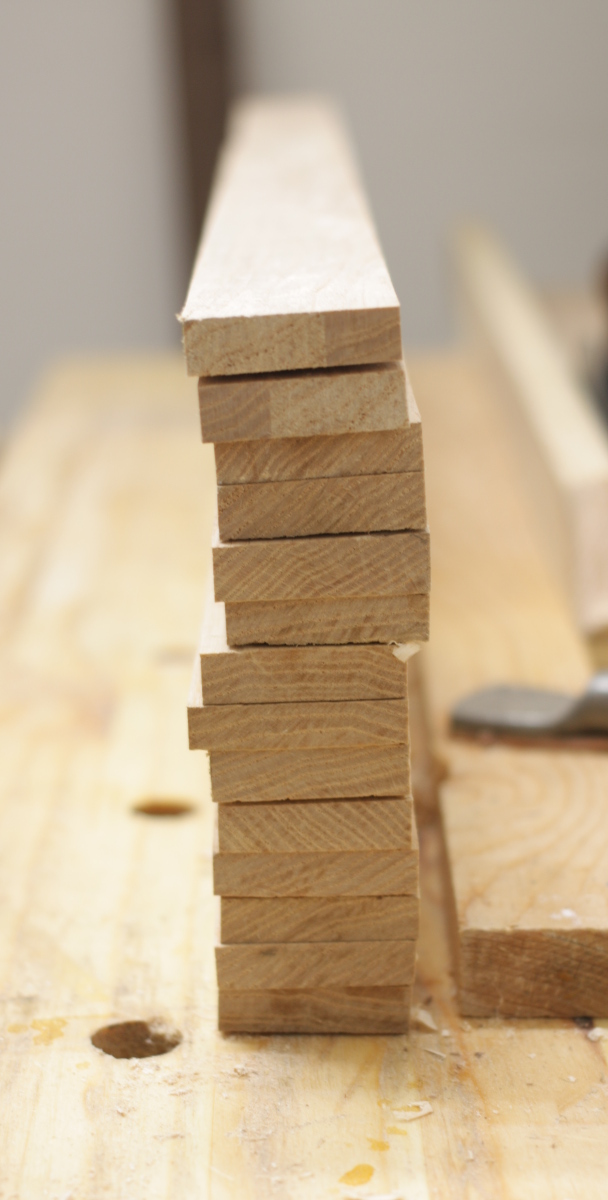
Four more slats planed to thickness and squared off today. Counting that first experimental slat, that’s fifteen in total so far. One will need to be revisited though, it’s too wide by quite a margin. Measuring all of them, they’re all between 10.5 and 11.5 mm thick, bar one (and there’s always one) that’s just hair under that; and they’re averaging 42mm wide, with a few a hair under and a few a hair over, bar one which is 40mm wide and another which is 45mm wide. That one is getting a few more swipes with the plane to narrow it up to 42mm, and once that’s done, I’ll have a standard deviation of 0.87, which for hand tool work from a newbie is acceptable. These are all going to need finish planing, which won’t affect the thickness too much. At 11mm thick on average, they’re basically a sixteenth over the original finished thickness goal of ⅜” — but then that goal was a loose one at best anyway, chosen by picking out an offcut I had and going “that looks like the right thickness” and then using that as the template in the thicknessing jig. Five more to go, and that’ll be the slats ready for joinery.
The shavings are getting a bit out of hand at this stage though. But not to worry, I have a plan. I just need to find one last component (a barrel or large bucket in the 30L range or therebouts) and I can put that plan into motion. More on that later.
Last thing for the evening. I’ve had several sheets of 4mm MDF sitting in the house for another project (basically, the one that put me on this road, building a hideaway for Junior inspired by this), but a little while afterwards I learnt just how nasty MDF is, so the idea of Junior sitting in a box of the stuff breathing it in is now not quite so pleasant. The hideaway can get made from something else instead (plywood probably) and that means the MDF is available for pretty much anything else because I don’t want to use it in anything we’ll keep around, so it’s now disposable material. An expensive mistake, but sod it, new lungs would have been more expensive.
Brief hint for anyone looking to start off in woodworking by using MDF — don’t. You can’t cut the stuff without making dust (well, it’s not even dust, it’s technically stuff called fines, which is even worse), even if using hand tools; the dust is part wood (which does your lungs no good) and part urea-based glue (which does your lungs no good whatsoever). You have to have specially rated filters on your respirator (don’t just use any old paper dust masks or even just standard filters on a proper respirator, the fines go straight through them). It doesn’t take finish fantastically, if you get it wet at all it swells up and is ruined, and you pretty much have to seal it and paint it no matter what you build. It’s quite weak compared to other sheet materials like OSB or plywood. About the only positives to it are that it’s cheap (though in the US plywood’s cheaper, here plywood is far more expensive than MDF), and that it’s almost always almost perfectly flat. Except for certain things, it’s more trouble than it’s worth.
I’ve used one sheet as an assembly&glue-up table surface for building the bench and I did have a plan to build a knock-down assembly table and I’d surface that with MDF as well. As surfaces that aren’t load-bearing normal to the surface, MDF is actually quite good and useful. These four sheets have been glued together to form a base for a jig for the most complicated and worrying bit of the cot build. I’ve some more work to do for that jig over the next few days, and hopefully I can get a test run this weekend on a test bit of wood. More on that then…
This is not even a little surprising, but it's getting exhausting.
A party running on the platform of "we won't do the right thing when it matters, but we promise that we will later, if you just hand us completely unearned power once again."