01
Sep 18

Short day’s shaping

Not much time in the shed today, but enough to make a start. First, new toys!

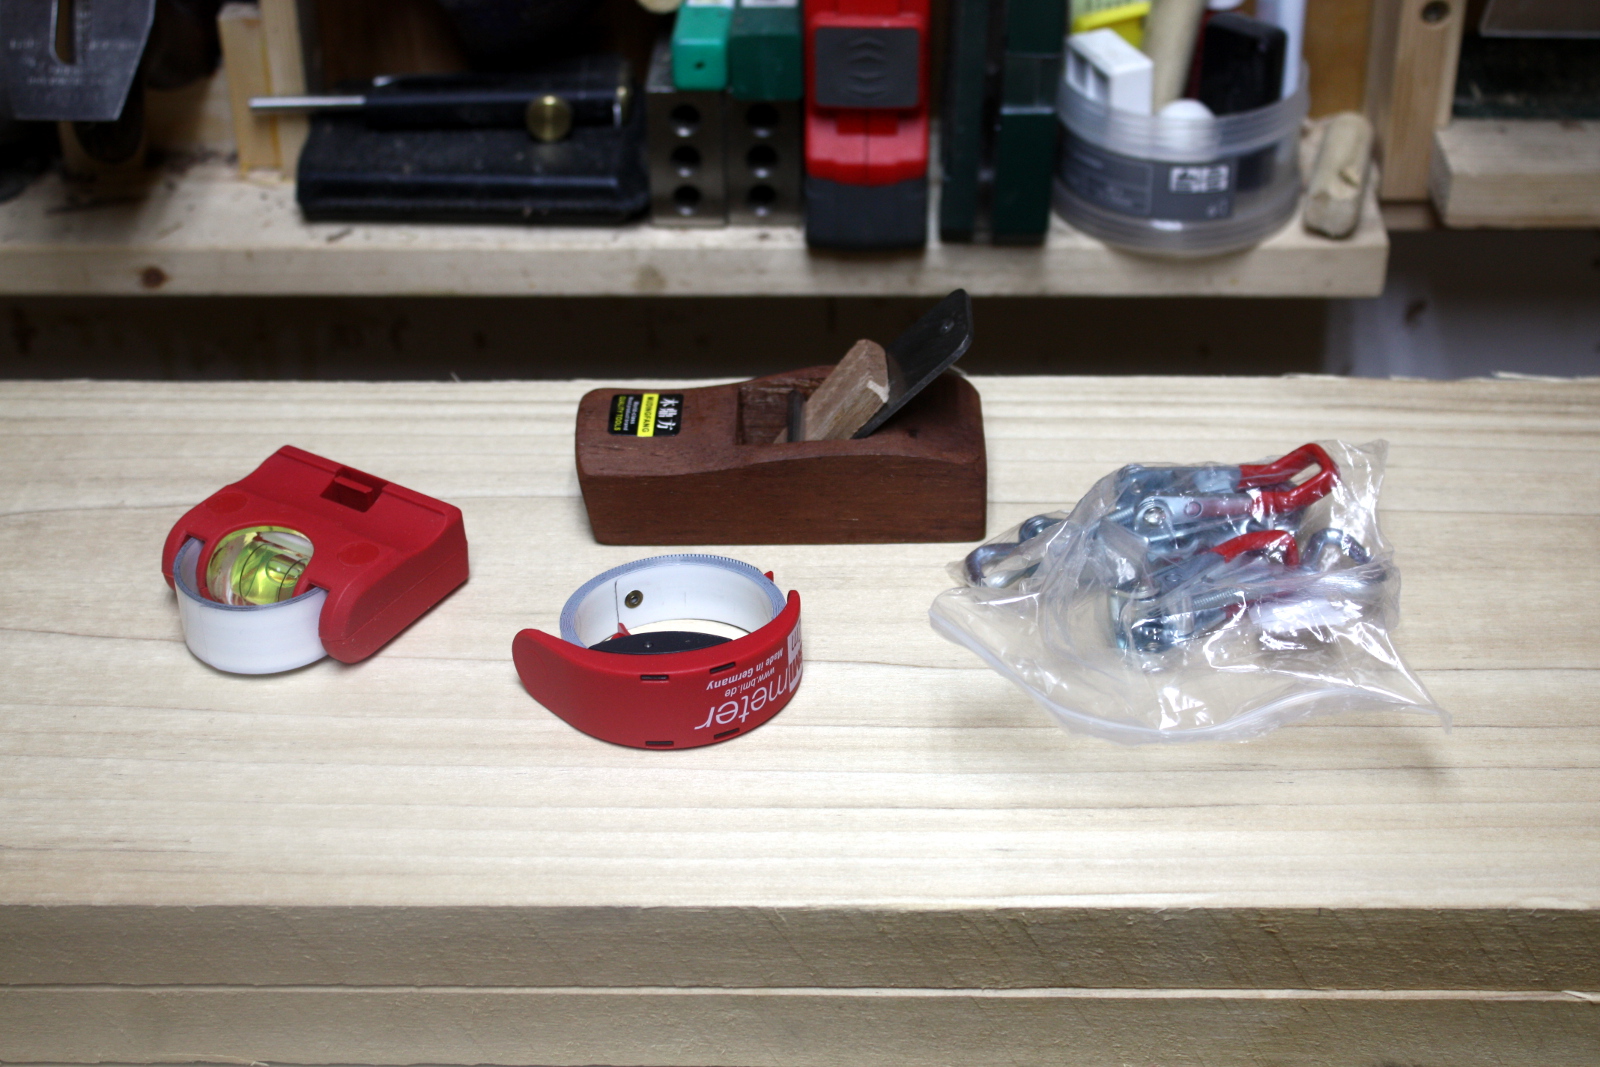
So some catches to help with the mod to the Dewalt extraction hood (I think I have everything I need for that now, I’ll get to it soon), an incredibly cheap handplane ($4.30 from Aliexpress delivered) which is more to play with and laugh at than to seriously try to use as a tool, and two interesting tape measures. Both of those are small (1m and 2m) which is handy for using in the shed, and I’ve just wanted to play with them for a while now ever since seeing them in action.

They’re a bit gimmicky and I’m not throwing away my stanley tape measures, but they’re fun to play with and that’s the point.

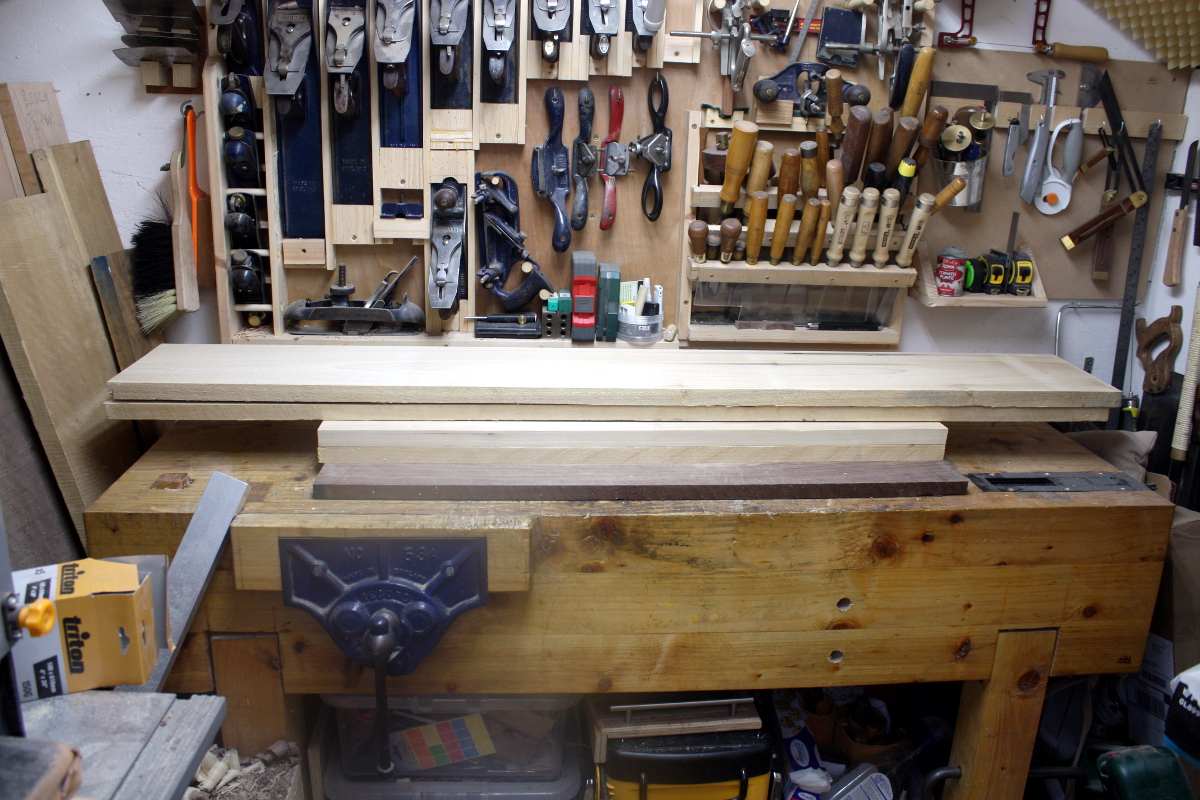
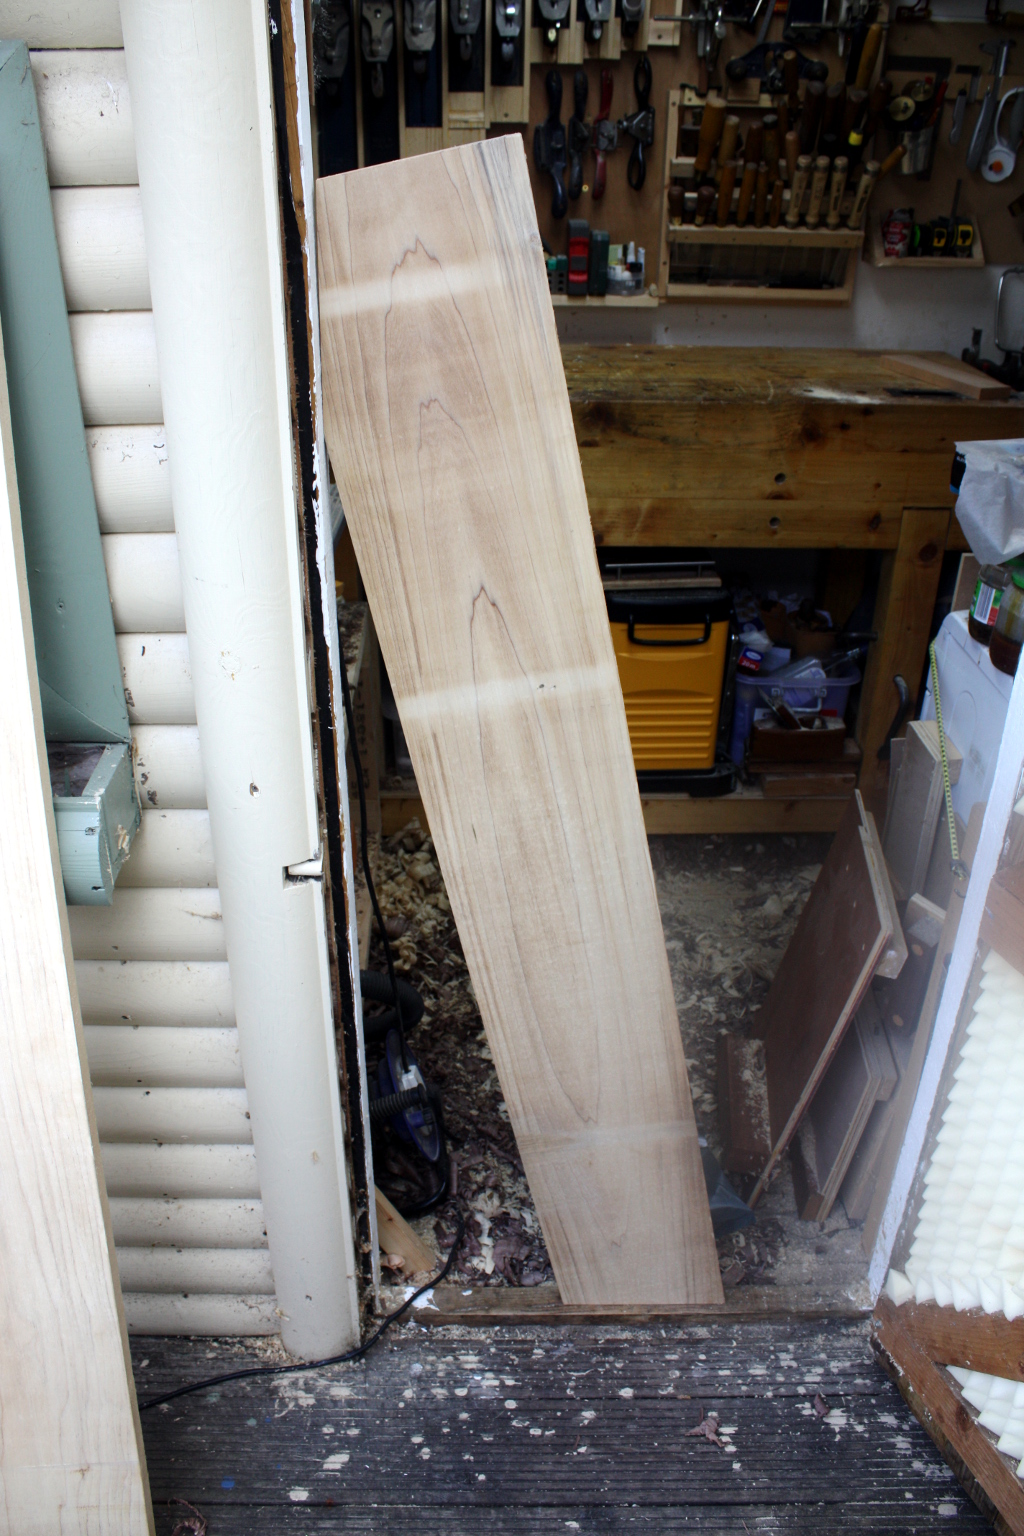
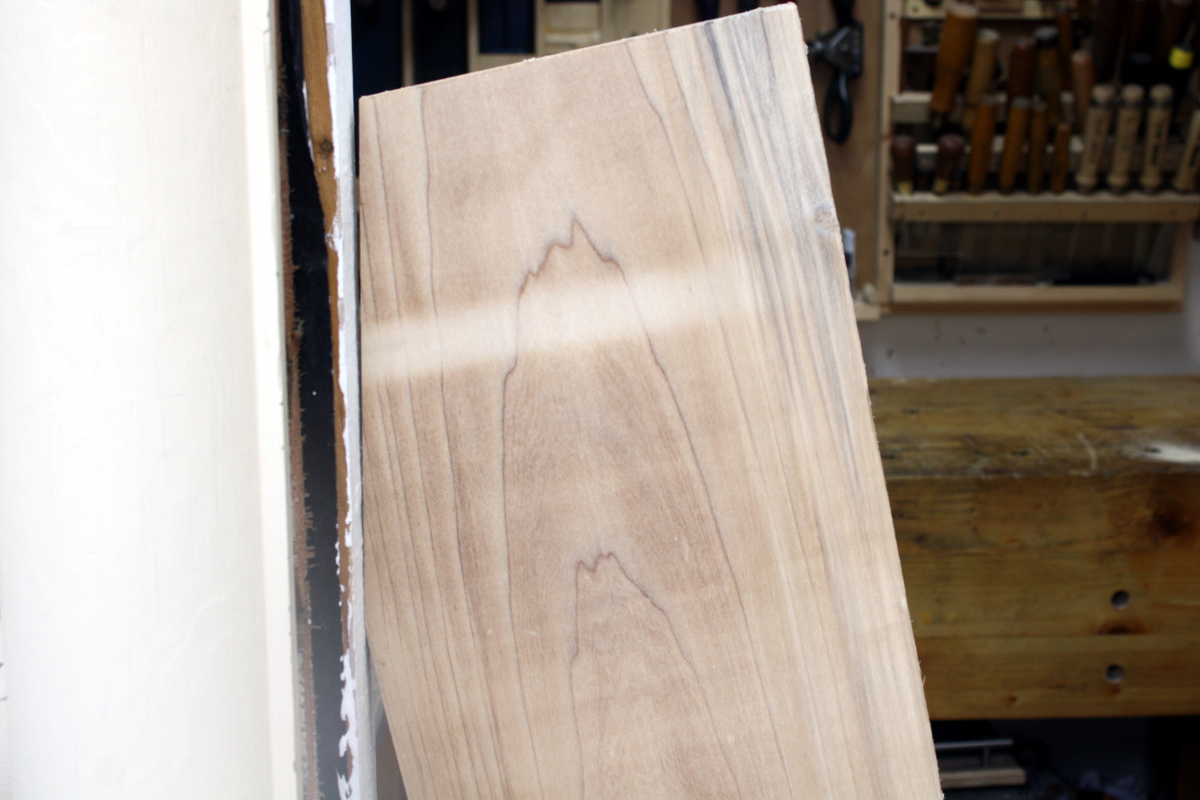
Anyway, that done, on to the sides. I wanted to get a start on these today. One’s developed some twist since I milled them. Not a huge amount, but noticeable – 3-4mm at the worst point. A lot of that twisted portion might be cut away so I don’t know if it’s something I need to get out of the board yet (or even if the shelf joinery will pull it back to straight). But I’m starting on the untwisted one and I’ll see how we go.

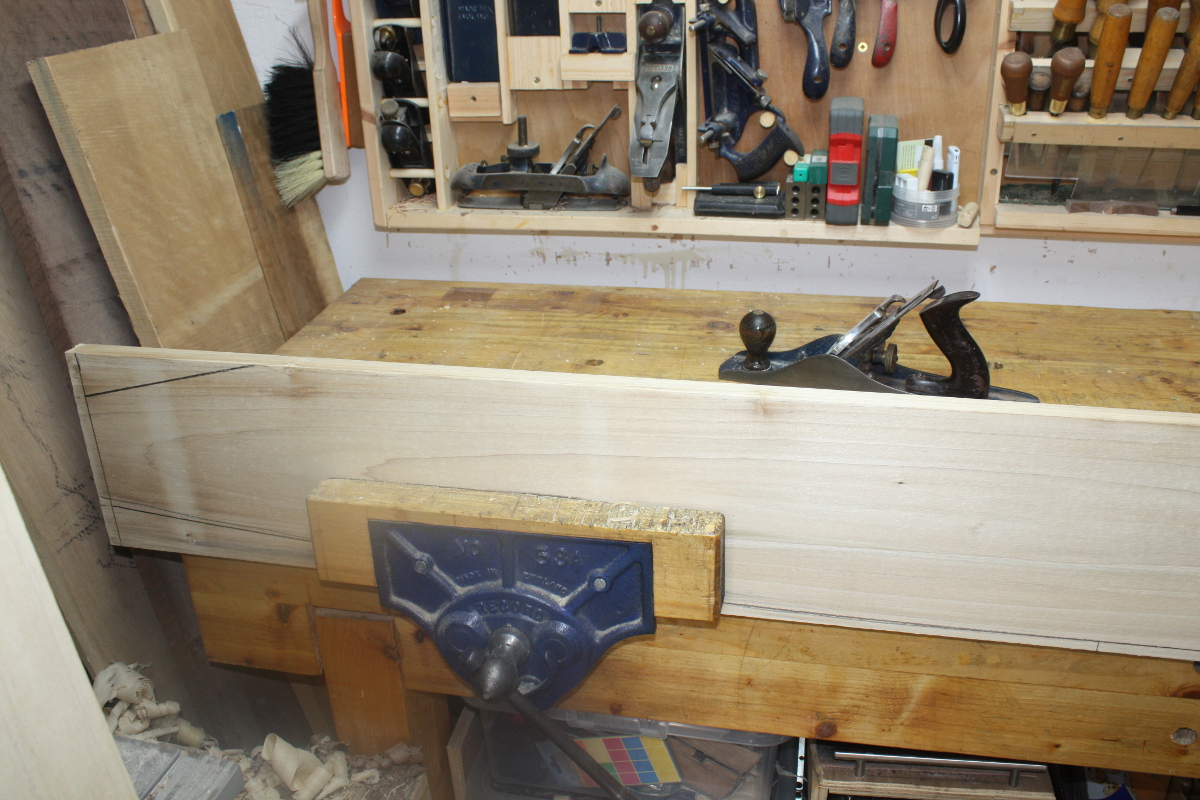
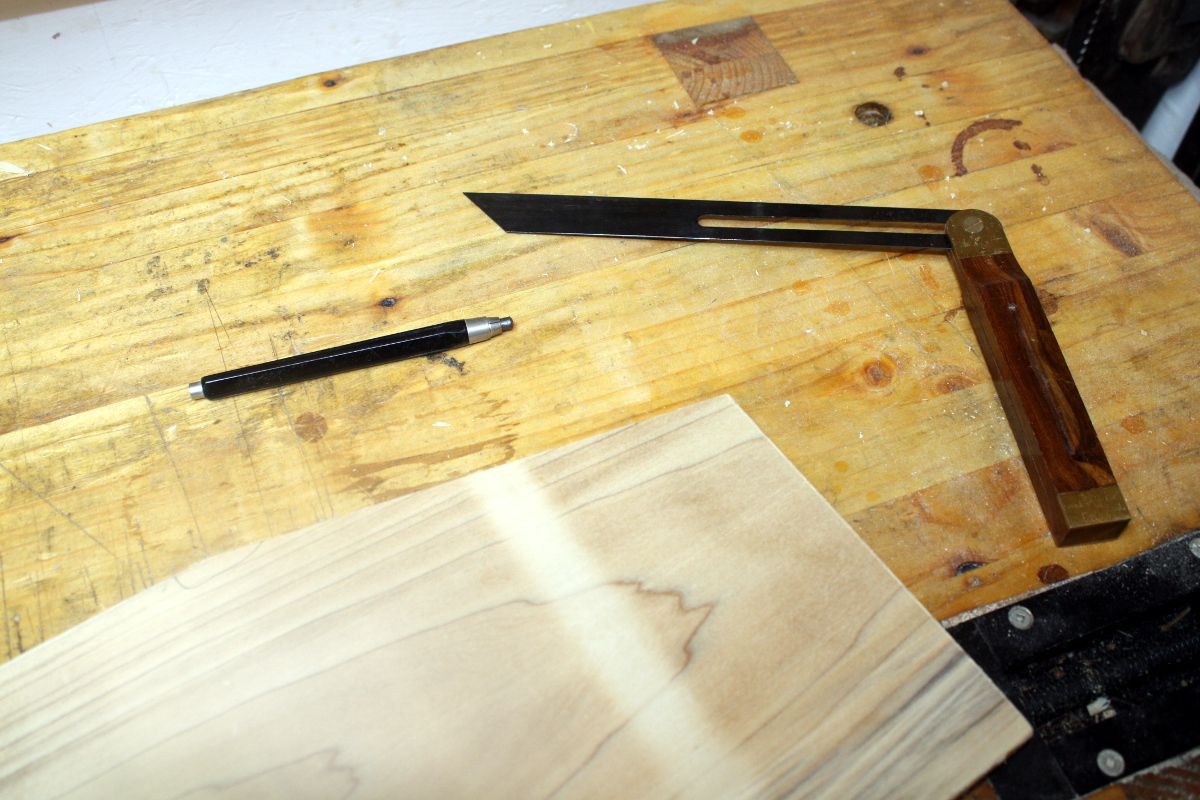
Marked up the cuts for the foot and the wall rest sections using the bevel, and the front curve by bending a long piece of dowel stock (didn’t have anything else that was long enough and thin enough to act as a batten). And then started making a reference edge from the back edge. The sides are long enough to make this awkward…

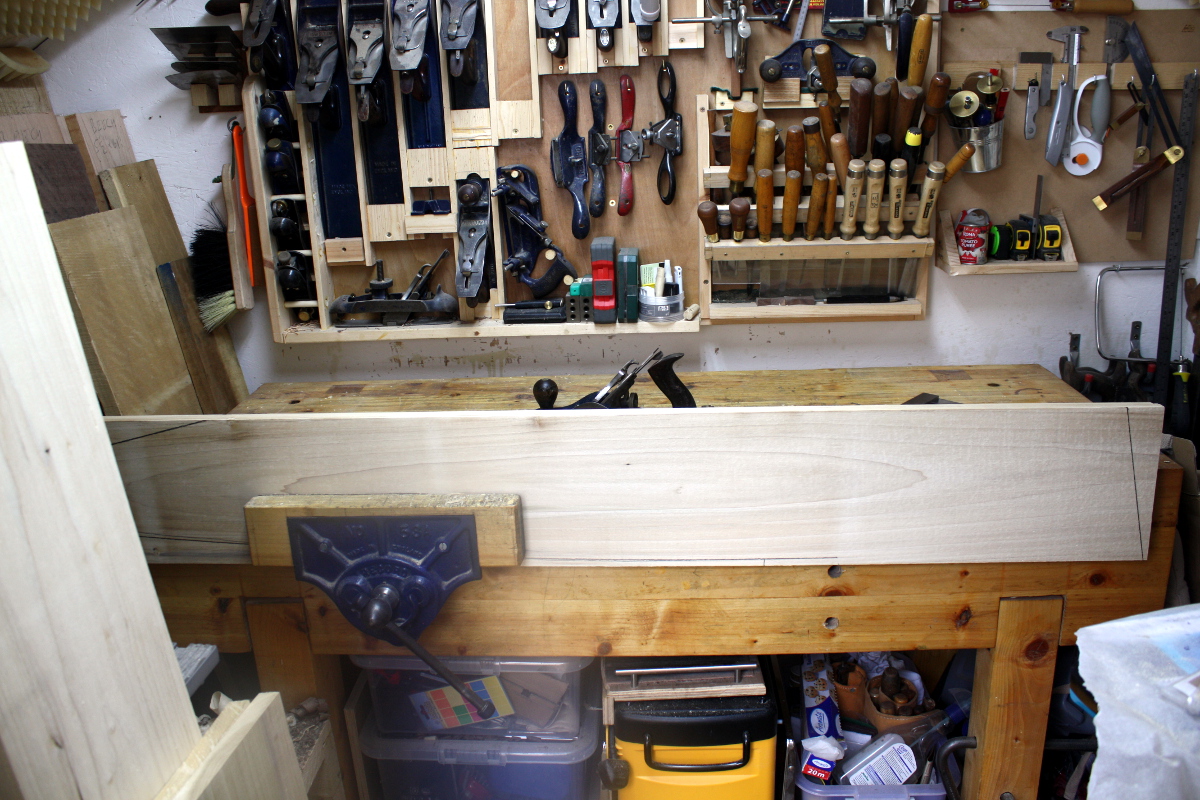
There’s barely enough room to do this. Really, there isn’t enough, but by being fiddly enough about it you can just about get away with it. Then, with the reference edge established, out with the bevel and the marking knife and time to mark off the final line to cut to for the feet and wall rest. First though, need to take off the last half-inch or so of board, give me another reference edge square to the back edge.

And cut off and then plane to flat.

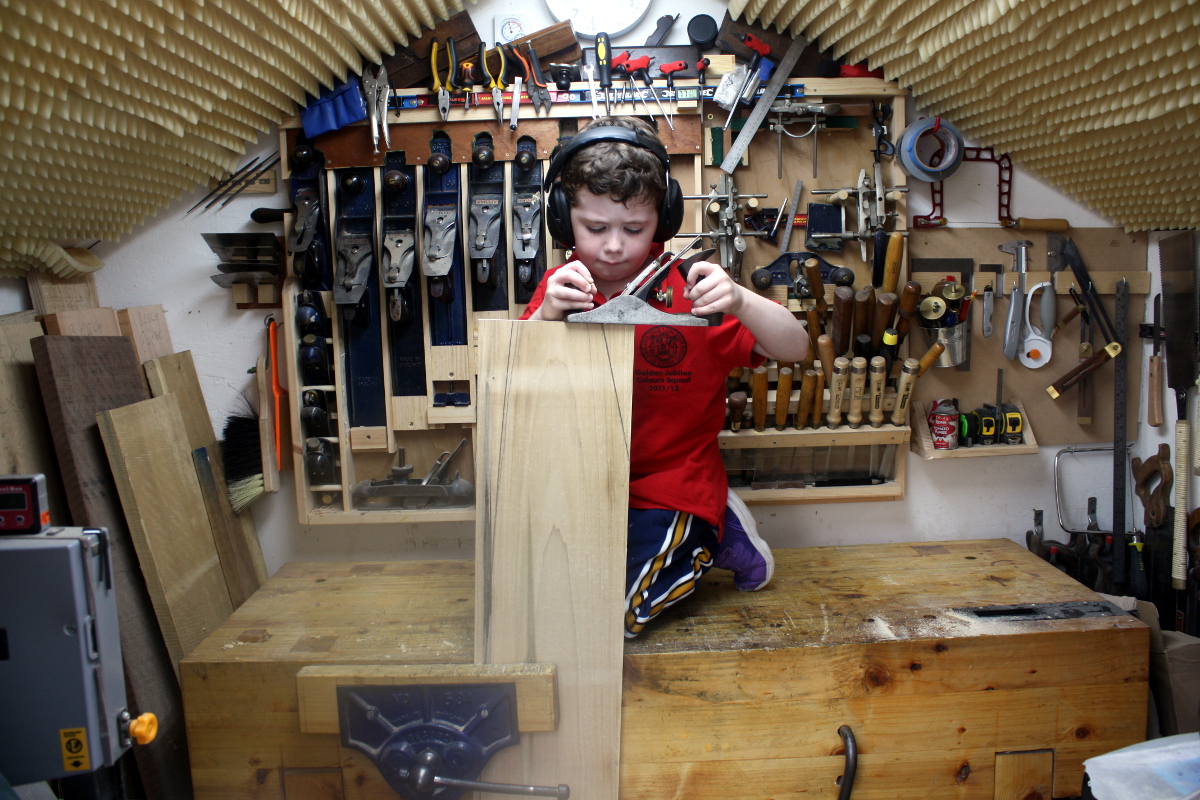
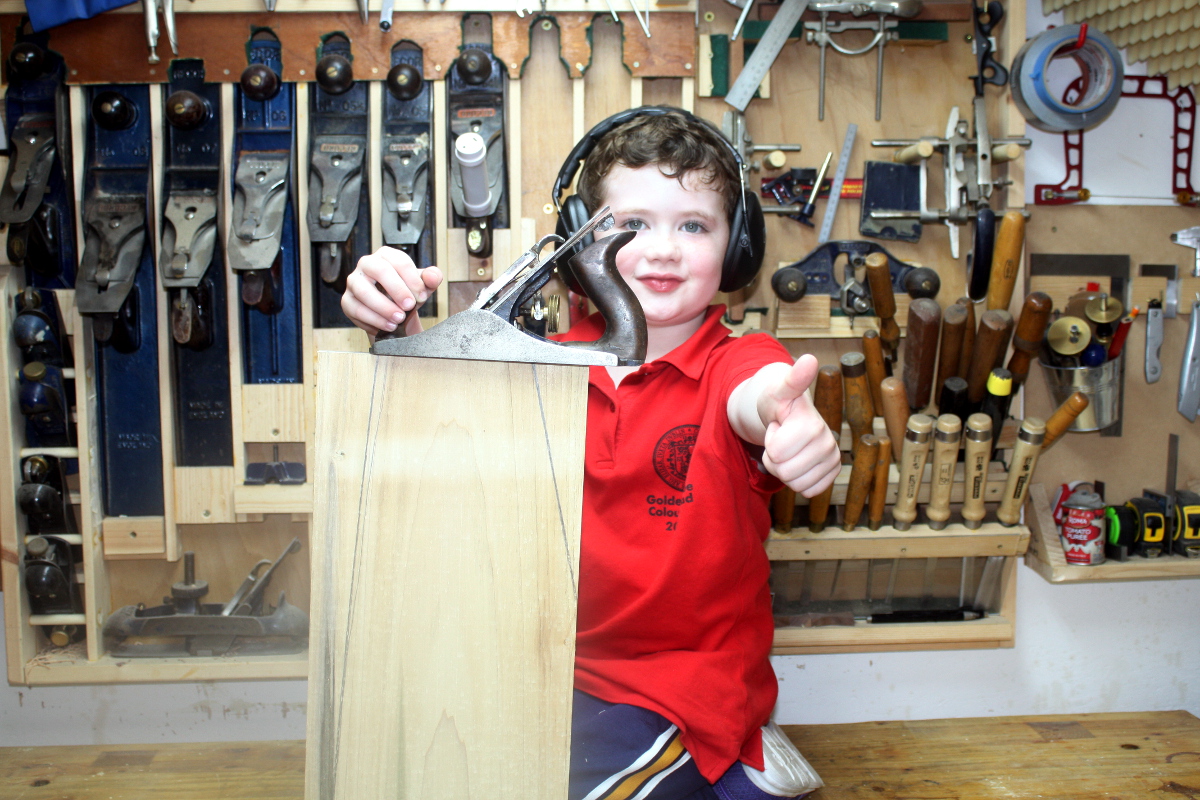
This is where having an apprentice can help (incidentally, for anyone who was wondering, this is why I have a Record #03).

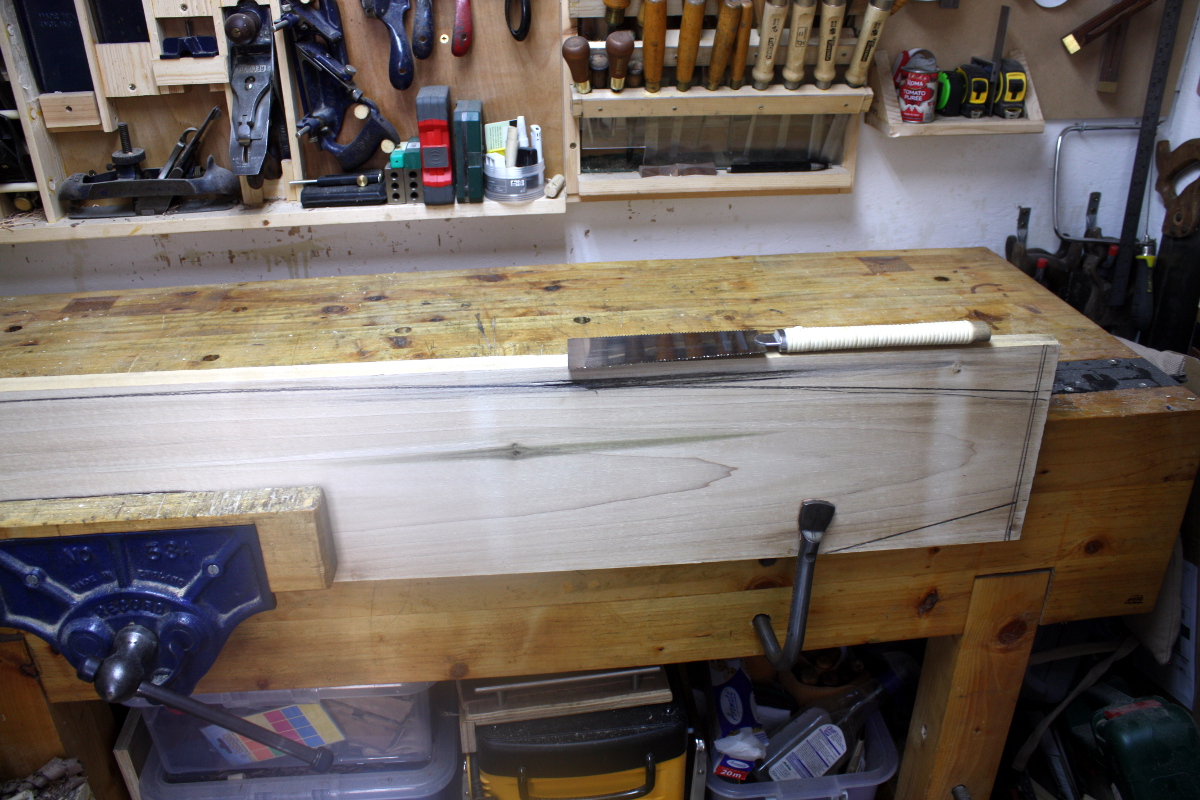
Once we’ve passed QA, it’s time to mark out the wall rest with the knife and bevel and then cut it (using a short batten to help guide the saw because the cut’s awkward due to the lack of space).

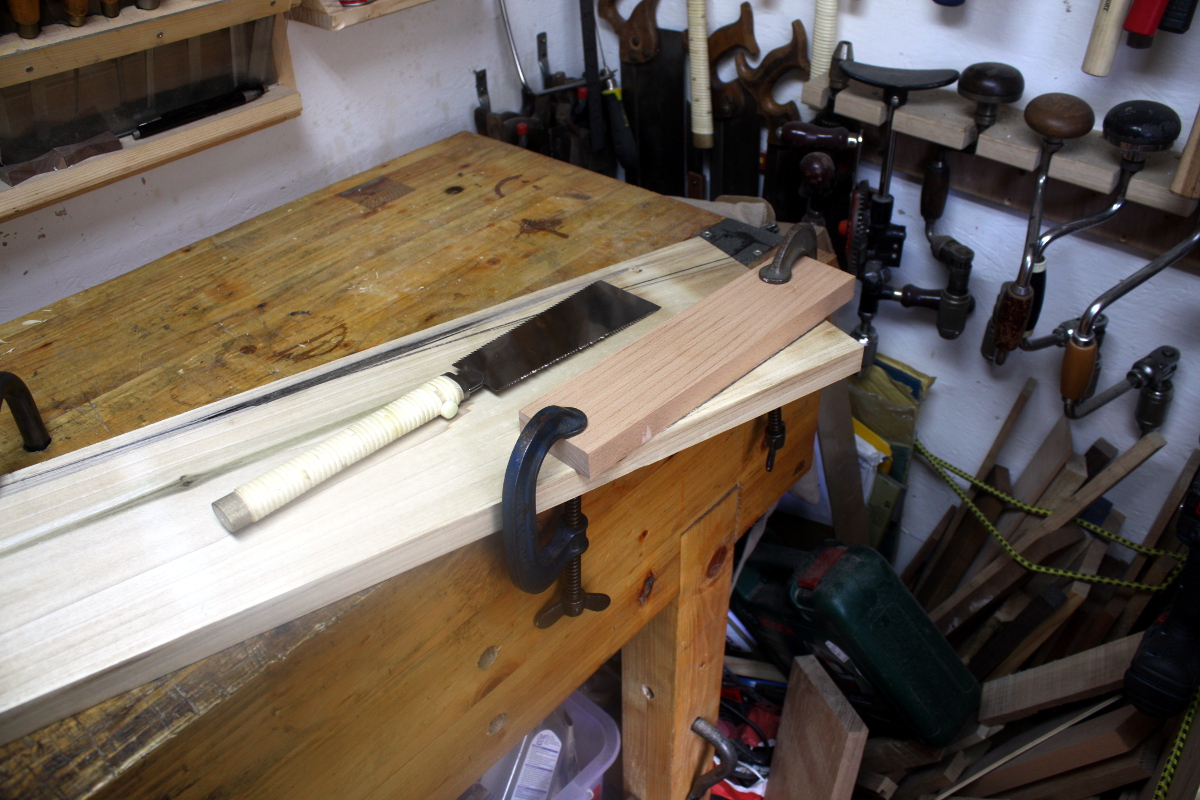
And then a few swipes with the #04 to clean up the cut surface when done. Do the same on the other end for the foot and now it’s time to check. I don’t have a five-foot-tall try square, so I’m just using the door frame of the shed.

So-so. There’s a gap at the wall rest.

Thing is, I’m pretty sure my door frame is as square as a rhombus, so I’ll check this with the bevel and might tune it slightly, but I don’t believe the door frame is a reference surface you’d trust too much 😀

Yup, bevel says the wall rest is slightly out. A few swipes with the #05 will sort that, but I’ll check against the actual wall it’s going up against before I do that.

Had to stop there, but tomorrow there’s a few more hours and the next step may be to cut the curved section at the top. Maybe. I’m not 100% certain if I want to do that yet, the parallel sides might make workholding easier. Have to think about that one…


25
Aug 18

Milling time

So, been sick. Children, they’re basically walking petri dishes that deposit germs on you. Anyway, back to it today. And nothing fancy, nothing terribly skillful, just milling timber to rough thickness.

Retrieved the mitre saw stand I bought from lidl a few weeks ago out of the attic, set it up, and mounted the Dewalt to it, spent a while faffing about with the mounting screws discovering that I’d fastened it down using the screws that are for adjusting the infeed and outfeed tables that are built into the thicknesser and had to re-mount it (turns out the thing won’t mount to the lidl stand quite perfectly because it’s too wide, but it’s stable enough to work).

I was going to mill up the two sides as well as the two remaining shelves, and the sides are just too long to do this in the shed, so I waited for a Saturday afternoon and did it all on the little decking area outside the shed. Which, noise-wise is a bit obnoxious, but this is a one-off (normally milling only happens for a short period at the start of the project, and on top of that, normally I’d mill up in a soundproofed shed so it’s as noisy to the neighbours as someone mowing a lawn, but with an annoyingly higher pitch). Anyway, the plan is to not do this in an evening and to try to time it all for Saturday afternoons if needed, and mainly not to need it by not picking projects which are physically too big to fit in the shed readily.

That needs to be a bit more of a cast-iron rule really.

On top of which, while I love what that machine can do and having that capability now, I don’t much like actually using it…

Anyway. Rigged the machine, faffed about with setup, then took the boards (which I’d checked were flat on one side and had flattened by hand if they weren’t) and ran them through the thicknesser taking off a mm or so at a time until I was down to an inch for the sides and just under for the shelves (it’s kid’s furniture, I’m aiming less towards elegance and more towards brick shithouse). It took under 30 minutes to do all four boards from inch-and-a-quarter down to planed, flat inch thick boards. Previously, that would have been most of a week’s evenings doing donkey work that was boring and sweaty and which tore up my hands.

Like I said, I don’t like using the machine, but I love what it does. Now I get to do fun stuff for the rest of the time, like shaping and joinery and finishing work and inlay and so on.

Now they’re not perfect. This is rough thicknessing only, I’m not good enough with the machine to do anything else yet and don’t plan to be for some time. But those shelves are grand and so is one side – the other has a little twist in it that I need to correct still, annoyingly. And the other has what must have been a bark incursion or something that I’ll have to arrange to be in the part that gets cut away when shaping the curves:

But I can do all that by hand readily enough. At most, a cut or two with the bandsaw. And of course some router work for the sliding dovetails. But nothing as obscenely loud as the thicknesser.

The amount of cleanup that machine generates is something else by the way. Wow. I mean, setup took a good half-hour, and tear-down took fifteen minutes, but cleaning took all that again, and even after that…

Still messy and needing a proper clean. Might do that tomorrow so I can start into the fun stuff without wading through shavings.

In other news, Boss Lady got her locker and loved it, especially the colour.

And promptly gave me another commission, this time for building a pair of bunk beds for the same dolls that will be using the locker. I do have to get Calum’s desk finished first, but there’s the next project lined up I guess 😀

Actually, little projects like that can be a bit fun and a nice way to practice things like inlays or kumiko or making shoji (no idea how that’d get worked into bunk beds, but you know what I mean).

And lidl had a nice sale of F-clamps, so I filled out the third rail:

And then to top it all off, I finally bit the bullet and bought myself a proper combination square. A Starrett, no less.
I mean, I know they say “buy once, cry once”, but I think they omit the bit where, yeah, you’re only crying once, but you’re crying for so much longer. Seriously, I think this will be the most expensive tool I’ve bought yet (not counting the machines). But that’s precision marking-out kit for you I guess. Anyway, everyone who has one say they last a lifetime, so I can amortise the cost and then have another cry at how little difference that makes 😀


25
Aug 18

Pizza

So I think I’ve gotten the pizza recipe down to “yeah, this’ll do” levels.

Looks good after two minutes in the oven…

And a good crumb structure and base. Grand.

Recipe:

I usually make enough for four pizzas at once.

In the bowl of the stand mixer…

  • 325g warm water (40C if you want to get all fussy about it, “not hot enough to kill yeast” if you don’t)
  • 10g of yeast
  • 20g of honey

And give that a quick stir with the whisk and leave it sit for ten minutes so the yeast wakes up and starts its thing.

Now add

  • 500g flour made up of bread flour and normal plain flour in equal parts
  • 5g of salt
  • 10g of diastatic malt powder.

And then whisk it until it starts to come together but stop before it grabs your whisk and you have to clean it out of the inside of the whisk. Put the dough hook in the stand mixer and mix on slow until you have a dough and the walls of the bowl are clean (mostly) of loose flour. It’ll be very loose, never mind. Turn the speed up to medium and let it run for ten minutes. Give it a quick pulse at high for 20-30 seconds to get the dough off the hook, then turn the dough out onto a floured surface and work it for a minute or two by hand to knead it into a doughball. It should be sticky and definitely not that firm, that’s grand. I mean, it won’t pour like milk, but it definitely won’t hold its shape. Now wash out the bowl, dry it, oil it with a tablespoon or two of olive oil, put the dough back in and flip it about and swish it round so it’s coated in the oil, then let the bowl sit, covered, somewhere warmish for an hour or until doubled.

Now knock the dough back, turn out onto a floured surface and work for a minute or two to a ball, then use a dough scraper to divide the ball into four, roll those into balls, and then drop into zip-loc bags with a teaspoon of oil, seal and put in the fridge overnight (or for a few days, up to a week, though it’ll be rising all that time so be careful the bags are sealed or you’ll be reenacting The Blob with your own fridge.

And nobody likes seafood pizza.

When ready to cook, put pizza stone in oven, crank oven up past max (so 270C in mine), and let the whole thing come up to temperature, which will take a good half-hour or more depending on your oven. Even when the oven says its ready, it’s not, it’s lying, they all lie, it’s a Thing.

Once your fancy laser-infra-red-pew-pew-pew thermometer says the stone is hot enough, it probably isn’t anyway so take your doughball, work it out to a flat pizza shape either by hand or by rolling pin or by hydraulic press, and dust your peel with polenta because finding cornmeal in Dunnes is now difficult because, I don’t know, life. And when I say “dust”, I mean “dump a few tablespoons on there and spread it round” because scraping a pizza off a peel into a 270C oven is a bad way to make a pizza dough twist with extra cleaning. Take your pizza dough disk, drop it onto the peel and paint the top with olive oil. I mean, don’t drown the thing, just literally take a silicone pastry brush and get the surface to look glisten-y. Add a single tablespoon of tomato sauce, spread out, and some cheese and, I don’t know, gearbox parts. Whatever you put on a pizza yourself.

Now leave that sit there for at least five minutes. Ten or more if you can, shaking the peel every so often so that little bit of oil that dripped over the side because you didn’t listen to me say “don’t drown the thing”, and which is now trying to combine with the polenta to form concrete to set the dough to the peel, doesn’t get a chance to do so.

Then put the pizza in the oven. 7-8 minutes because even a 270C oven is 130C too low really for this. Pull from the oven with tongs onto a plate, not a peel, because you started making the next pizza on the peel seven minutes ago, and then transfer the pizza from the plate to the chopping board and leave sit for 2-3 minutes so the cheese starts to return from nuclear plasma form to a more firm consistency, then cut up and serve.

It’s not that bad really.

Oh, about the diastatic malt powder. It’s a fancy-pants additive made by drying malted milk down to a powder, and contains an enzyme that breaks down the starches in the flour to sugar. In higher amounts it’d turn bread to a sort of slime, but between 1% and 2% by weight, it improves the rise, the crumb structure and so on by weakening the dough a little and letting the yeast blow bubbles more easily. I’ve been trying to find it here for ages in amounts that weren’t measured in kilograms, but couldn’t until I found this crowd on amazon recently, and it’s been working really well so far. Definitely worth trying.