22
Jan 18

Blood, gouges and drawbores

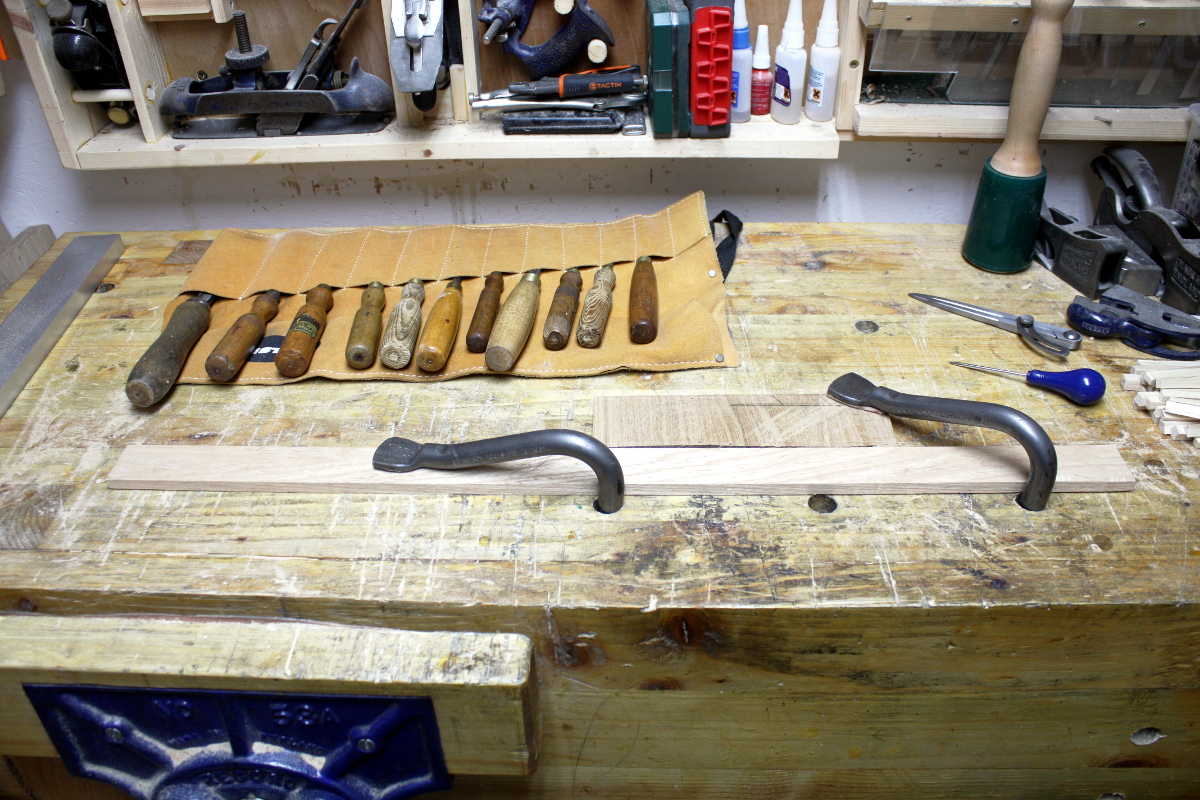
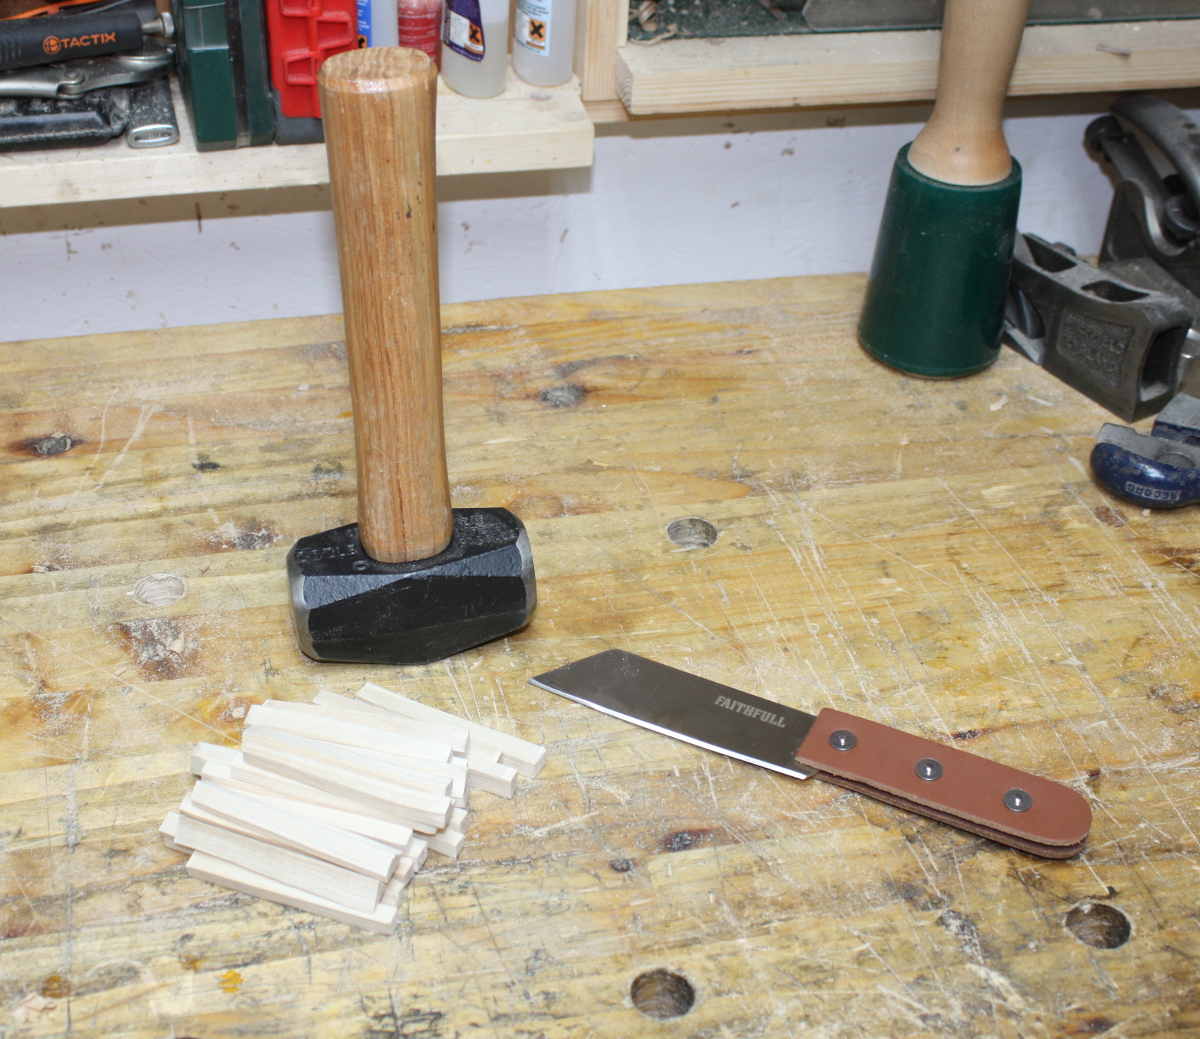
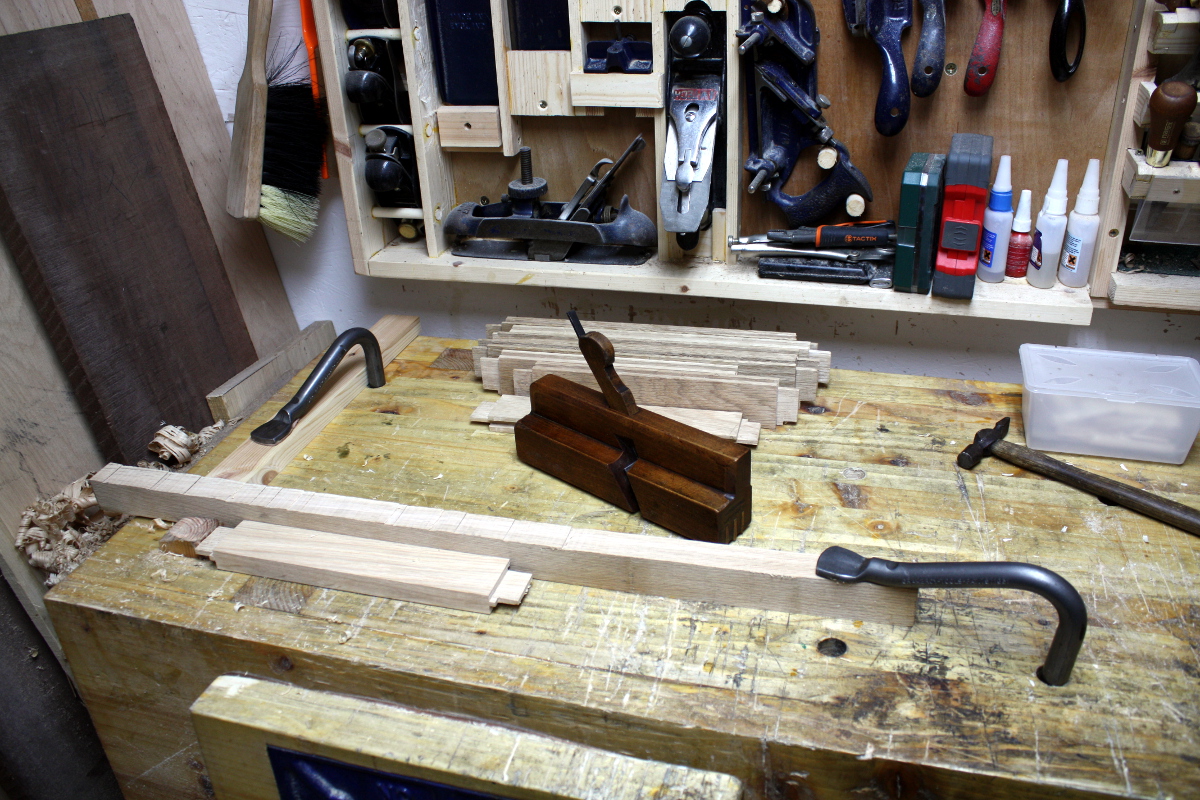
Started off the day with the noisier tasks to get them out of the way…

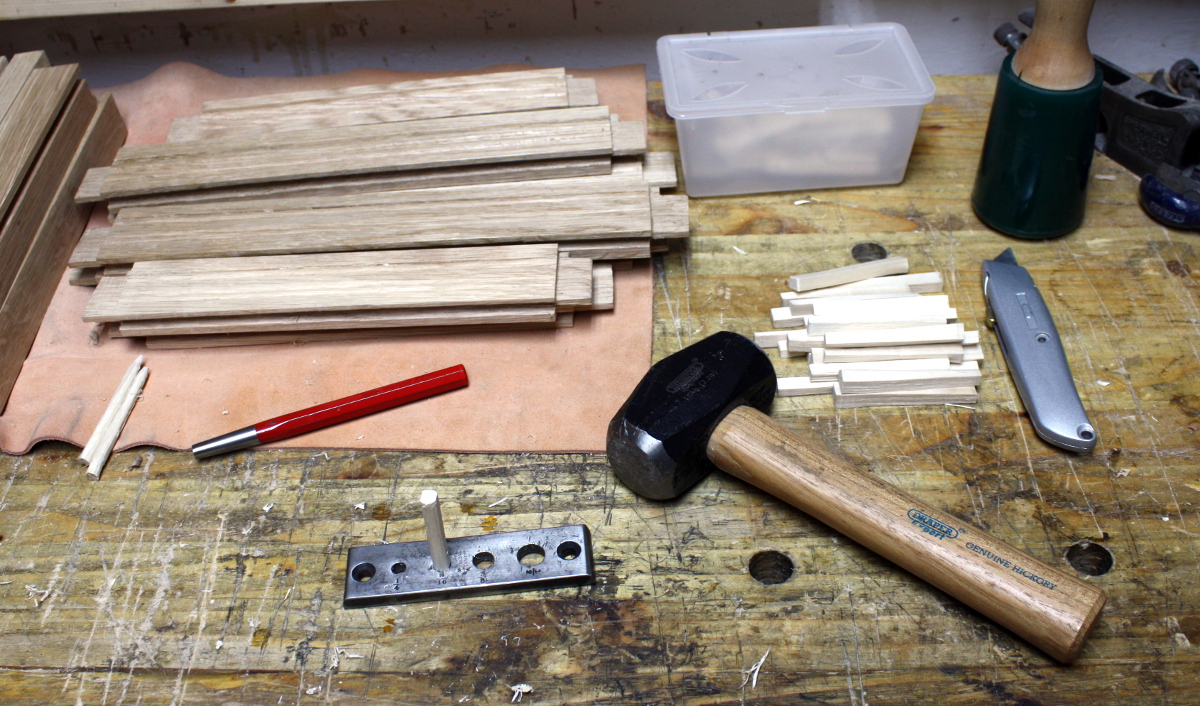
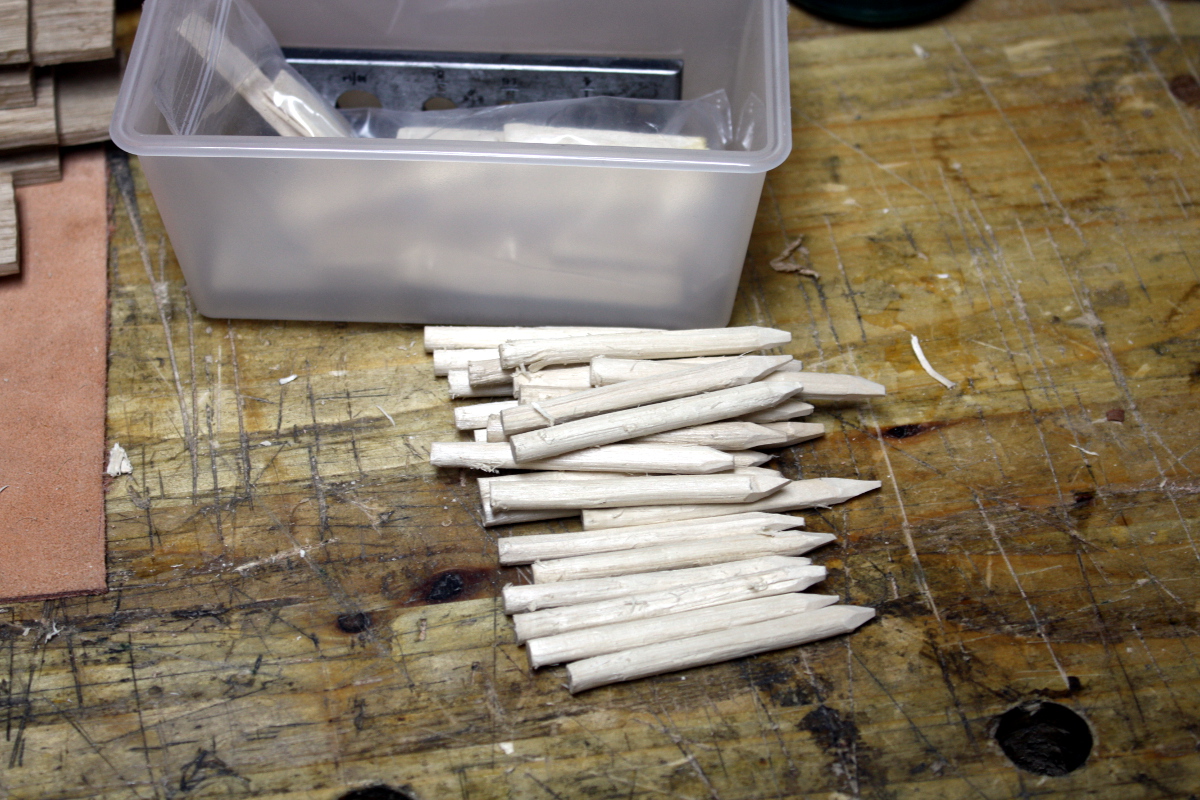
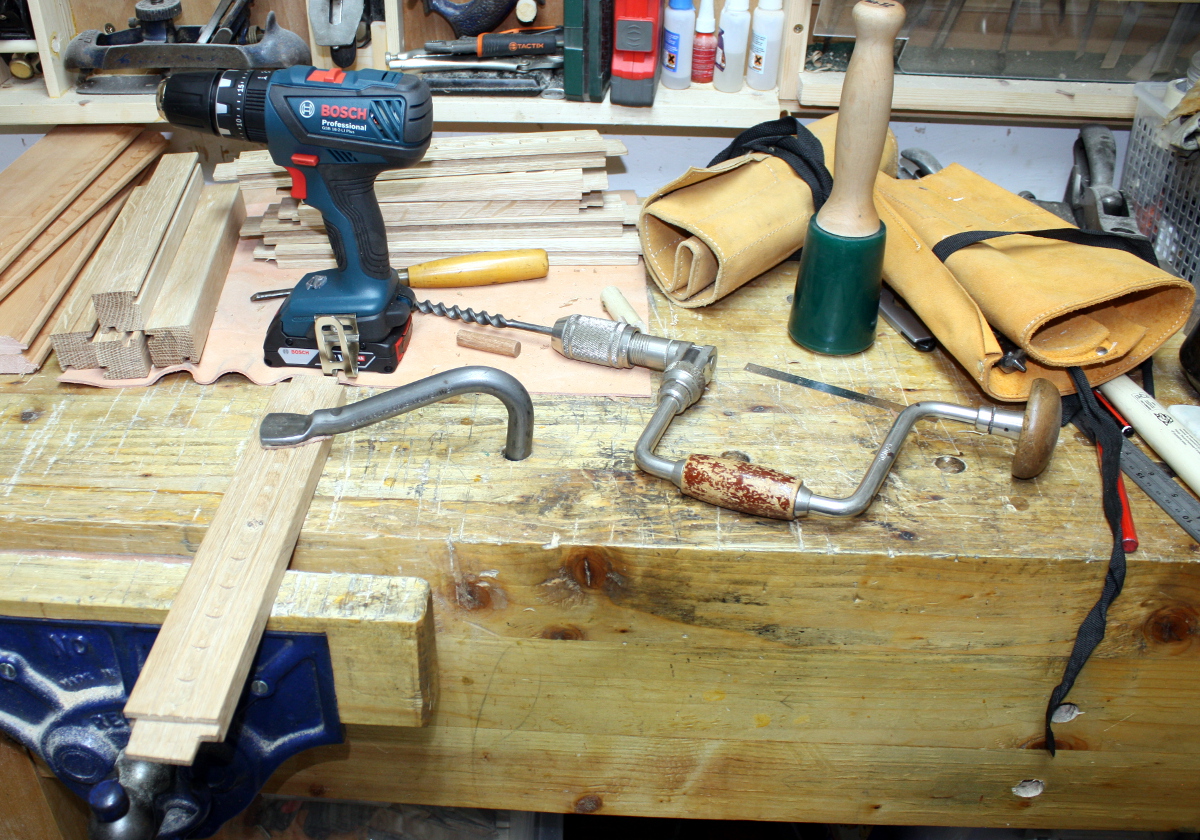
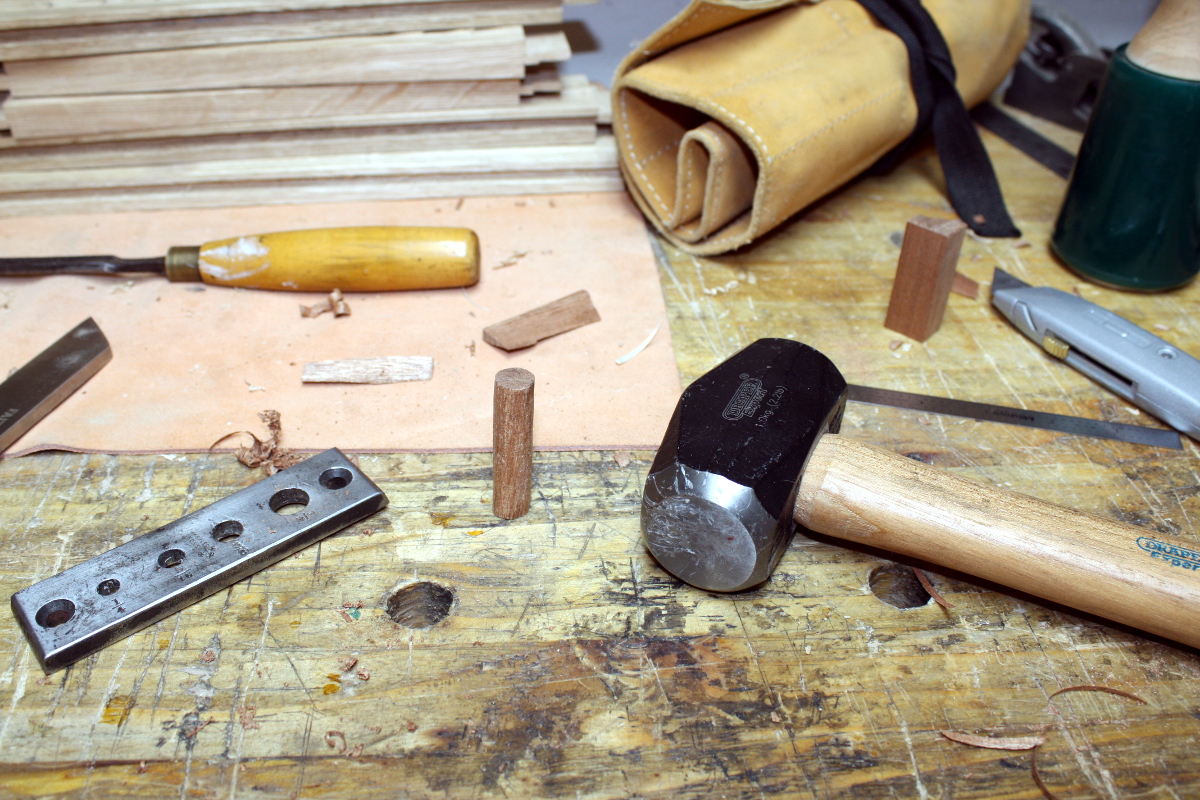
There’s not a lot of art here. Rive the stick to about the diameter you want, pound it through the hole with the big hammer several times, move on to smaller hole until desired size reached, sharpen slightly, continue on. And it’s noisy, so ear defenders. But, keep going and you finally have all you need minus one (because the universe hates you, there will always be a need for one more than you have).

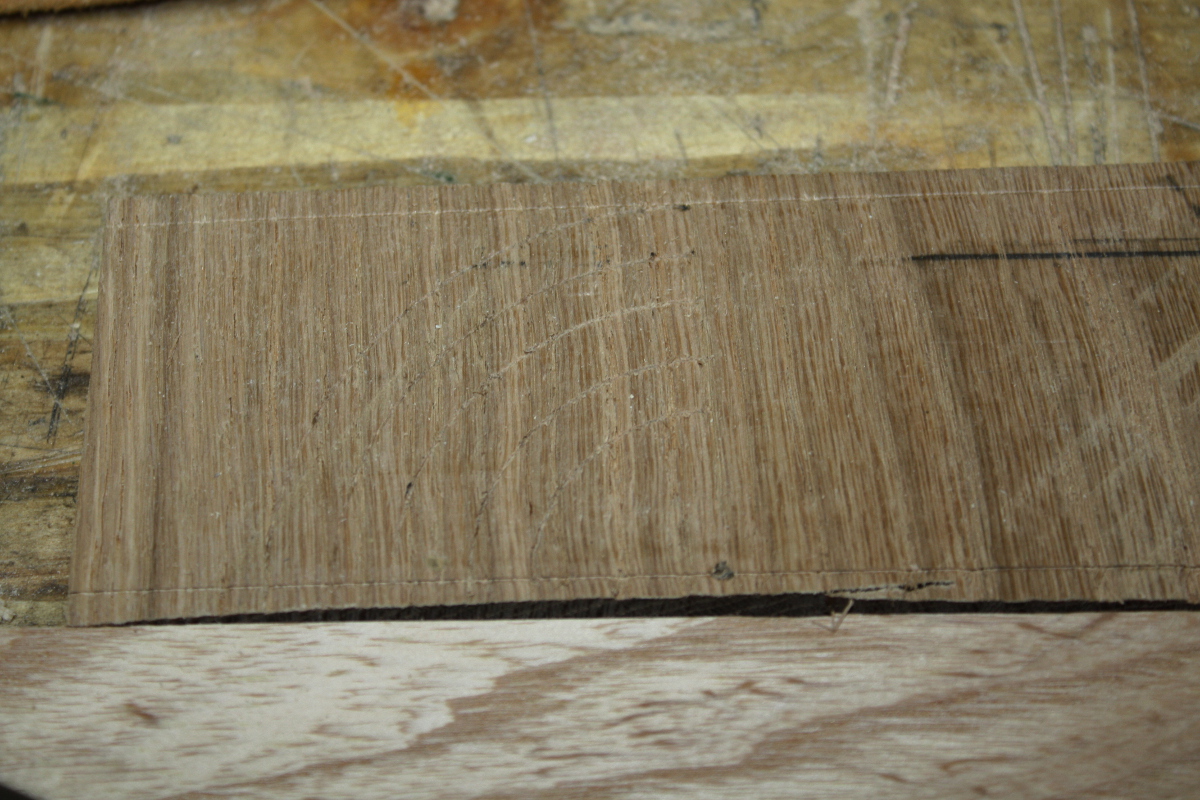
Then on to finishing off the carving.

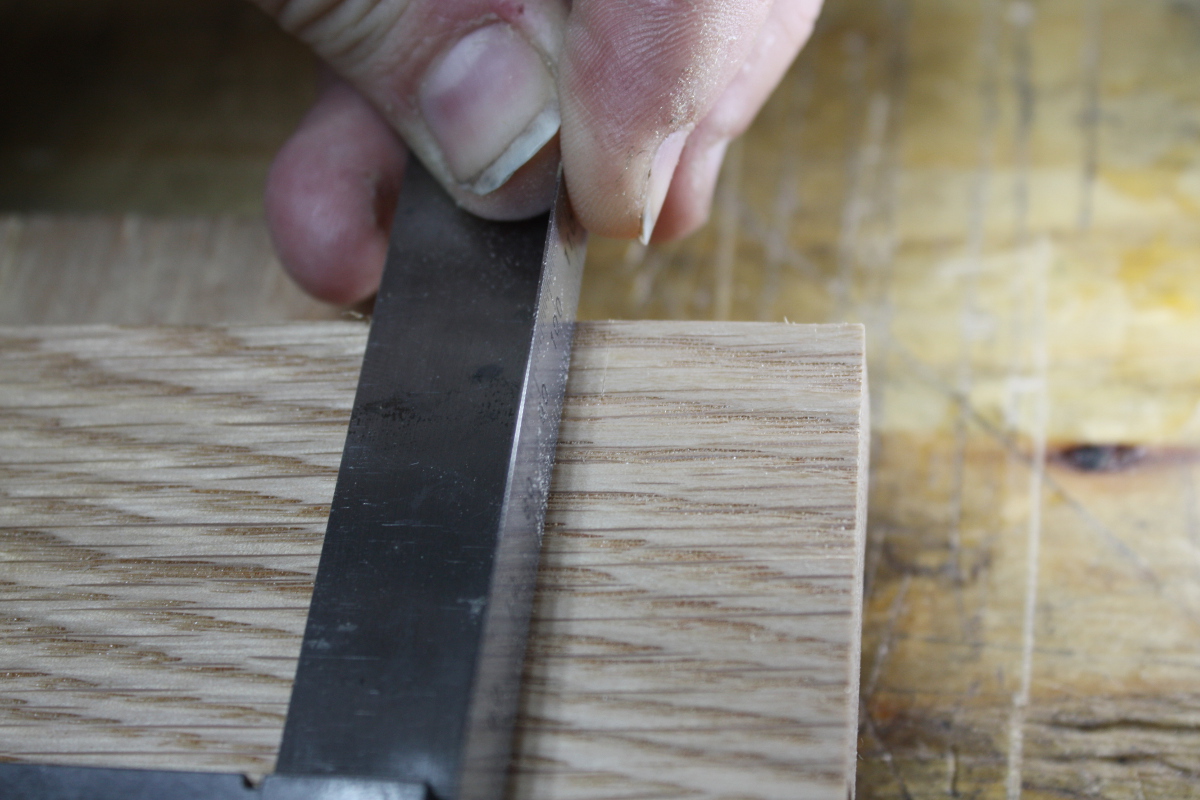
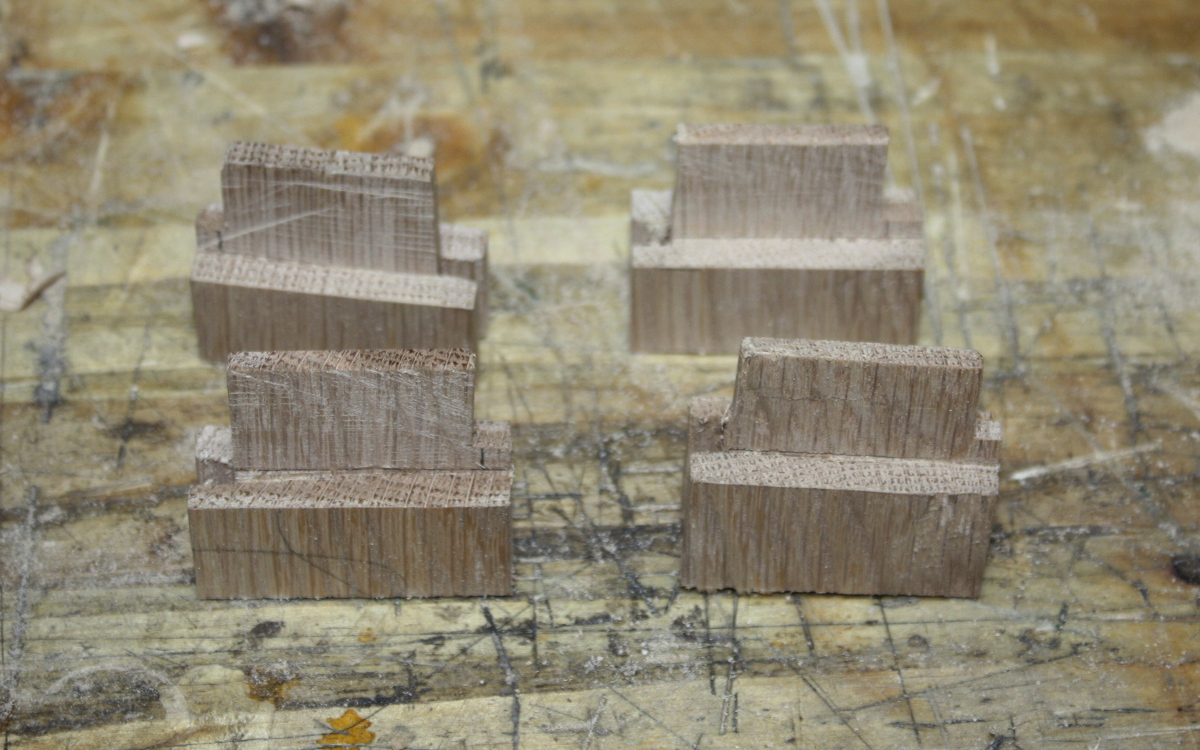
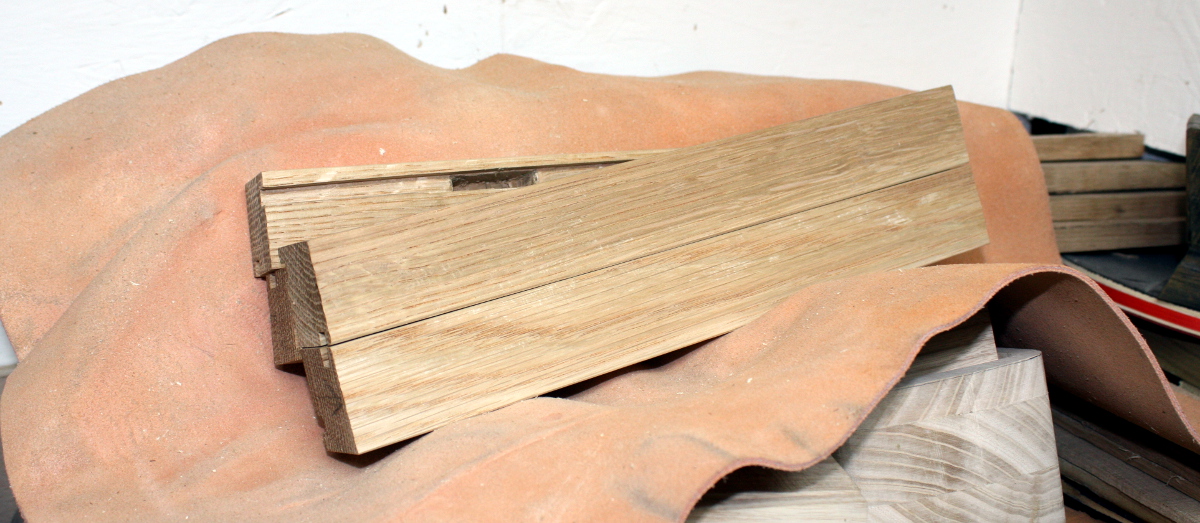
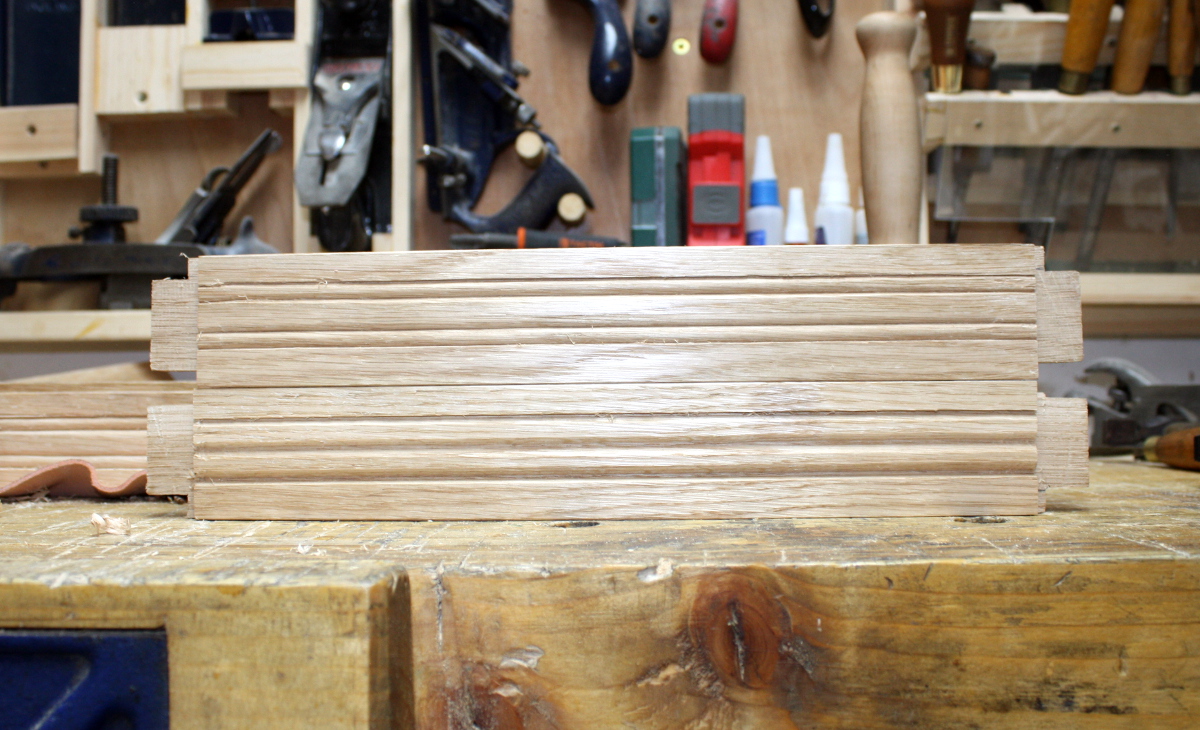
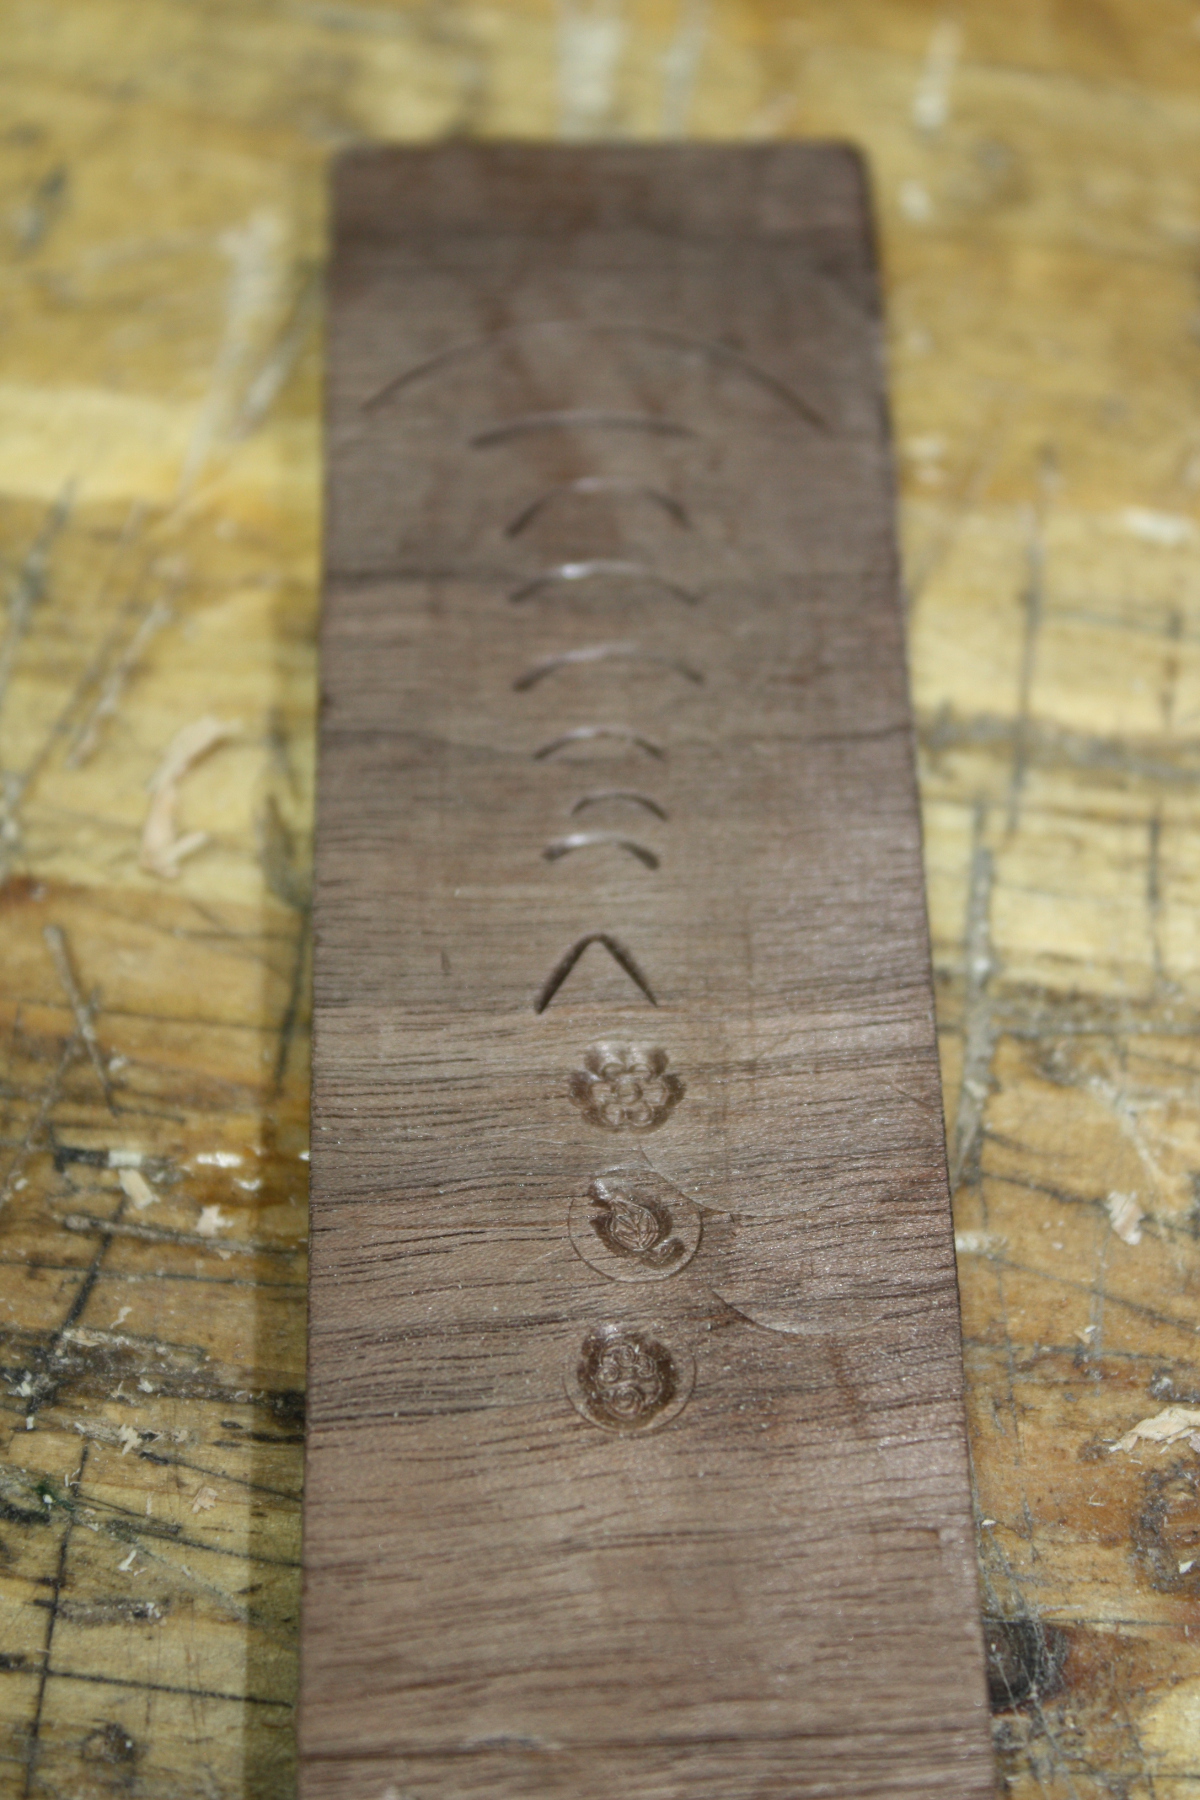
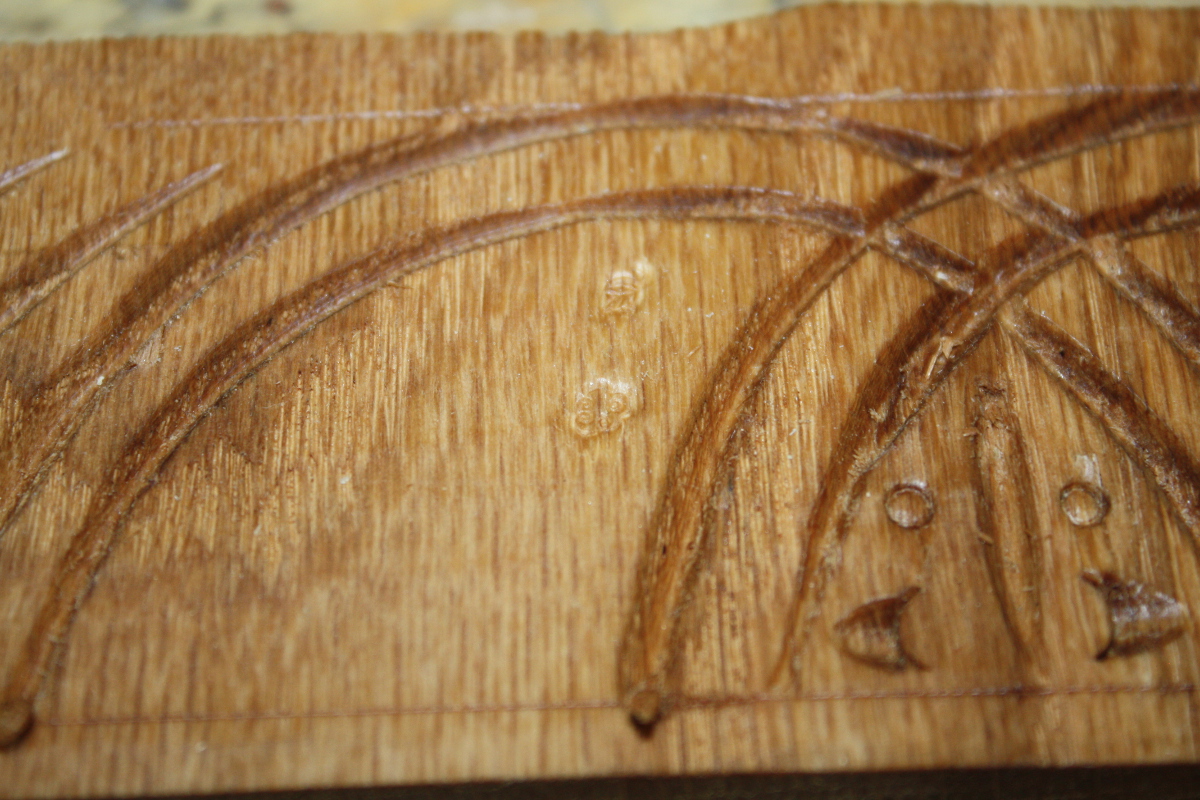
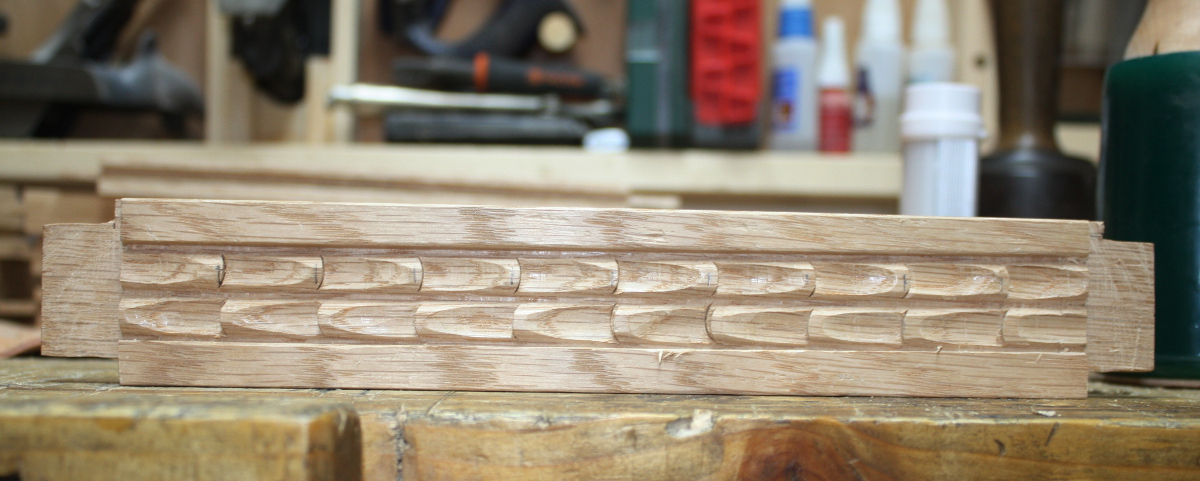
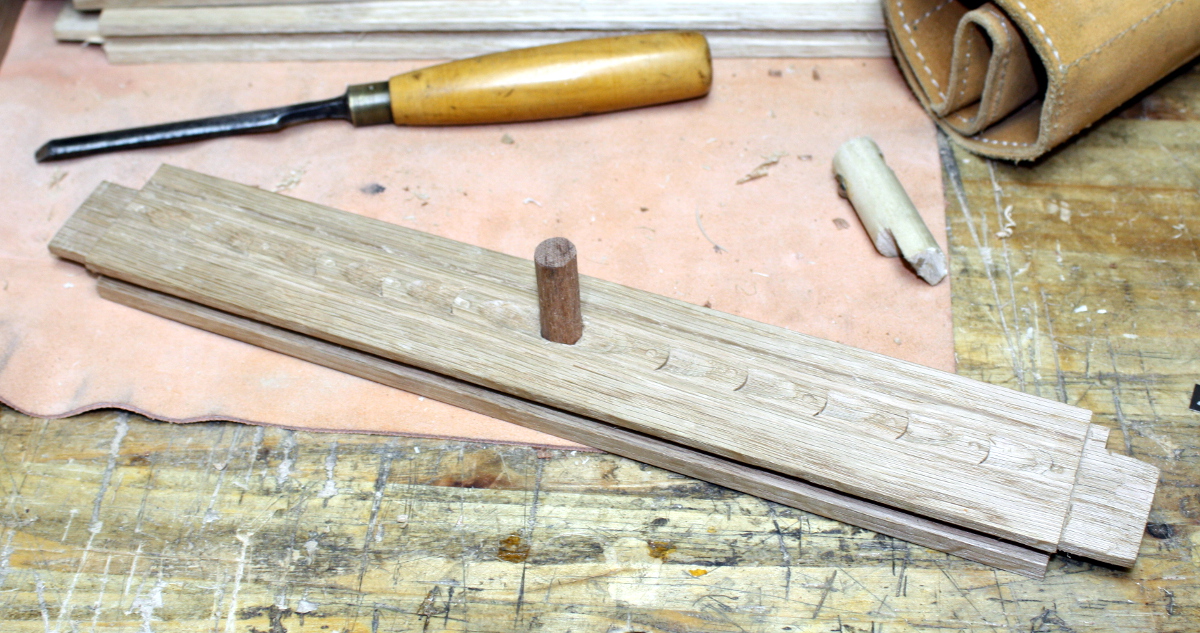
It’s a fairly simple design on the bottom. Mark off every inch on the two reeds I cut yesterday.

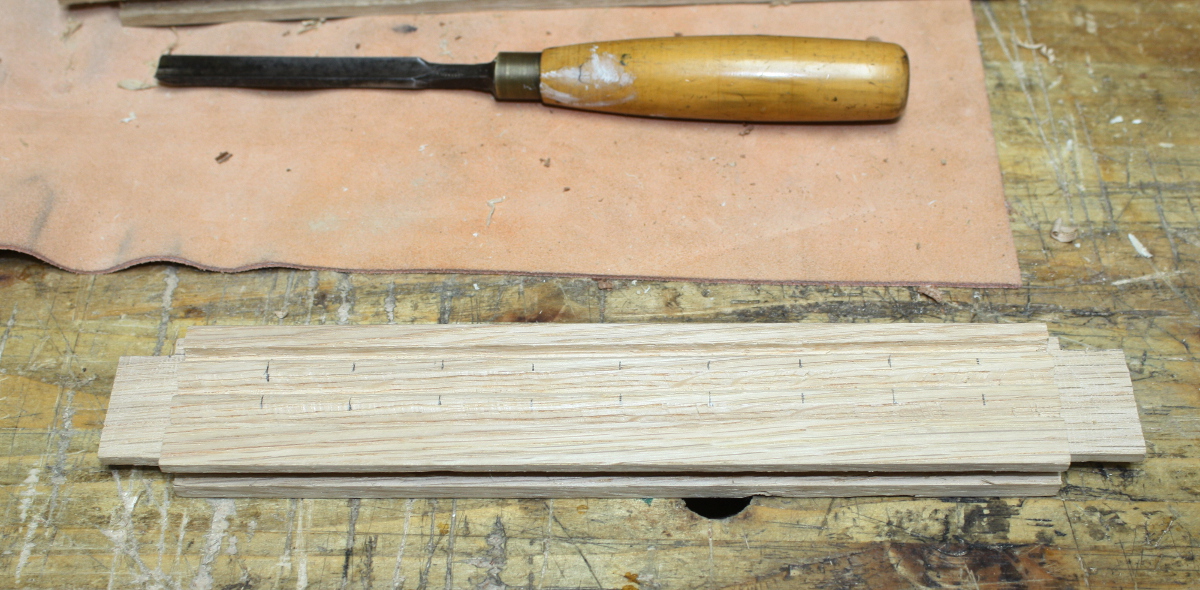
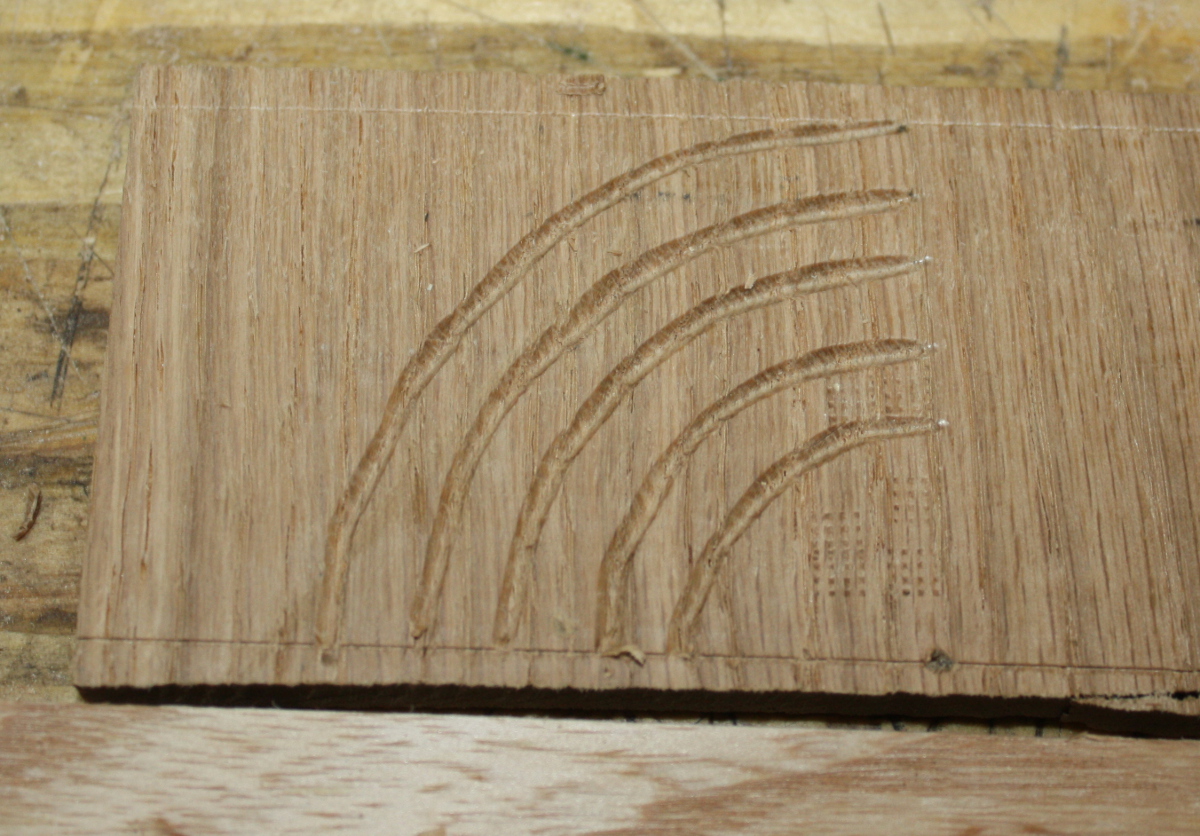
Then chop down vertically with the gouge (whose profile matches the reed pretty closely) on each spot on one reed.

Then flip the piece and chop down at each spot on the other reed, only offset a little (judge this by eye) so it looks like a kindof backwards ‘S’

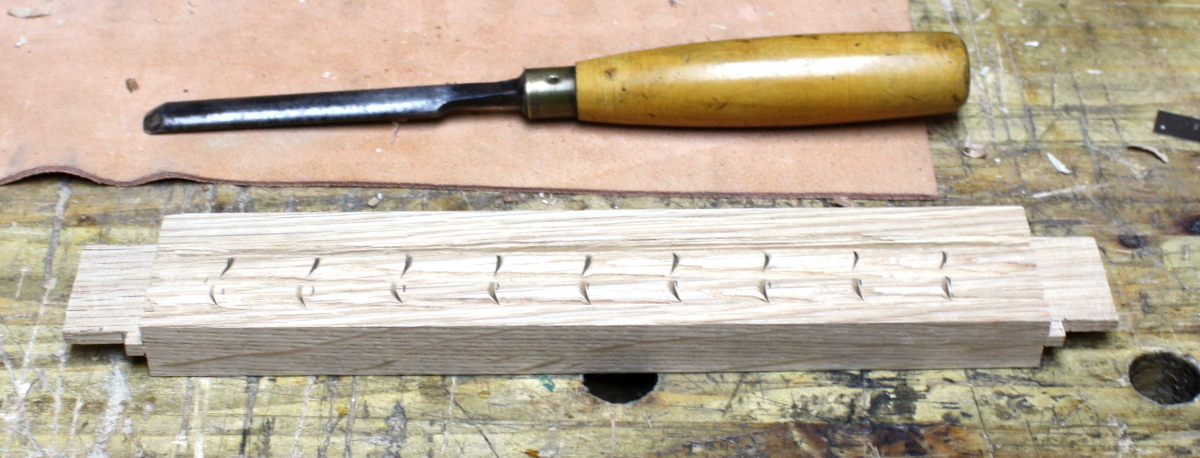
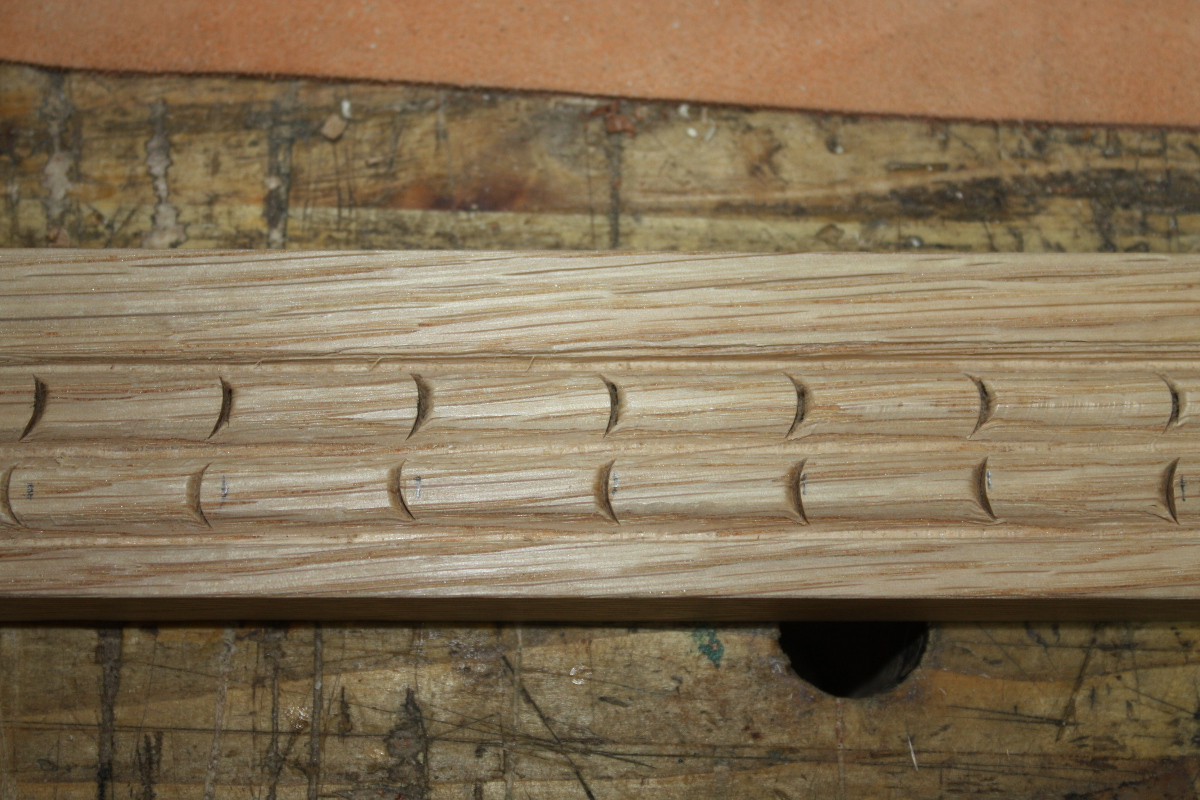
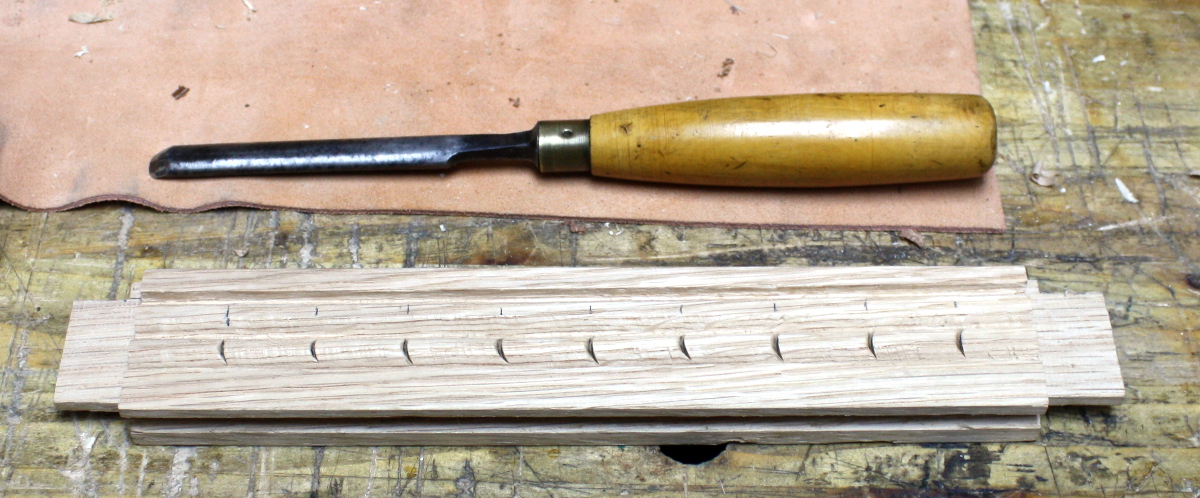
Now use the gouge to cut down from just behind one gouge chop into the stop-cut created by the next gouge chop over. You’ll be gouging in different directions on the two reeds so it finally looks like this:

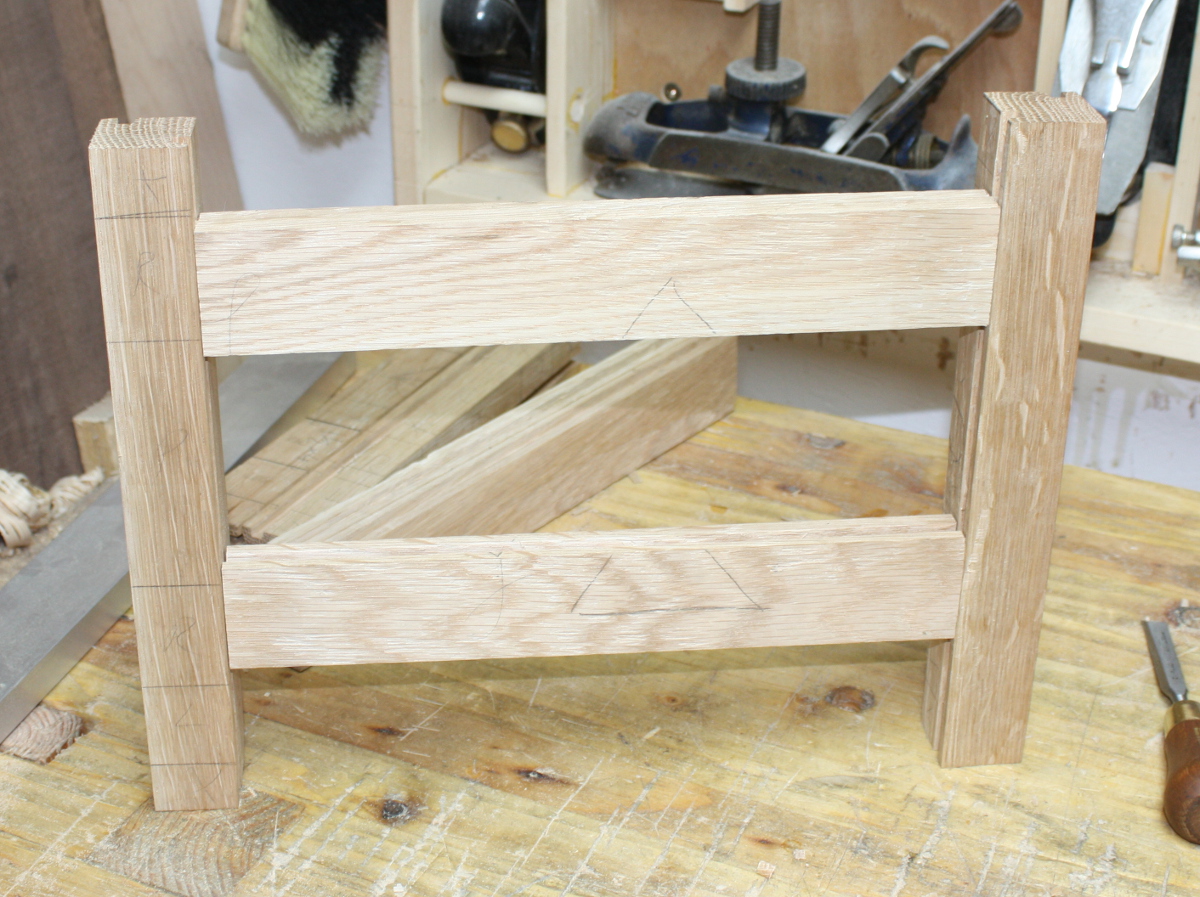
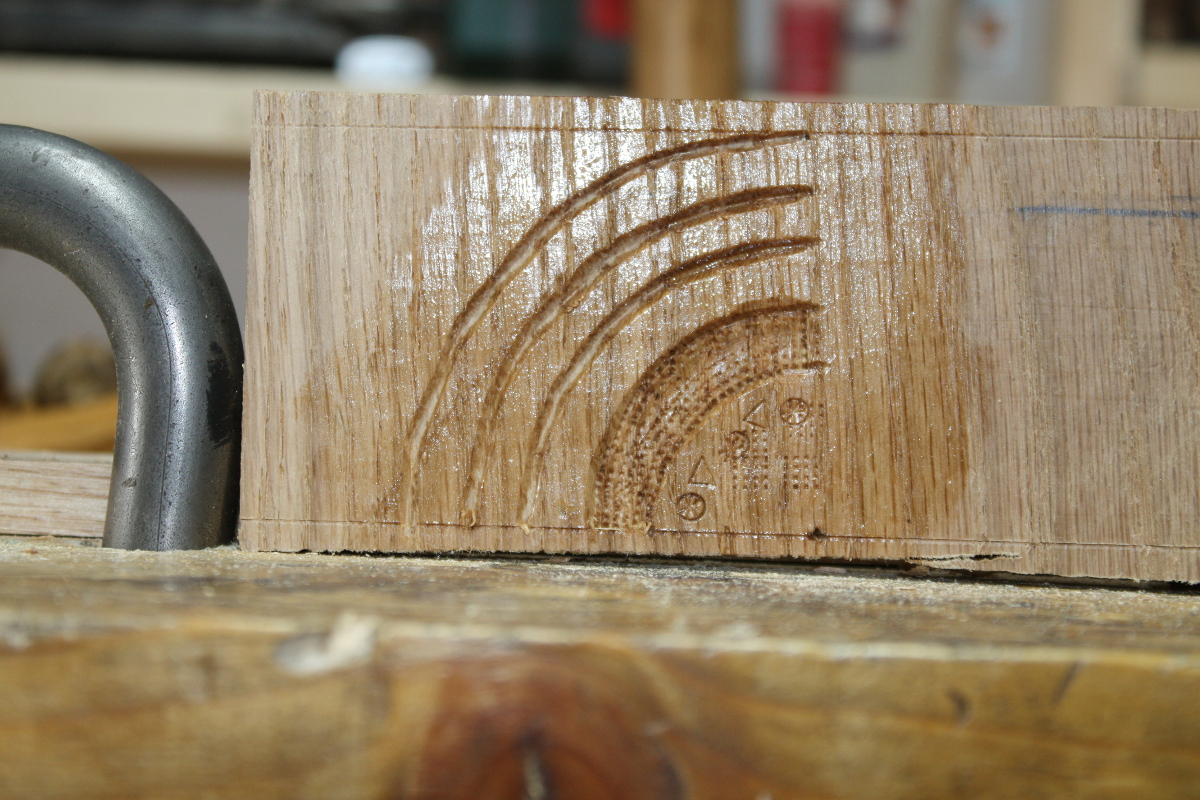
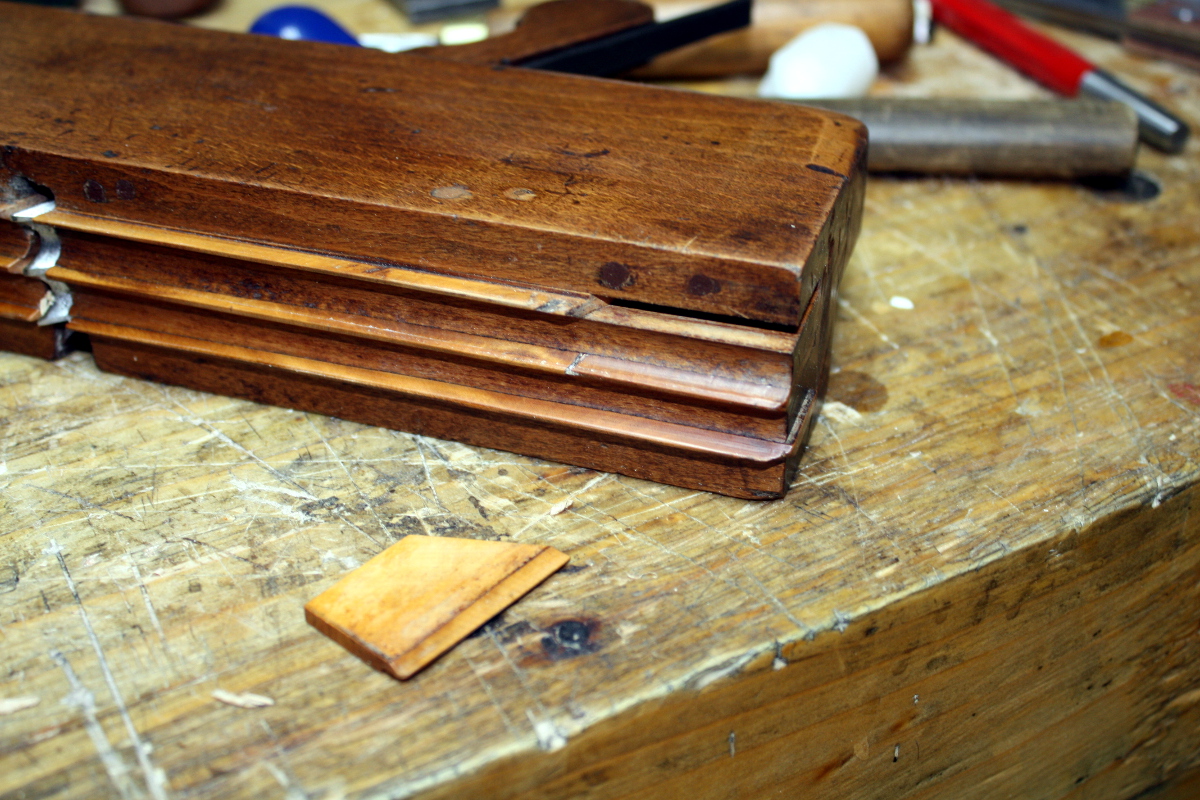
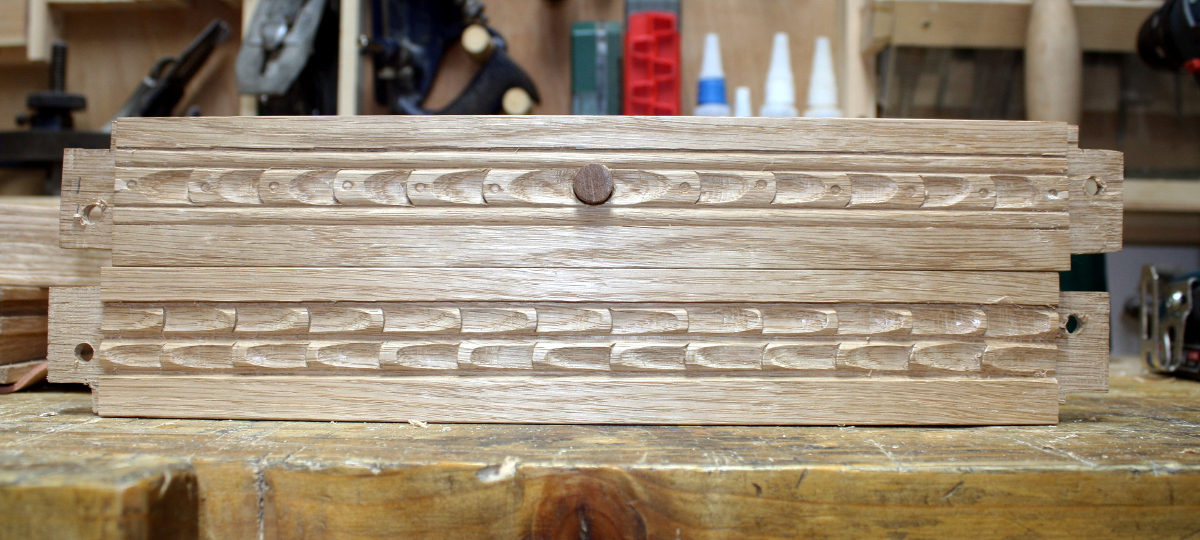
The top rail is something similar but with only one row of those motifs, surrounded by the two scratch stock reeds from yesterday. And I threw in a punch into the motif just to be different.


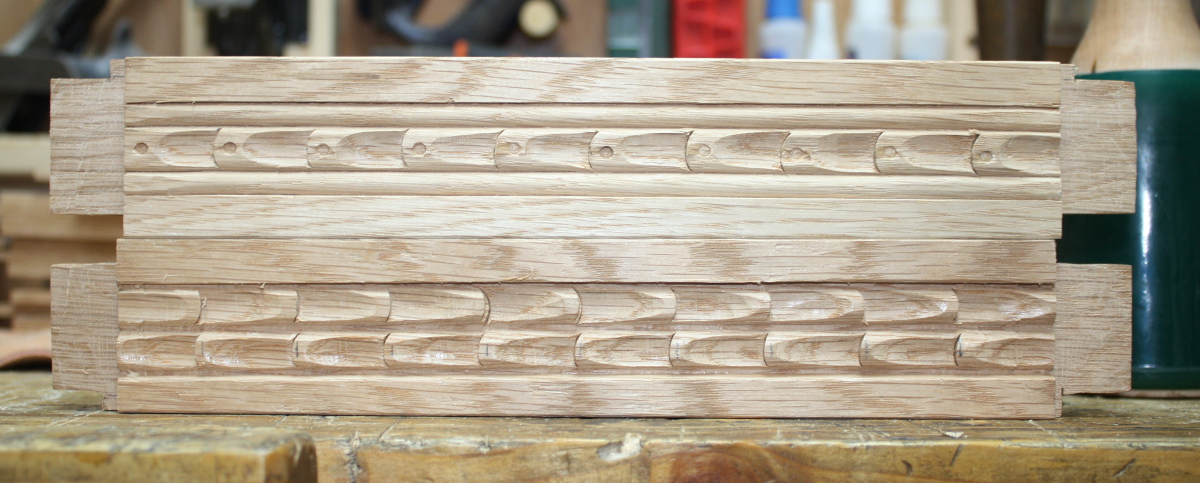
The thing about that design on the top going only one way is that you can keep track of which rail is which and have the motifs flow from a single point on the front to a single point on the back. So on the back I just cut away the foreground and stipple the background with a punch:

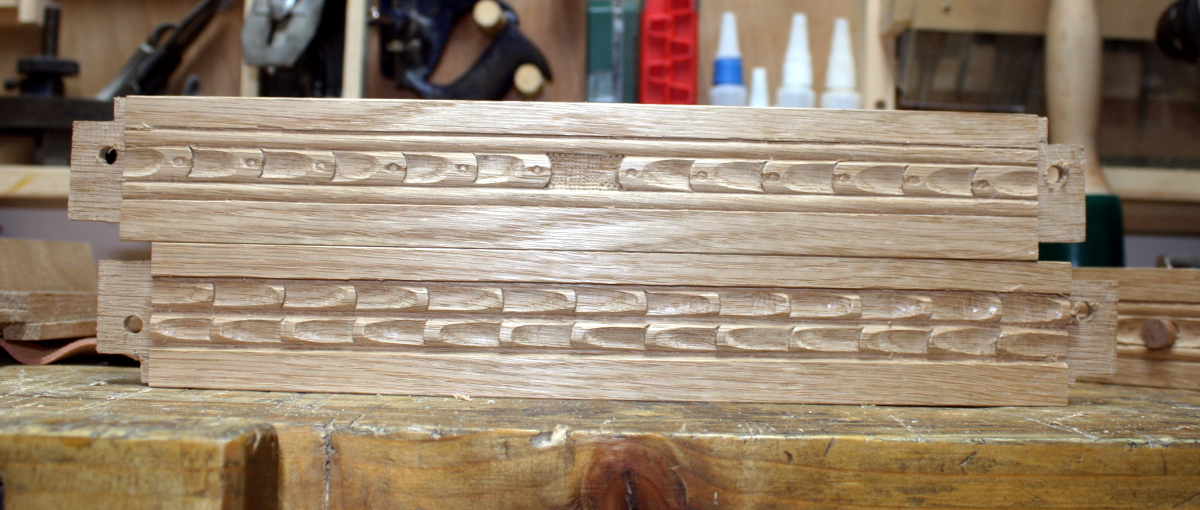
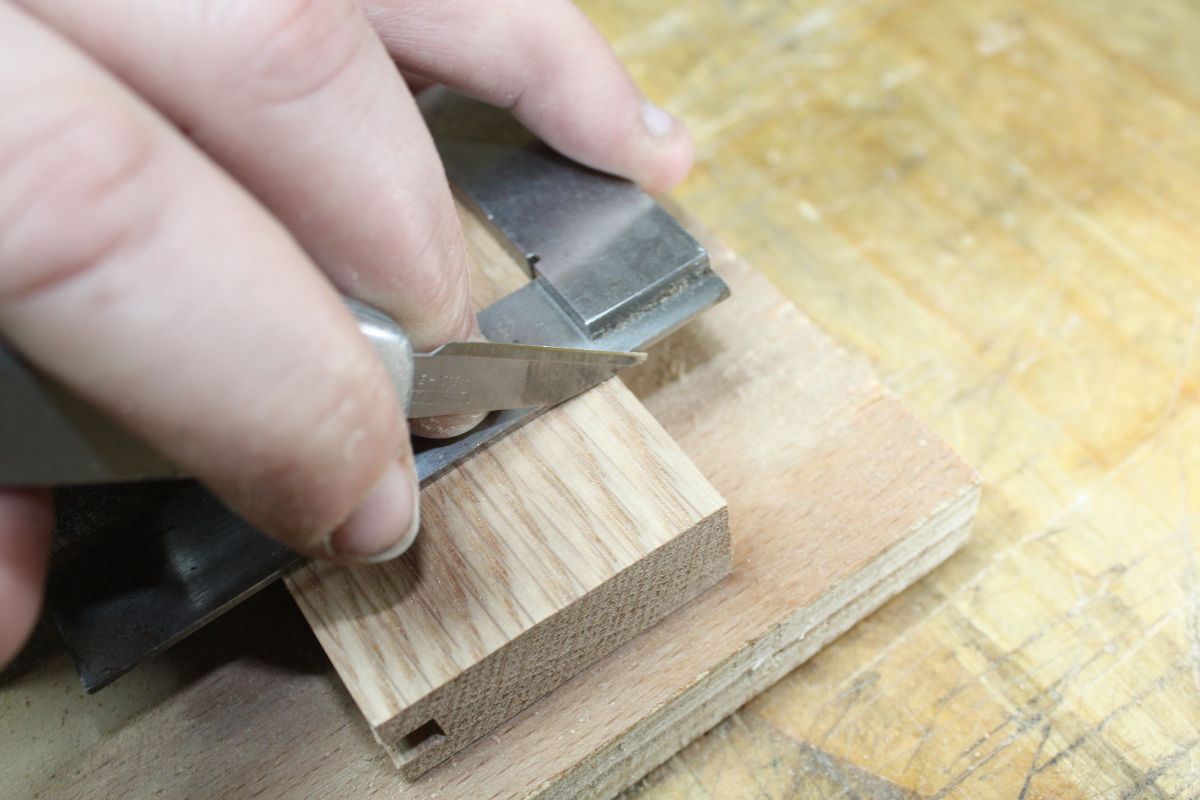
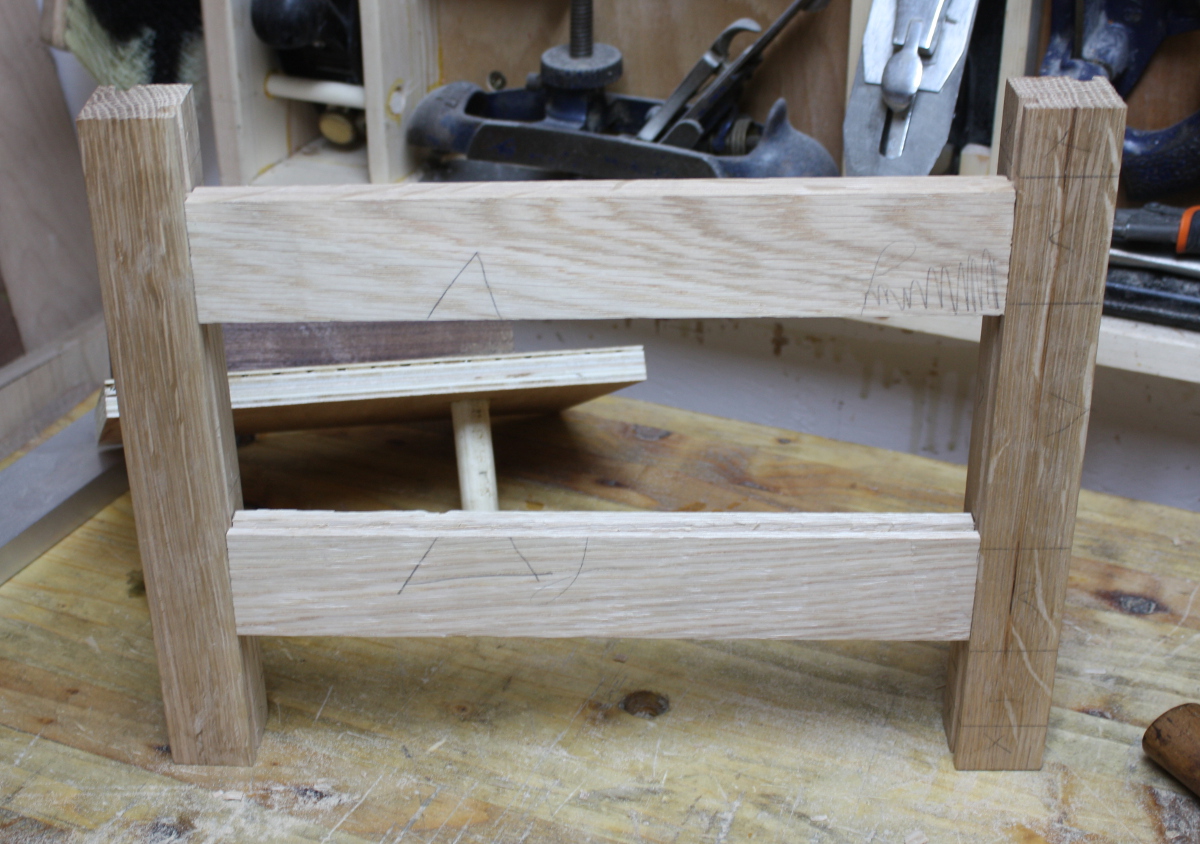
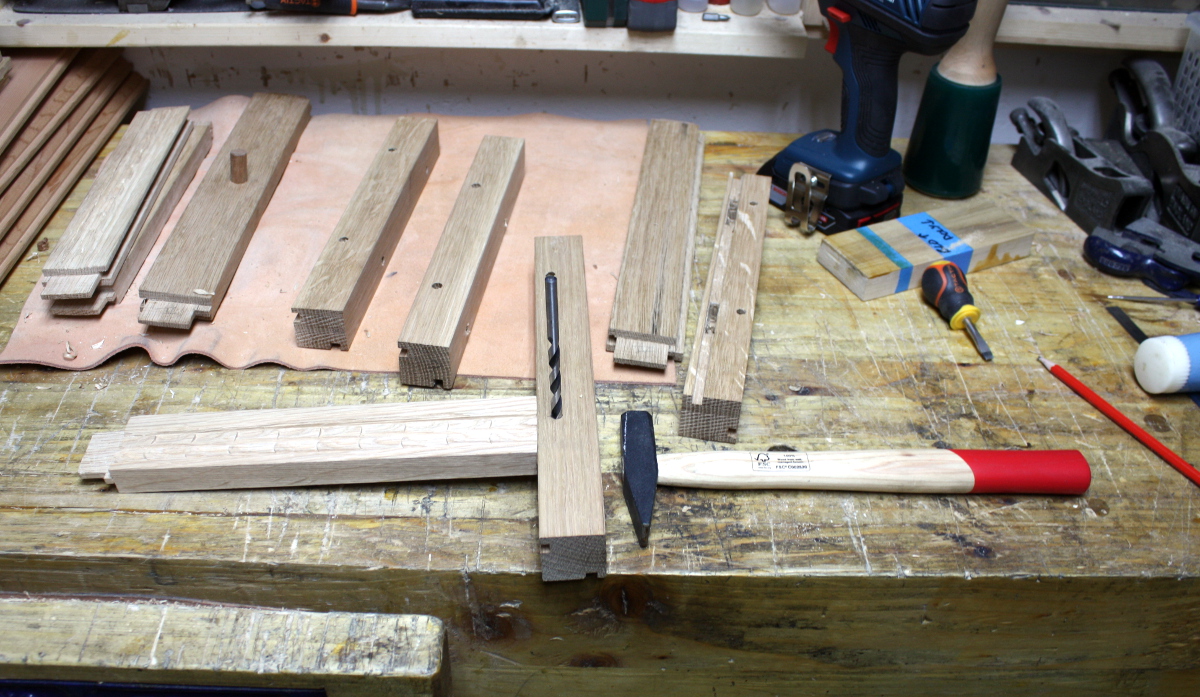
And on the front I had planned to have a small decorative element:

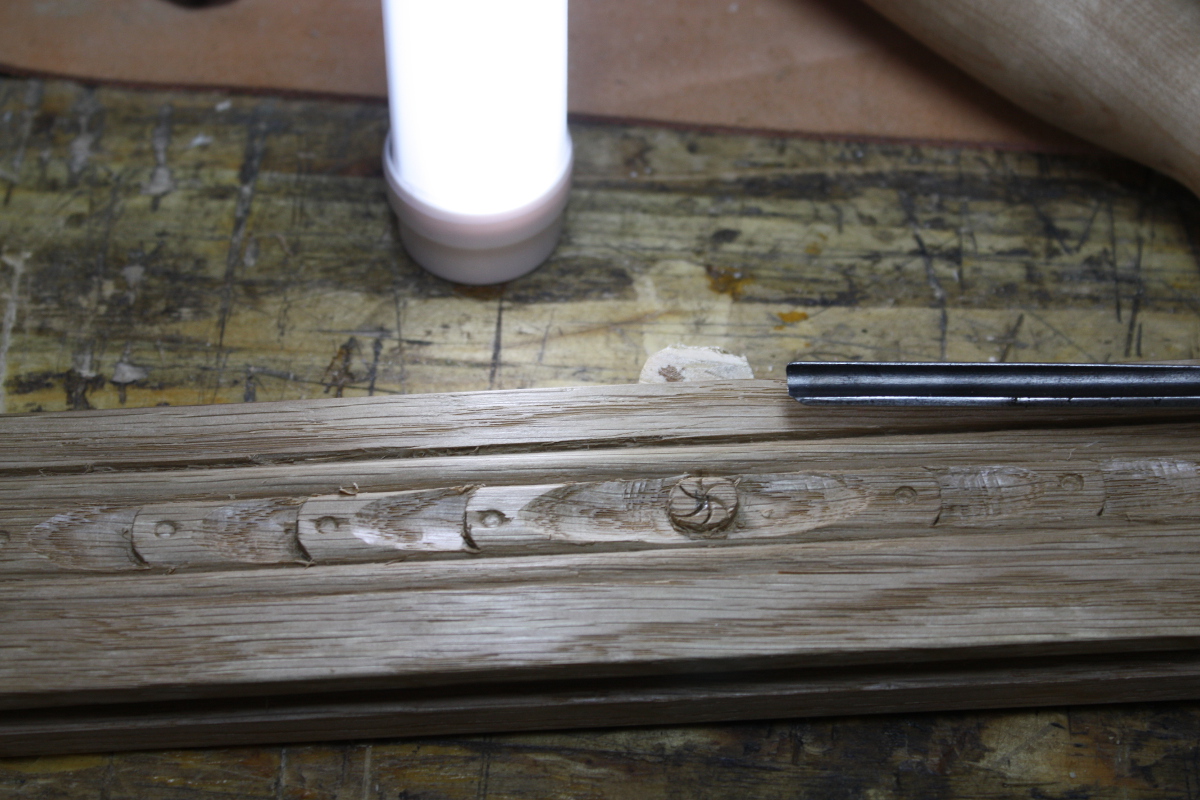
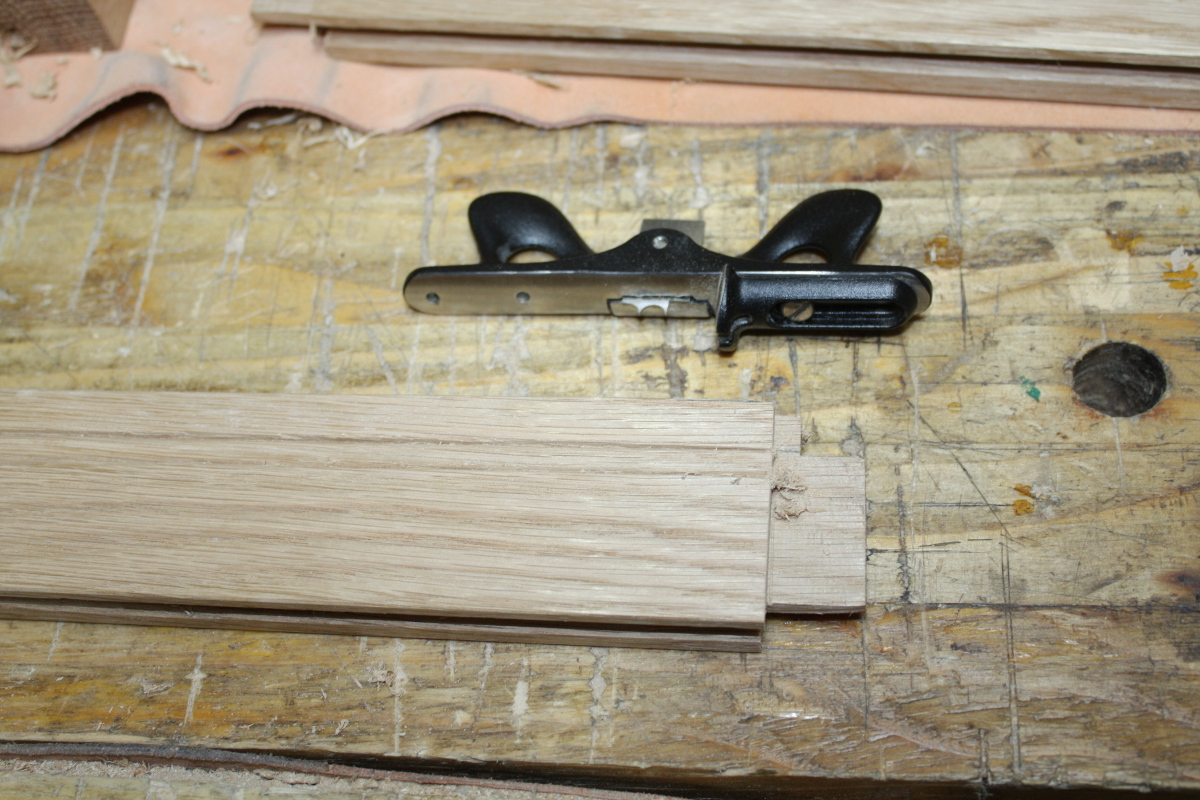
But it proved too small and fiddly and it lost all its crispness almost immediately so I scratched that idea, and drilled out the spot the central element was in:

And then made another peg from a short piece of sapele:

And glued that in place:

I’ll trim the peg down tomorrow, and I’ll have a blue-collar inlay of sorts on the front:

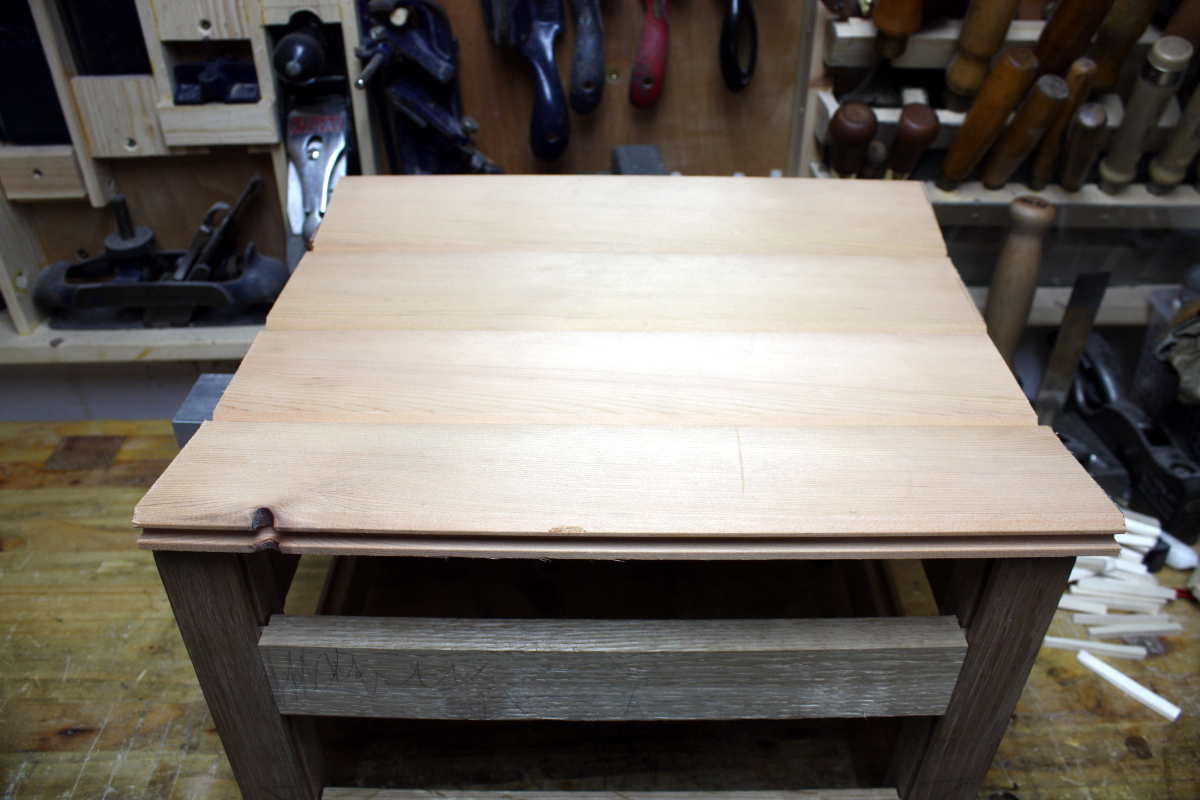
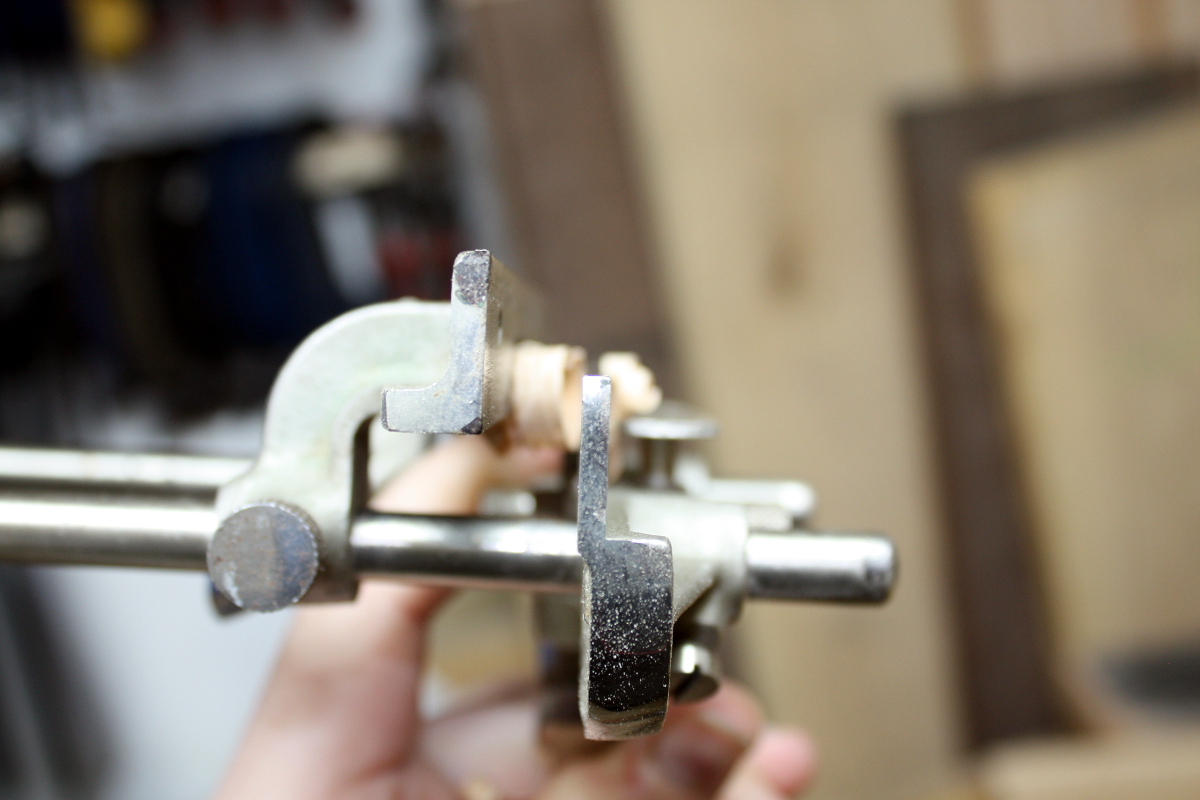
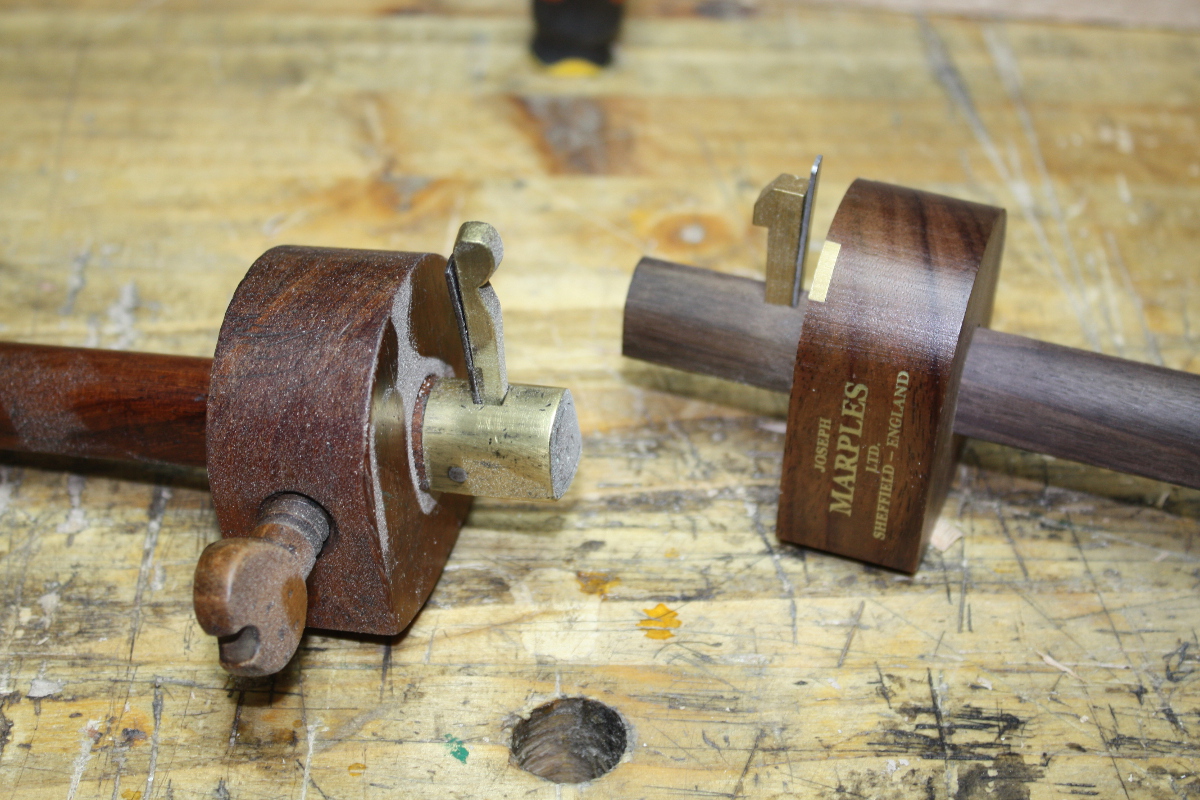
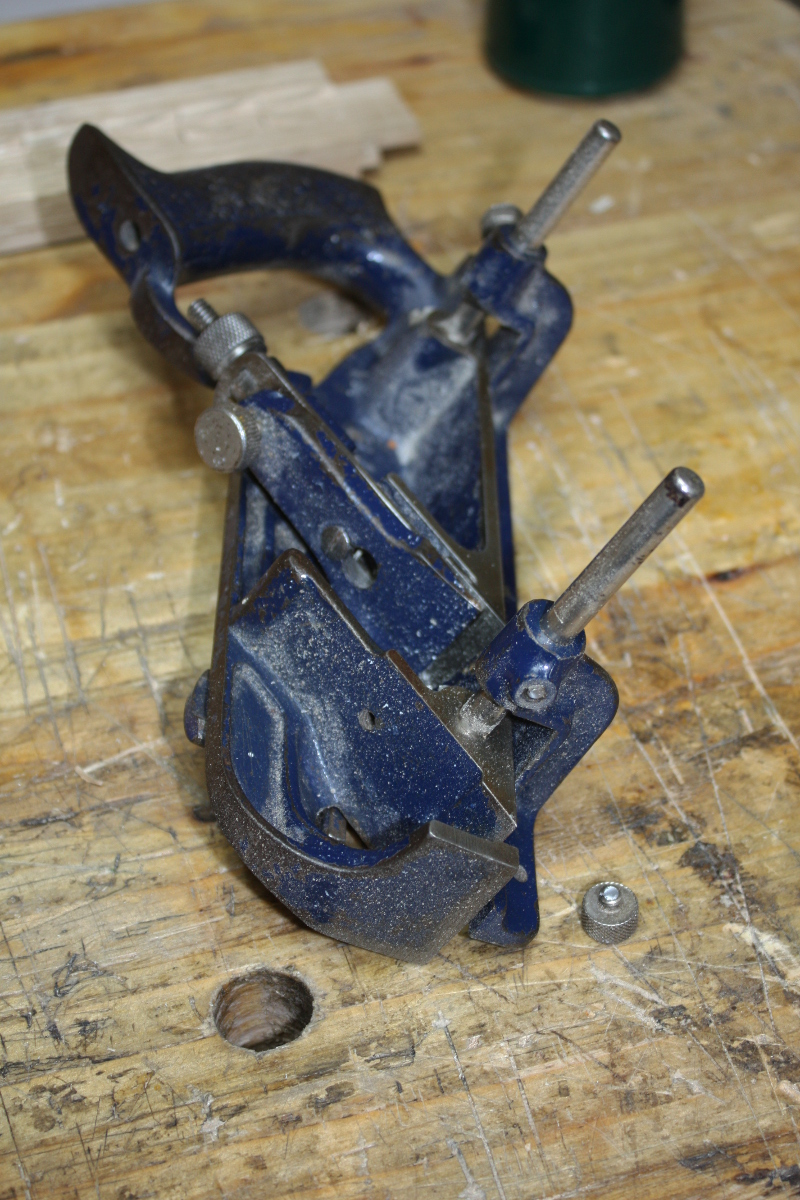
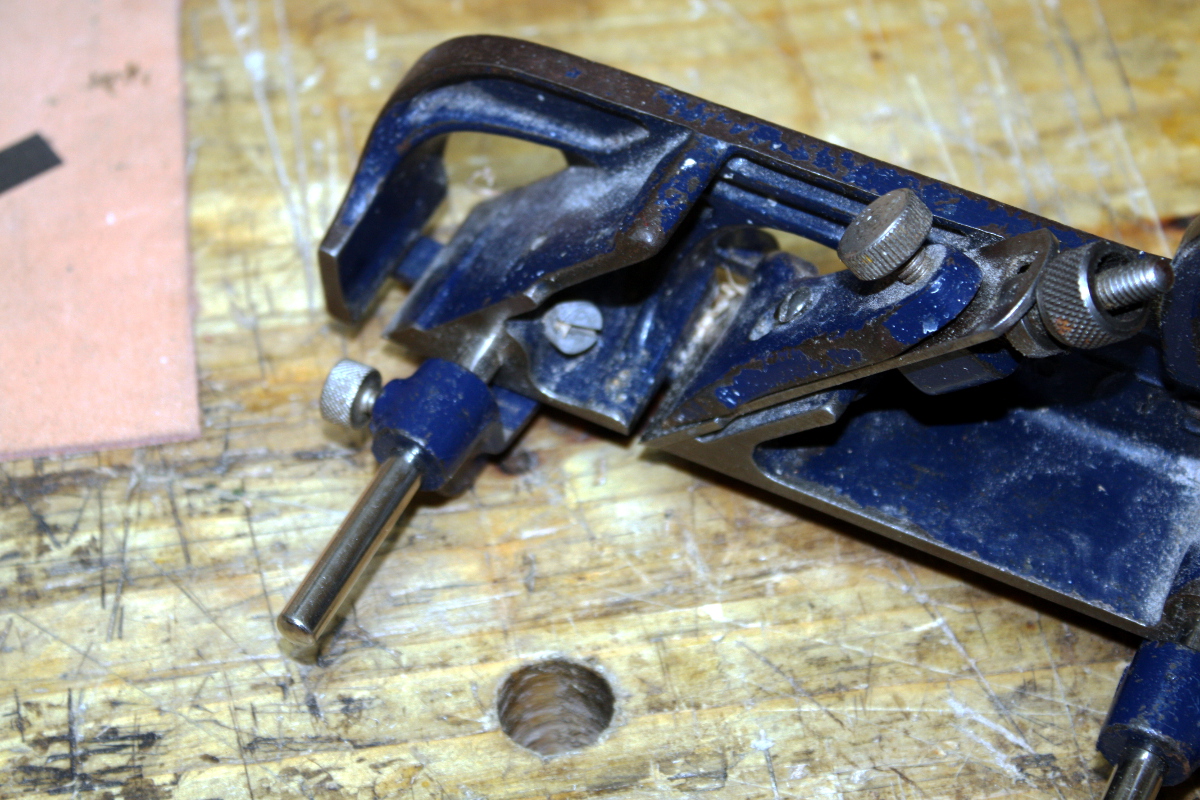
With that done, I went to cut a rebate on the front and back bottom rails to hide the floorboards from being immediately obvious. Only a quarter inch deep, so they won’t be totally hidden, but I can plane down the edges so they don’t stick out like a sore thumb. And then as I was tightening the thumbscrew on the #778’s fence…

Well. Shite.

A moment of panic and wondering if I could use it without the fence and then I remembered that when I bought the #778, I accidentally bought a second fence and I’d never gotten rid of it…

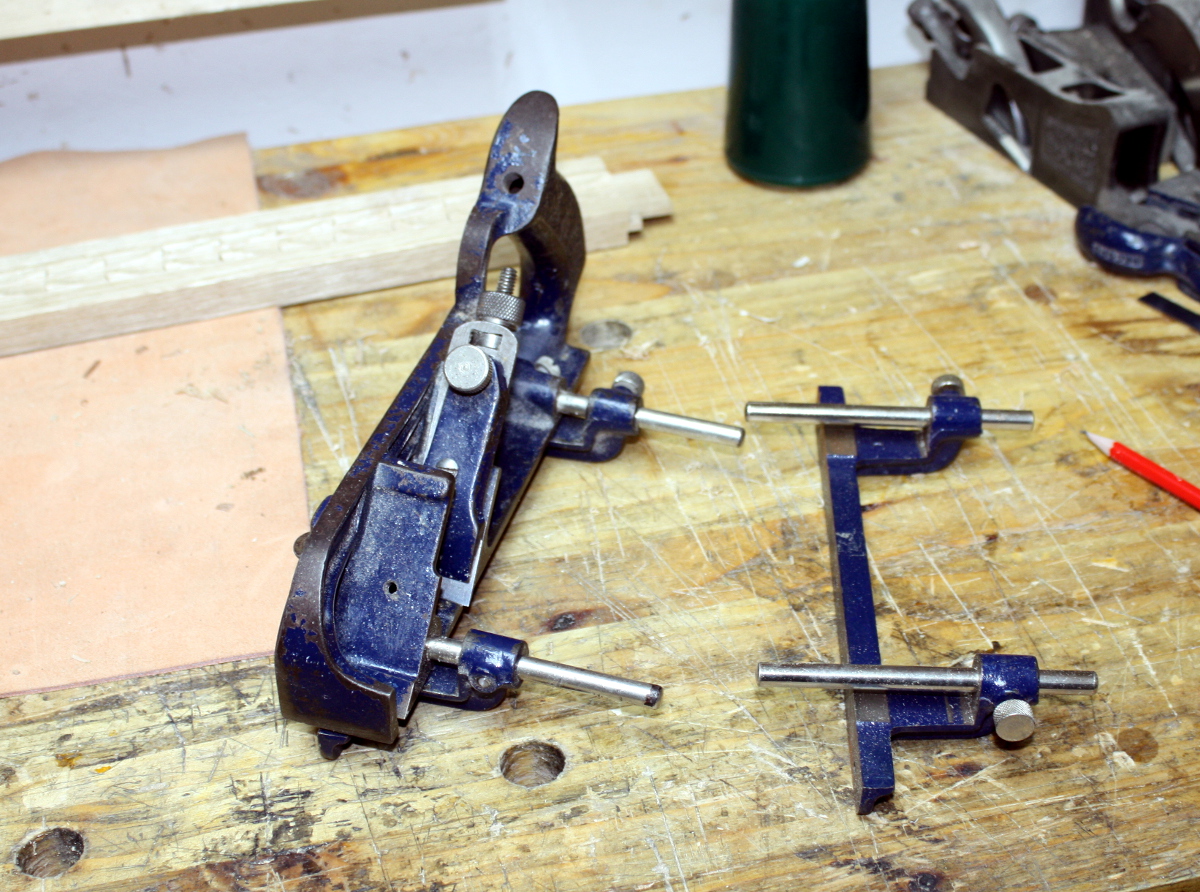
Sometimes hoarding pays off. A quick swap and I got back to the rebate.

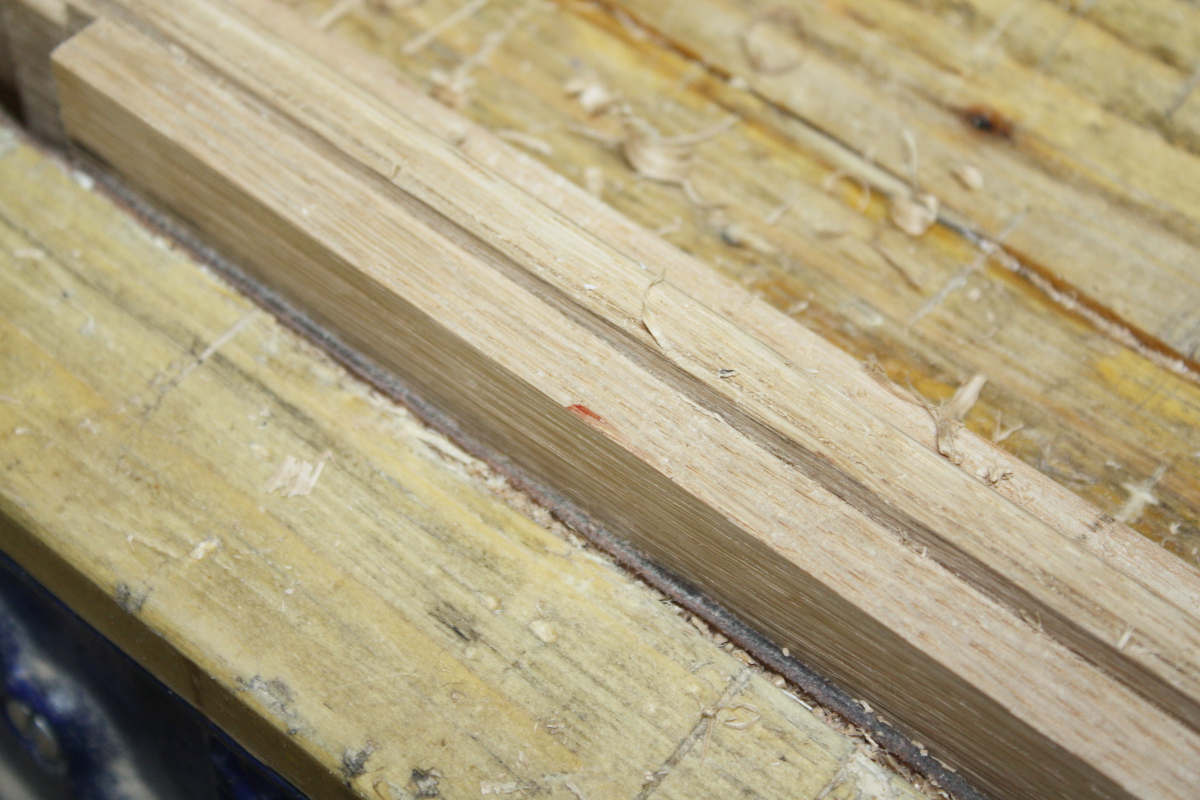
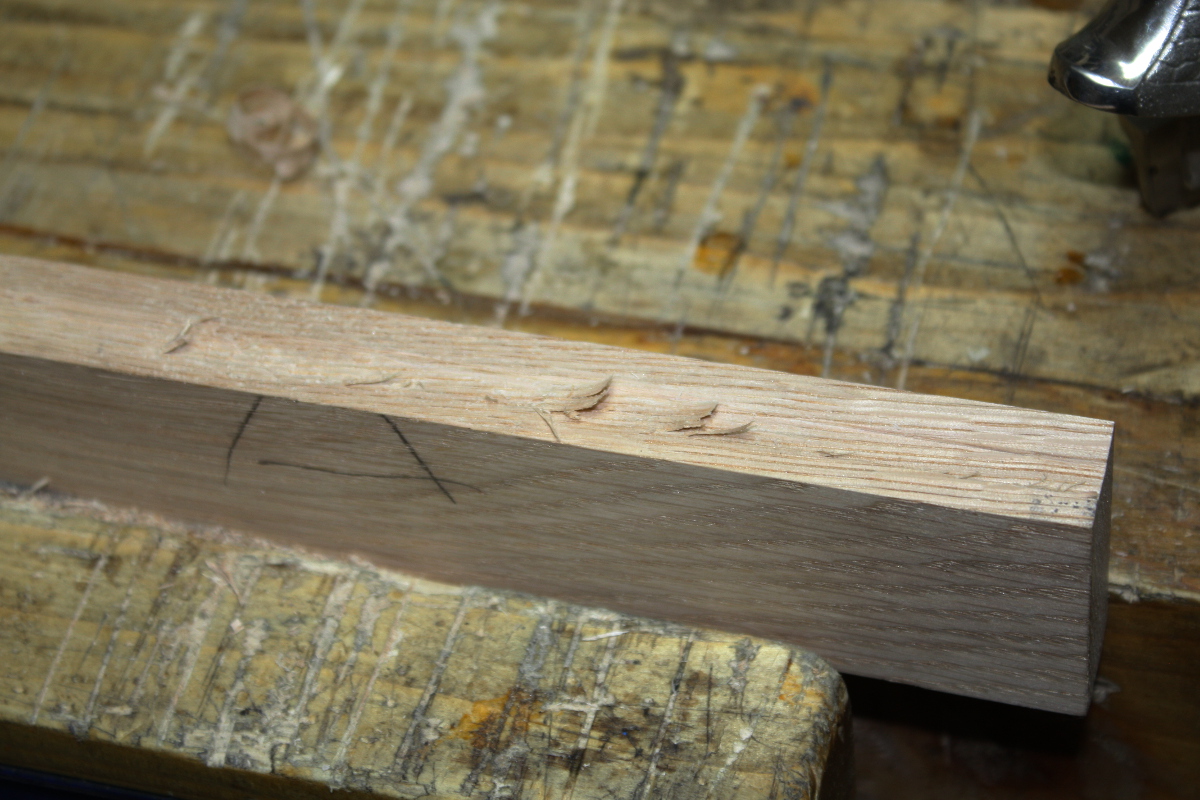
Well, feck. It’s that time again, where am I leaking from now?

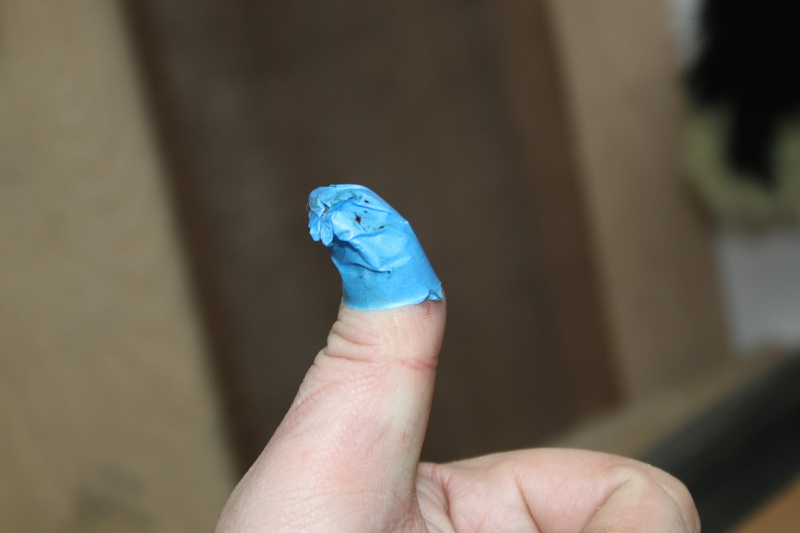
Ah, there we go. I blame the 778 and all its sharp bits:

I mean, you start reaching in there to pull out the shavings that are clogging the mouth and….

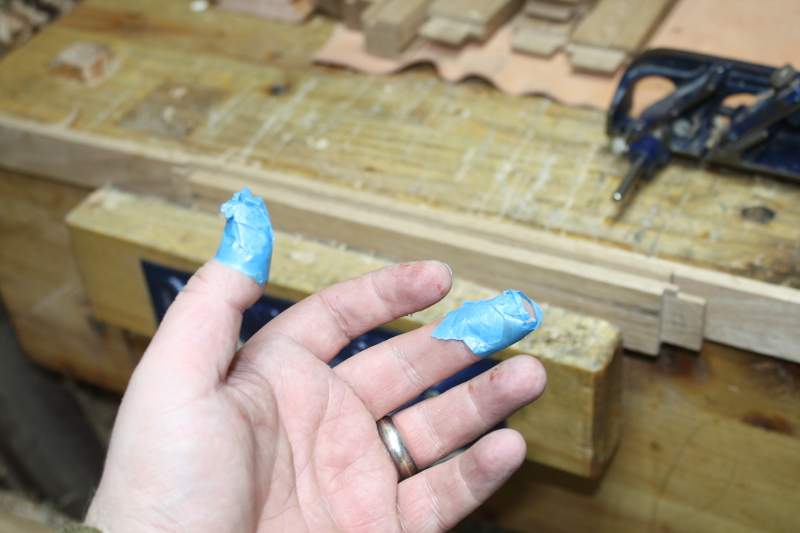
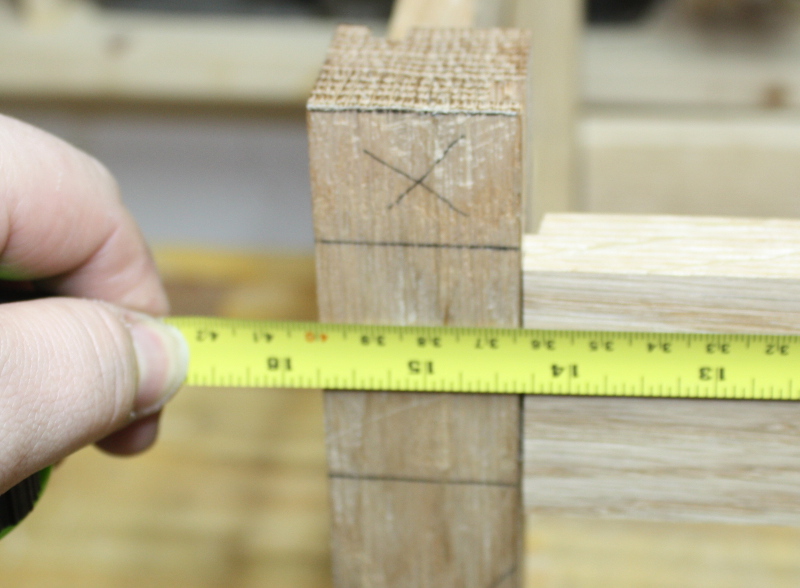
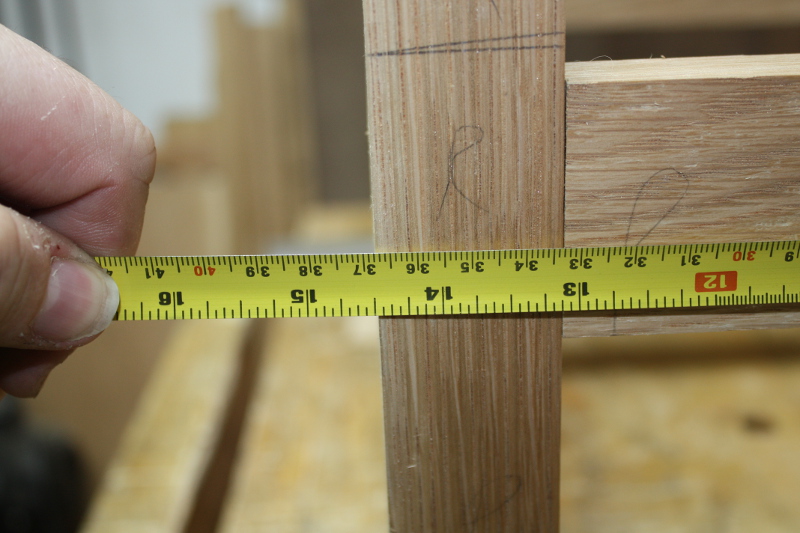
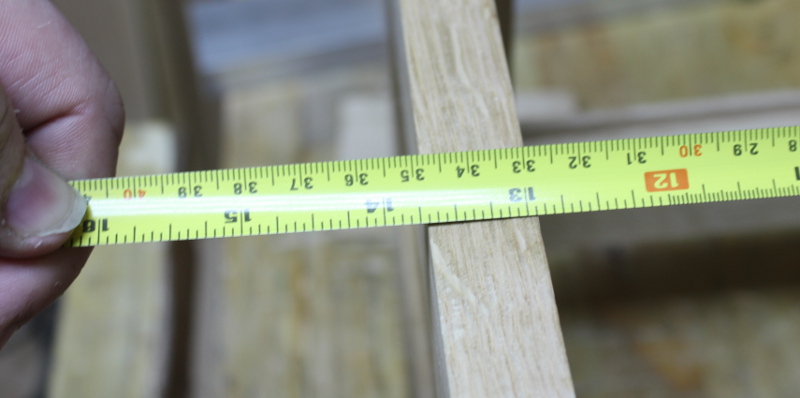
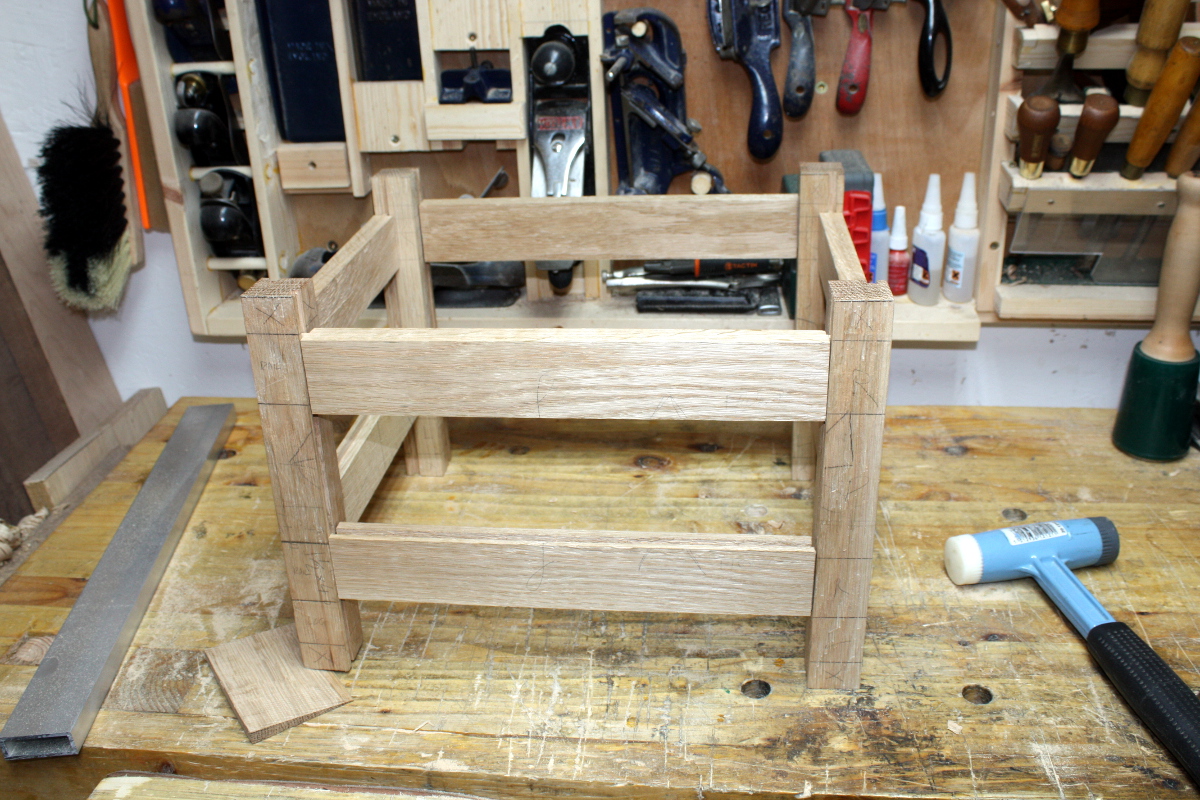
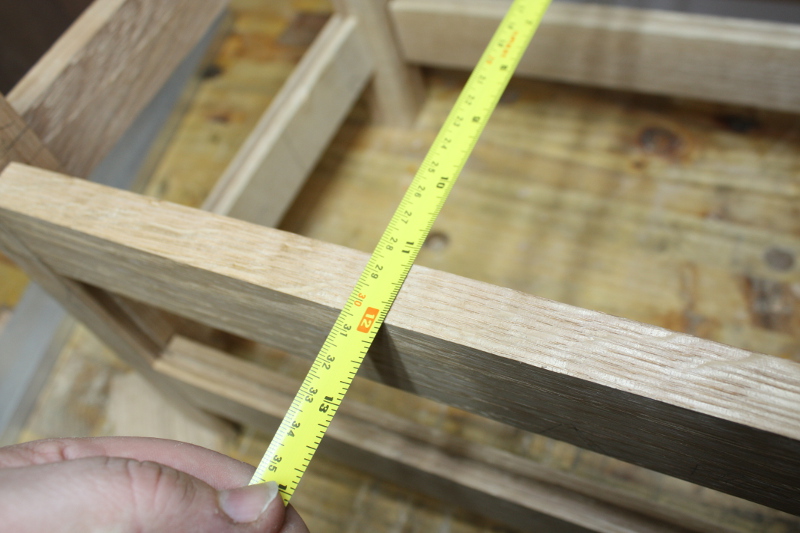
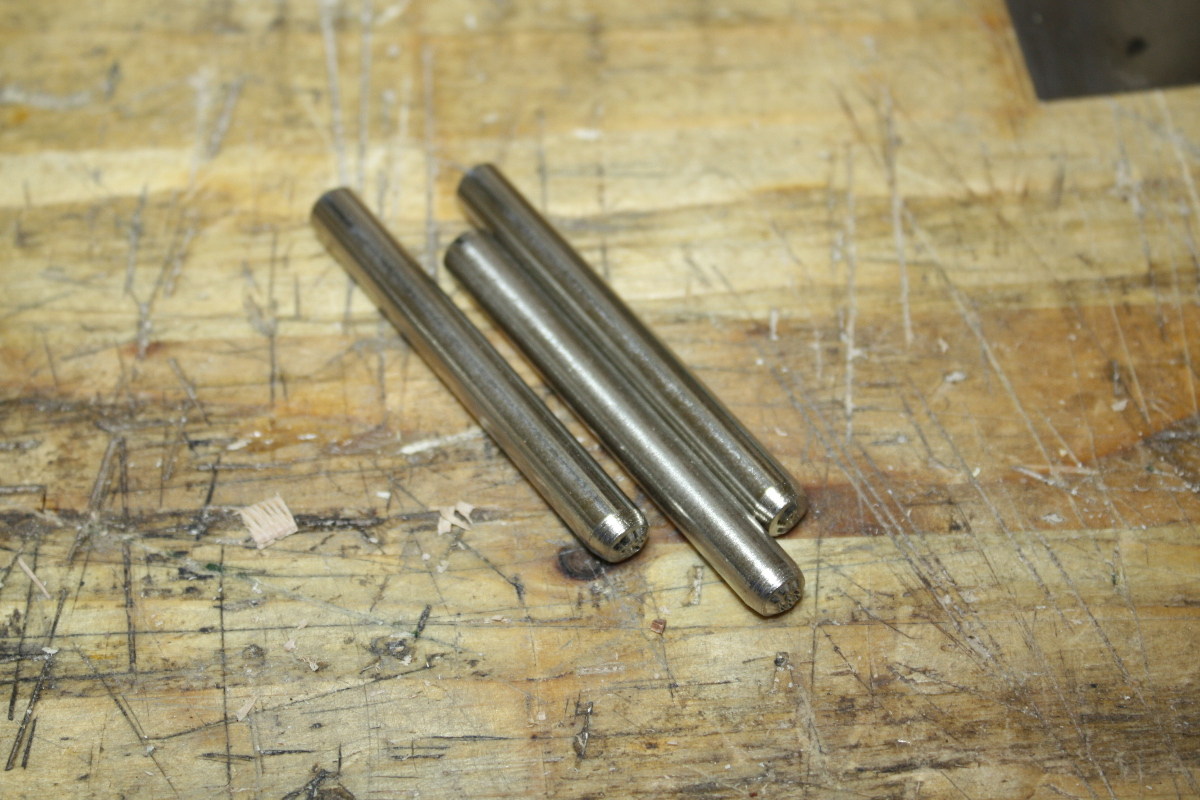
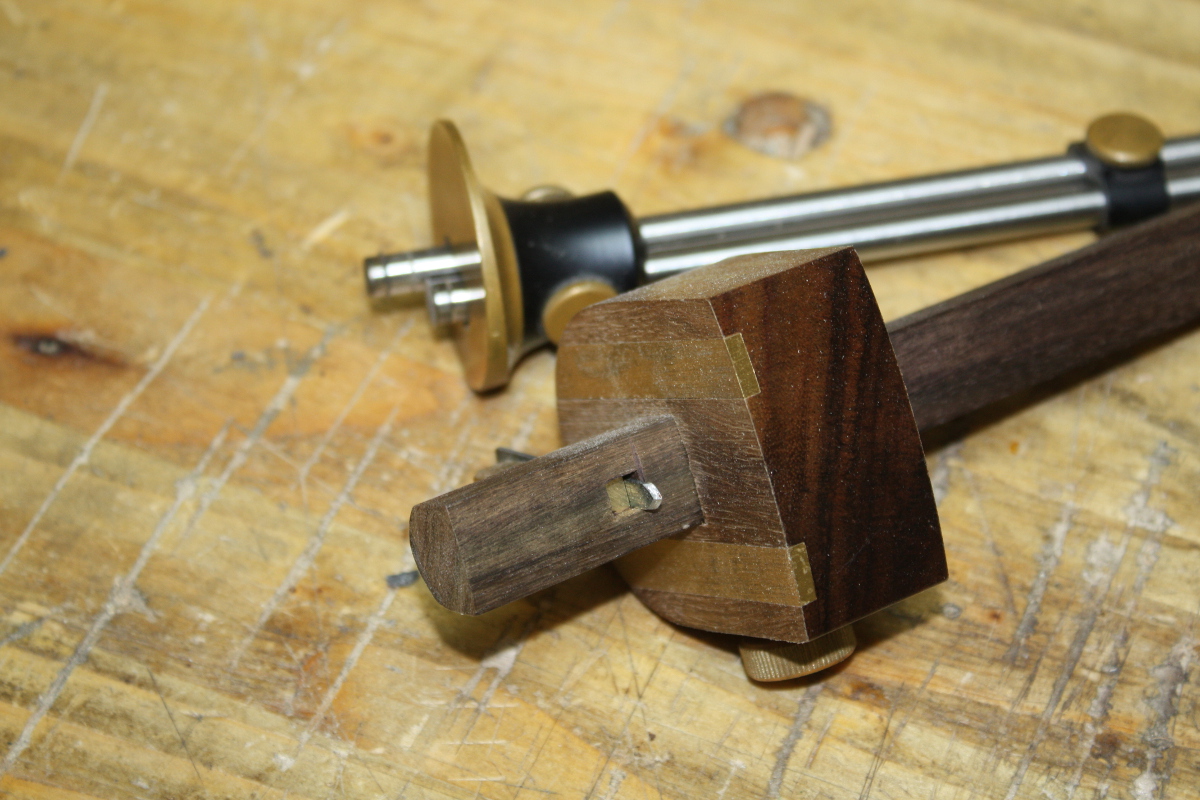
Feck. This is getting silly now. But I got the rebates cut, so on to the drawboring. I’m doing this with the new hand drill, mainly to see how it behaves (answer: like a power drill. Only much more solidly built than my last one).

Everything got done in batches; drill the holes in the mortices, then go through every tenon, seat it, tap the drill bit in to mark the tenon, then bradawl a point a sixteenth (or a millimeter – the distance seems to be the smallest whole unit the person talking about drawboring grew up knowing about) closer to the shoulder, then drill that hole out in the tenon; and repeat.

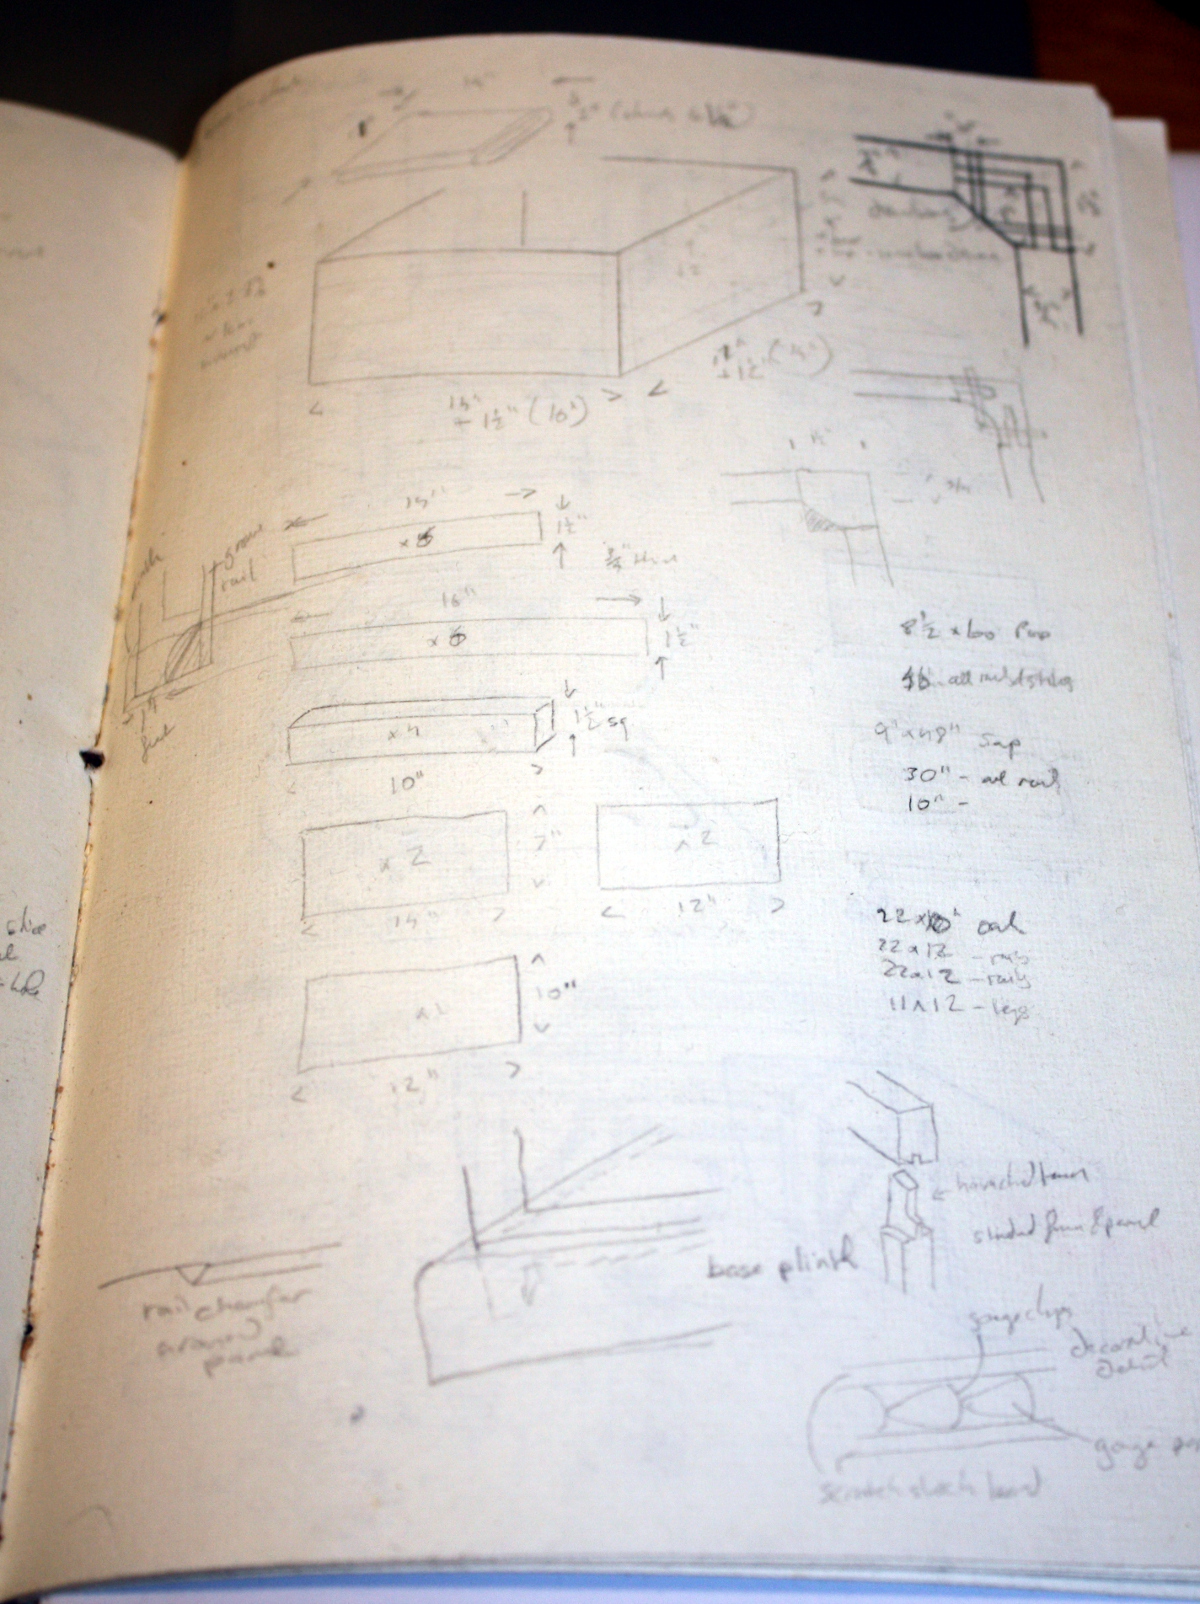
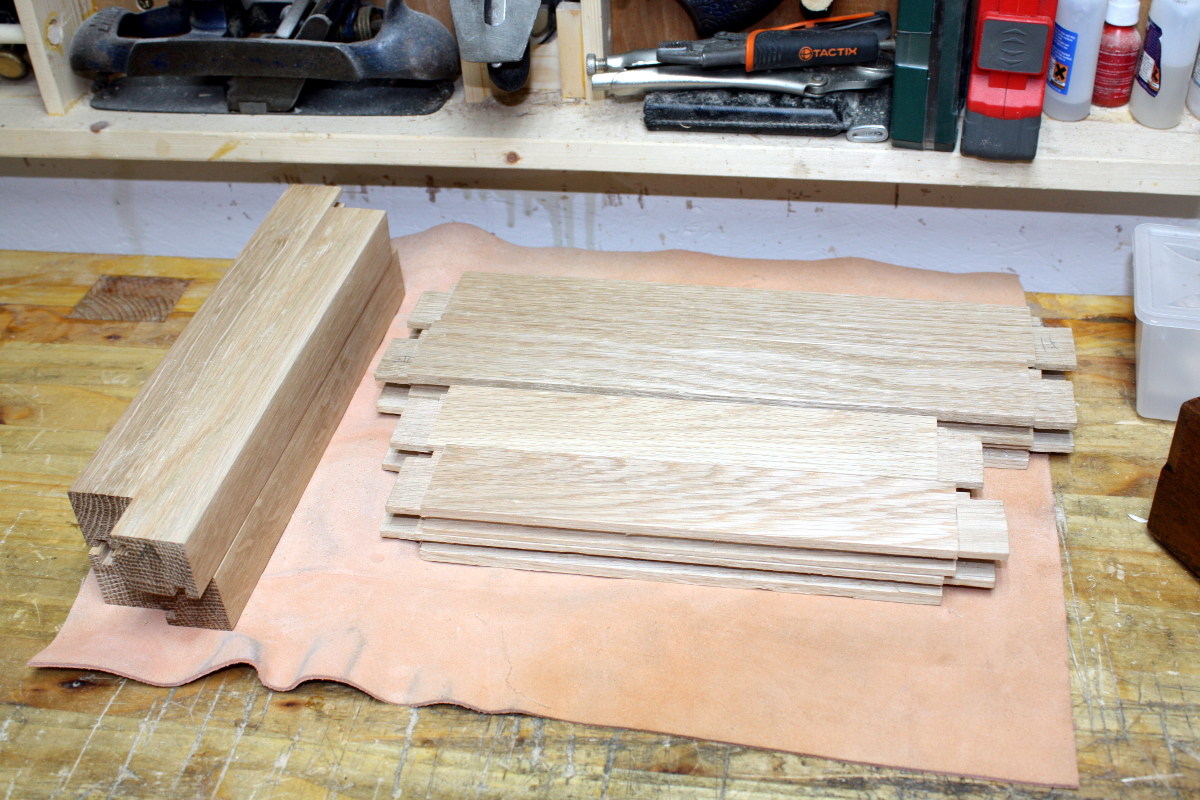
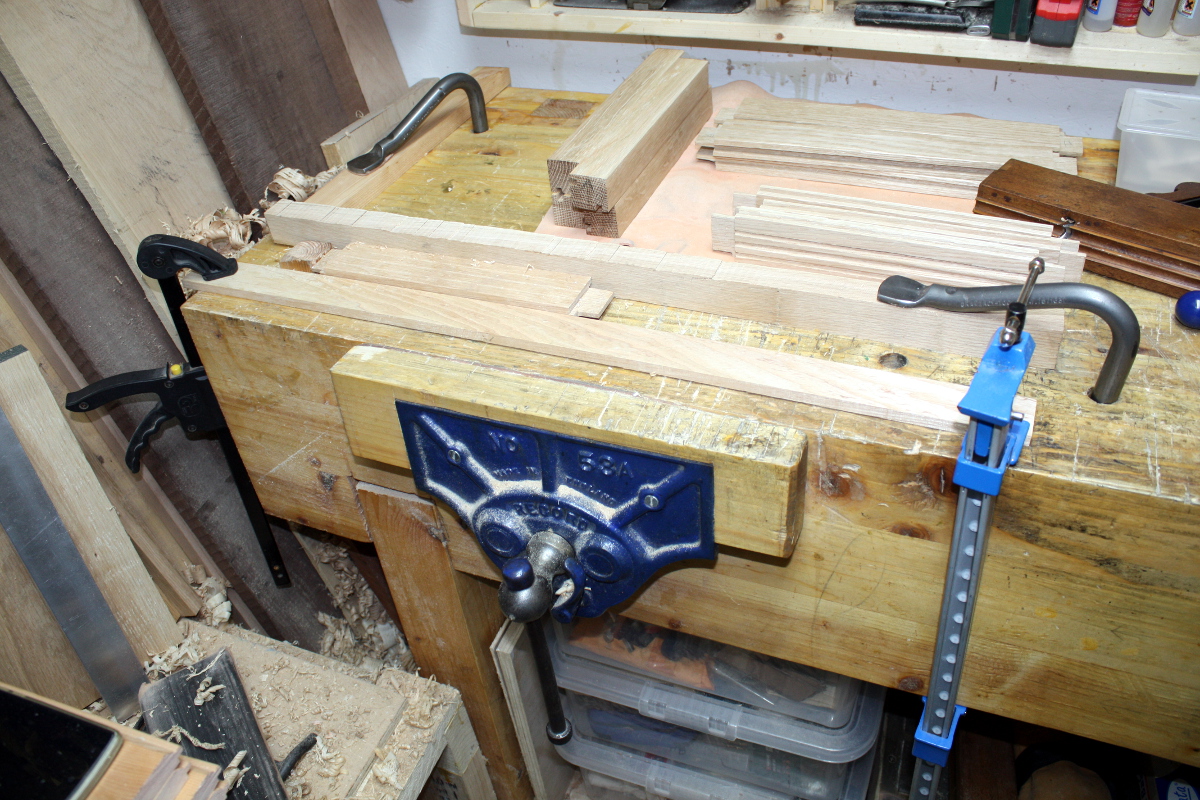
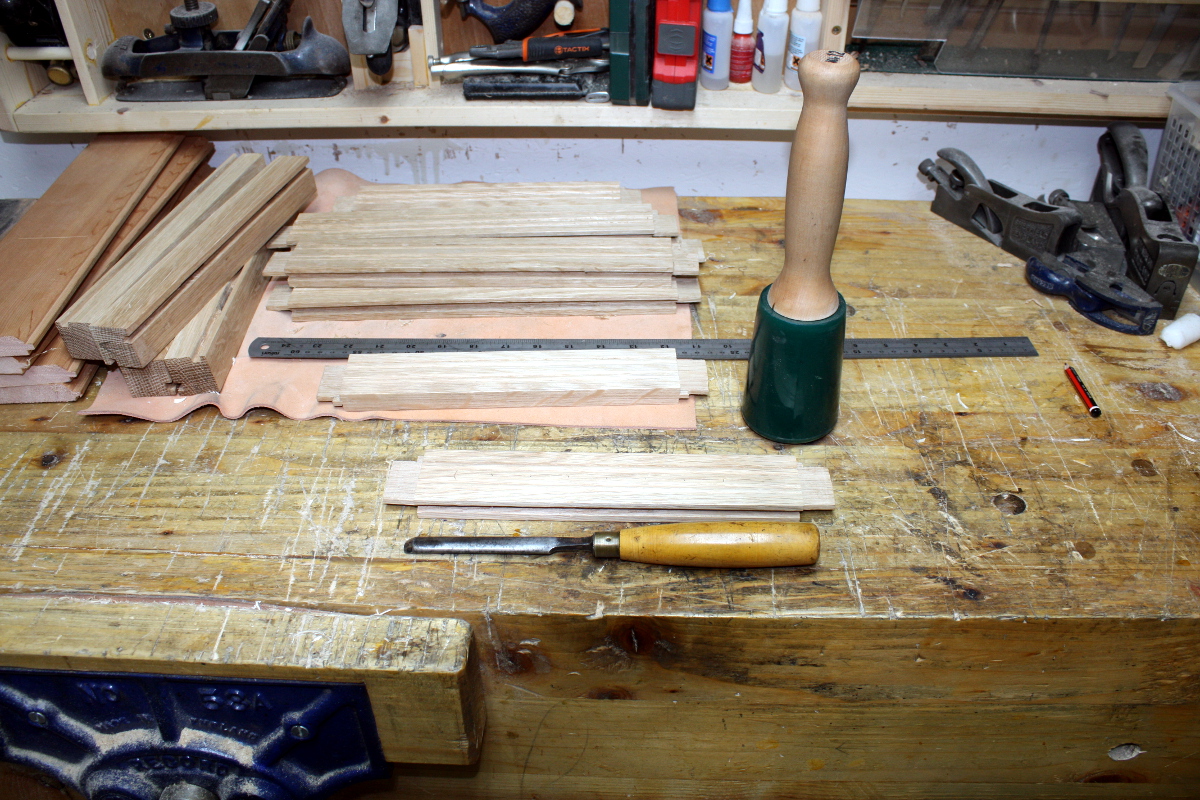
Last job of the evening was to roughly crosscut the panels oversize, and plane them smooth on both sides. I’ll finish plane them when I have the final dimensions. I won’t be carving them because of time.

Tomorrow I’ll start assembly; when the carcass is together I can cut and install the floorboards and start working on the lid…

TDL:

  • Rip out lid frame parts
  • Groove lid frame parts
  • Cut lid frame M&T joints and drill for drawboring
  • Measure out lid panel size
  • Groove lid panel
  • Shape lid panel
  • Cut box tenons and drill M&T joints for drawboring
  • Groove bottom box rails for floorboards
  • Crosscut floorboards to width
  • Plane panels
  • Cut panels to final size
  • Bevel or rebate panel edges to fit grooves in rails
  • Plane away inside corner on stiles
  • Cut edge floorboards to fit around stiles
  • Possibly build face frame for the top of the chest
  • Assembly
  • Hinges
  • Finishing

21
Jan 18

Too many inches

Quite a bit of time in the shed today, so made some progress (there being a nearby deadline, this is a good thing). Started by cutting a side rail’s tenons, then marking off the other side rails from it (same as for the long rails).

I wanted to keep using the offset shoulder idea, but rather than gauging it by eye, which I can’t do yet, or sawing on one or the other side of the line, which I also have trouble doing, I decided to just mark out the shoulders and cut to the line. So I marked off the show face shoulder, ran the line round with the square to the back side, and then marked out 5mm or so of the line on the back side, then put a ruler on the line and butted the square up against that.

Problem is my ruler’s too thin. And it’s fiddly. And then I had an idea – I’m already holding a thin bit of metal, why not use it?

Put the knife upside down, butt the edge up to the line at that point on the back where the back of the knife starts sloping down to the point so I had a consistent thickness (the whole blade narrows down to the bevel slightly like a saw plate), butt the square up against the other side of the knife, then flip the knife over and cut the back shoulder line.

Works quite well. And that’s about as much of an offset as you need really, at least for something of this scale.

By the way, one of these makes it a lot easier to see the lines. It’s a little rechargeable camping light off ebay. Big Clive did a video on them and the internals were quite solid so I bought one.

It cranks up to quite a high brightness and if you just put it on the bench near the work you get a nice horizontal light thrown across the piece so cut lines stand out clearly. Plus, has a nice magnet in the base so I can just put it on a plane on the wall and it acts as a quick light on those short runs to the shed to grab something when I don’t want to plug in the whole shed but need light. Or it can grab onto the bandsaw frame and act as a work light when I’m using that.

Not bad for €6.40 delivered. Big Clive had a link to a generic ebay search if you want to grab one.

Anyway, got the side rails done.

That offset shoulder method is even faster when you don’t have to faff about cutting to one side of a line when you don’t have the skill for that 😀 And all the joints bar one fitted off the saw, which I was happy with.

What I was not happy with was the overall look of the piece when I put all the rails into the stiles to get a look at the final size.

That’s… it’s just not right. It’s square. I don’t understand that. First off, it looks clunky. Secondly, the design was not square, it was rectangular because it’s designed to hold something specific which is very rectangular.

Measuring tape time.

Width is fine, a quarter inch under but no biggie.

Depth is about what I estimated (well, a half-inch over). Still not seeing it. What are the internals?

Internal width is perfect…

And internal depth is… wait, what? 13 inches? That’s supposed to be 11, what the…

Ah. Shite.

If you change your initial sizes in your design, and you’re adding on a margin for the thickness of the material, you need to run the sums again and change the final size too. Feck. Well, at least this is an easy fix (too short would have been a bit more work). I want 11-and-a-quarter inches in internal depth, so if I move the shoulder on the side rails back by one-and-three-quarter inches, that should give me the size I want. So, out with the marking and measuring gear and the saw…

And I recut all of those tenons on the rails (and everything fitted off the saw this time, yay), and reassembled the chest.

I don’t know if the photo gets it across, but it looks a lot more right this time. Weird how your brain reacts to proportions.

That’ll do nicely.

At this point I took some time to practice carving…

Simple practice pattern, just some concentric circle segments to cut out with the v-tool.

It’s a physical skill, so you just need to practice. I’m getting slowly better.

Not sure if I’m at the stage where I’m comfortable carving the panels for this chest or not. I will be for the next one whenever that is, but this one… not sure. Might leave it.

Or not. Really not sure – if the design is simple enough, it might look acceptable…

But enough diversion. Quick side job now, splitting out blanks for drawbore pegs.

I can’t tell you how much better this job is thanks to that hacking knife. Compared to a chisel, it’s faster, more controllable, safer, and just all-round better. I tested one of the peg blanks by hammering it through the dowel plate down to the quarter-inch size, but just one (it’s a noisy job, better suited to earlier in the day even with the sound dampening in the shed so I’ll do it tomorrow).

Meantime, I rough-cut the floorboards to size.

They’re cedar, already tongue-and-grooved which is a nice timesaver. I haven’t decided yet whether I should just rebate them into the base or whether I should groove three rails and nail them to the fourth (which is cut narrower). Need to figure that out tomorrow.

At this point, I got out my #04 and stropped the blade and reset the cap iron and started cleaning up the rails and stiles.

And then I set up to do some of the decorative features I had in mind for the rails. First, some fences to hold the bottom rails in place.

This wasn’t great, the piece kept spinning out, so I added another fence clamped to the front as well:

This worked nicely. It’s effectively an ad-hoc sticking board, and I’m going to use my new 167-year-old reeding plane on the bottom rails. This was the point of buying it, after all. And I’ve learned I’m not that good at using the thing, though I’m starting to get the knack of it. I think I need to get some slipstones to sharpen it a bit more (the strop only sortof works) and I’m starting to think I need to go buy and read “Mouldings in Practice” because even when I finally get the iron set to take a fine cut so it doesn’t chatter, it still digs in in the last half-inch or so of the groove and I’m sure it’s something I’m doing wrong. But I got it working well enough to do the bottom four rails. Not before I discovered that I need to do some repairs though…

It is somewhat disconcerting to hit your moulding plane with your plane hammer where you’re supposed to hit it to retract the iron and have bits fall out. It’s even more fun when you go to advance the iron and don’t realise the wedge is loose. That iron can really get some distance on it when you give it a belt with a hammer when the wedge isn’t holding it in the plane. But I was able to get it back from behind the bench without any damage, so that’s allright.

Anyway, the top four rails get a different treatment, for which I needed my scratch stock.

Lee Valley. It’s a luxury I know, but it wasn’t that expensive (it was about $50 plus P&P for the stock and all of its scratch cutters) and it works very nicely once you get the hang of it and only try to do short strokes instead of long runs (you do a few of those but only at the very end when the moulding is well established, and you have to be careful even then that it doesn’t dig into the grain and dive off to one side or the other). I used it to cut a pair of beads separated by a gouge’s width on the top rails, and called it a night there. I have some work still to do on the decoration, but it requires belting a gouge with a mallet so it’ll be loud so again, I’ll wait till tomorrow for that.

Not too bad, though a little more ragged than I’d like in places even after burnishing with a handful of shavings. But it’s not done yet…


15
Jan 18

Setbacks…

So I get the ‘flu shot every year, but apparently the strain picked for the shot this year did not tally with the strain that showed up in Ireland (apparently from Australia of all places) and it’s been rather rampant of late…

Also, in an unrelated topic, meet the longest muscle in the human body, the sartorious muscle:

So, can you guess what happens if you catch the first and pull the second? Did you guess four days flat on your back in bed doing nothing shed-related past reading Alan Peters’ book on cabinetmaking (interesting read btw, as it’s less “here’s how to cut a dovetail” and more “this is how you run a successful woodworking business”, which is a nice look into a different world) and watching an endless train of Japanese cabinetmaking and Roy Moore videos? So the project I was working on has stalled until this evening bar an hour on Sunday. Yay.

There are however, some new toys. So here’s my current dust collection rig:

Yes, I collapsed it, but it still works. I need to build a safety valve. However, it’s also a 60L drum because when I ordered it I didn’t quite know what I’d need and I was overly cautious. And now it’s eating space so I wanted to downsize – so I ordered a 30L drum and it arrived right after christmas, just when I couldn’t do anything with it.

So I’ll try fitting that as soon as I get a chance (it’ll have to be a weekend I think). That should get me a chunk of space back.

Also, I was watching Peter Follansbee again and he was making pegs for drawbore joints and he has this lovely mini meat cleaver thing for the job:

All I have to use is an inch-and-a-half chisel which is not the most stable of arrangements because you’re trying to hit a point a foot in the air above a peg-sized piece of wood balanced on end and held in place only by the chisel edge which is neither easy nor terribly safe. However, in the video Peter mentioned that a glazier’s hacking knife was a good modern substitute, so I looked them up and they’re dirt cheap and I need pegs for the current build so…

One cheap hacking knife. Should be far more controllable and safe for the splitting, but we’ll see. I kinda want to take the grinder or a file to the point of that thing and get rid of it though, just have a flat blunt end at the front of the knife.

And the pin chuck I ordered last year arrived…

along with the 12″ speed square I’d ordered (mostly because this is the tool I keep wanting in the timber yard rather than the framing square I have at the moment):

More tidying may be needed at some point 😀

Oh, and a few places on ebay were doing sales on brass hardware so I picked up a box of the things because after the wall cupboard build I didn’t want to get caught without a handle at short notice again. And some hinges because I looked at the shiny brass against the oak for the current build and it’s not quite right. But we’ll see. Mostly this is just stuff bought because it was going for less than half price.

And these were a few design punches bought for very few peanuts as part of the whole “learn 17th century carving” idea. They work great on something like walnut:

(That’s my reference stick for my gouges in case you’re wondering)
But in oak, which the carving is done in:

Just too faint to be made out. Too much detail in the punch for the grain of the oak to take on. Oh well. Into the toolbox for later they go. I have a few more that were ordered off ebay that are on their way, I’ll give those a try when they get here. At least two or three of those are re-workable with a file but seem to be the stippling pattern Follansbee was using in his work. They won’t be needed for a little while though, thanks to the flu delaying everything.

So I got back to grooving the rails tonight – or at least tried to. I’ve been having some issues with the grooving using my Record 044. Ralph over at Accidental Woodworker has been having some issues with his as well, and I thought it might be a common problem but it turns out my fence is aligned okay. My skate’s bottom isn’t perfectly at 90 degrees to the skate sides – you might just be able to make that out in the photo – but it’s only out by a few degrees and it’s so narrow that can’t be the problem either. The grain on the oak is squirrelly and reversing half-way along the rail, but I’m getting horrible tear-out before I even get to that point:

That’s with a freshly sharpened and stropped iron (even worked the back of it just in case I’d missed that iron somehow when rehabbing the 044). I spelched out through the rail completely on the first try on this one and had to plane back to the reference edge and start over, so when it started tearing out here, I got out the cutting gauges instead of just the mortice gauge and sliced the nearest edge very deeply.

Then I got out another cutting gauge (which happens to be about seventy years older or so and actually cuts better) and sliced the far edge the same way.

Then with the 044 set for a very fine cut I got a okay-ish groove cut down to depth; but it wasn’t even. I used the new Japanese chisel to chop the far edge to properly vertical rather than the gentle curve it had become, but then I noticed that the 044’s fence wasn’t even in contact all the way along to the same degree. I must have been tired – it took another five minutes of staring at it before I realised that the rail was twisted.

I planed and prepped it to flat in early December; sitting in the shed through a few cold snaps and 60-70% humidity with the squirrelly grain in the wood must just have been too much for it and it pretzeled itself by a good few degrees. So did two of the other long rails. The last long rail was only slightly twisted, but it’s one of the uglier pieces because of a knot. The short rails were still fine and are still perfectly flat, as are the stiles, so they can still be used.

Luckily I have a rough-cut chunk of an oak board in the timber store that’s only a few mm shorter than the long rails (literally a few, three to four in total) so I’ll plane that flat and rip out new long rails from it. I’ll probably cheat and get most of the way to thickness by resawing with the bandsaw and take them the last mm or two of the way by handplane (I’m now quite short on time for this build and I’ve already been dropping elements from it to try to get this done by the end of the month). The grain’s less squirrelly in this piece as well so I might even be able to do some decorative elements on it if I’m lucky. Silver lining and all that. Oh well. I had to prep more pieces for the lid anyway (which I finally got a design for in my head that should be stable and relatively straightforward to do). Still a bit annoying mind you.

It’s not as annoying, however, as walking to and from work today (and standing on the Luas both ways) and then finding when I got home this evening that I’ve buggered up the leg muscle again, it’s all sore and swollen. Standing, no problem. A step forward or back if I don’t bend the knee too much, that’s more or less okay. Walking from the kitchen to the shed? Sortof like having someone stick in a hypodermic needle into the muscle and then breaking it off so it pokes you at random moments. I think I’m stuck working from home for a few days, this thing is not going to heal if I keep walking a few kilometres a day on it.