04
Dec 17

Not progress…

Hm. Well, I guess not every day is going to be a great shed day. Stupid “job” and stupid “mortgage payments”…

At least the walnut blank for the bandsaw box came out allright.(That white glue streak is from where the bad saw cut was. The design will have to cut around that).

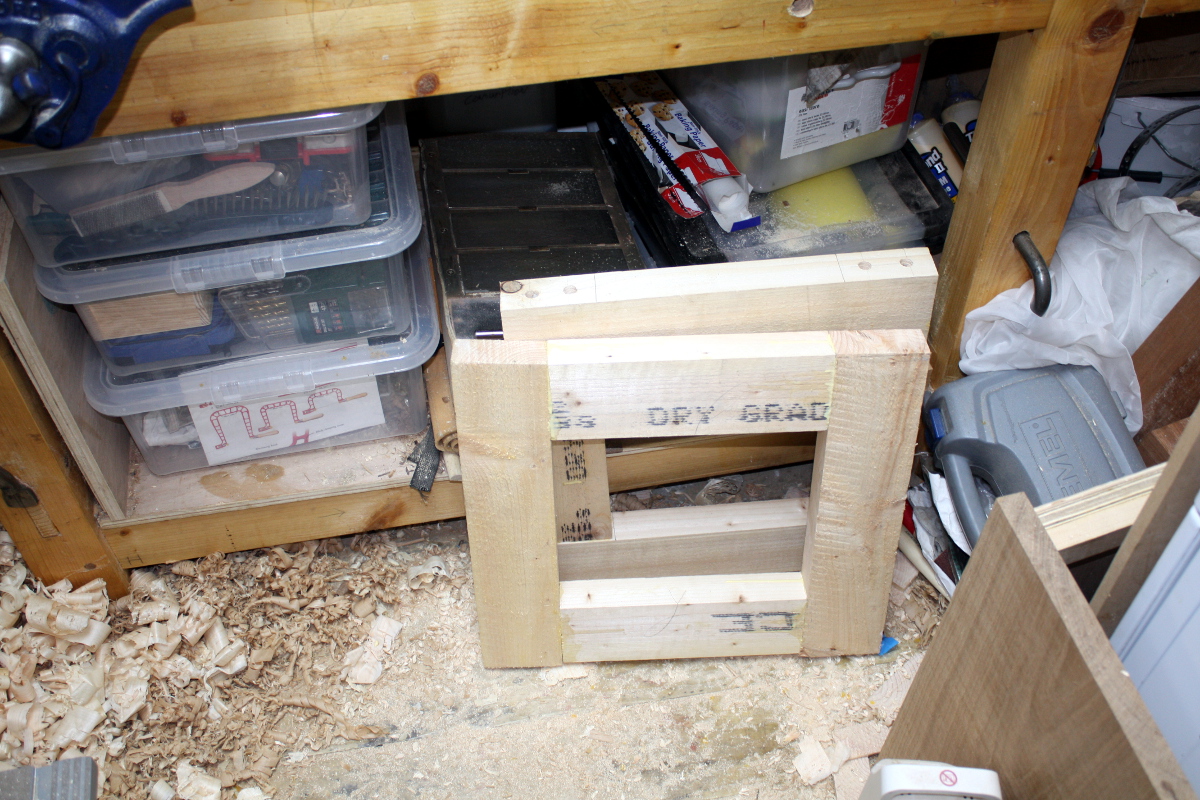
But I couldn’t drill the tabletop for the threaded inserts because they’re not here yet, so I just cleaned up the glue squeezeout from the table legs.

The new plastic razor blades were actually really useful here.

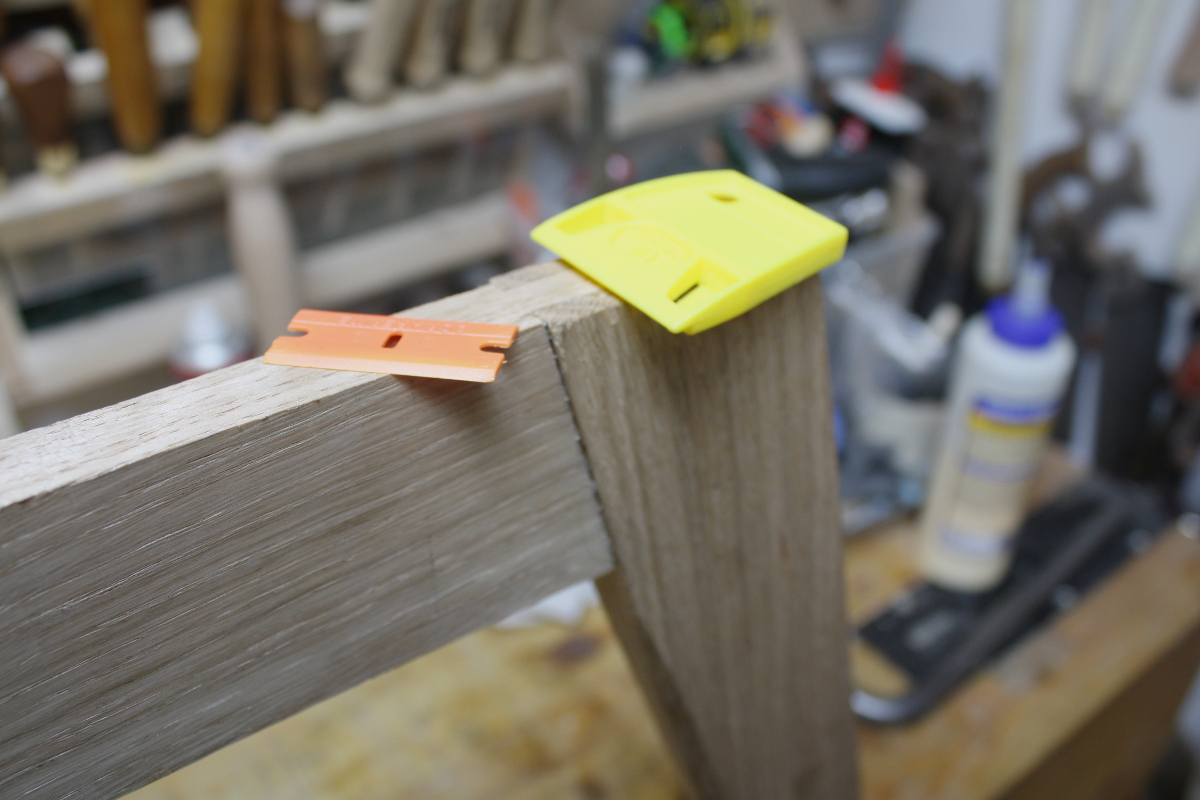
I guess you could just have a thin plastic knife for this (or a scraper if you didn’t mind then scraping out any scratches from the surface finish). But they were on sale and try anything once.

I got out the feeler gauge as well. There were places here and there where I could get a 0.2mm gauge in, but only on one shoulder was that consistent. And the ends didn’t look too bad.

Mind you, the bolts that are to hold the tabletop on… they were 70mm. They really should have been 75mm (but I couldn’t find those. Time to go hunt round the pick-n-mix hardware section in Lenehans and Woodies I suppose).

I mean… they’re nice and all but… I don’t think 5mm of thread is going to have much strength, y’know?

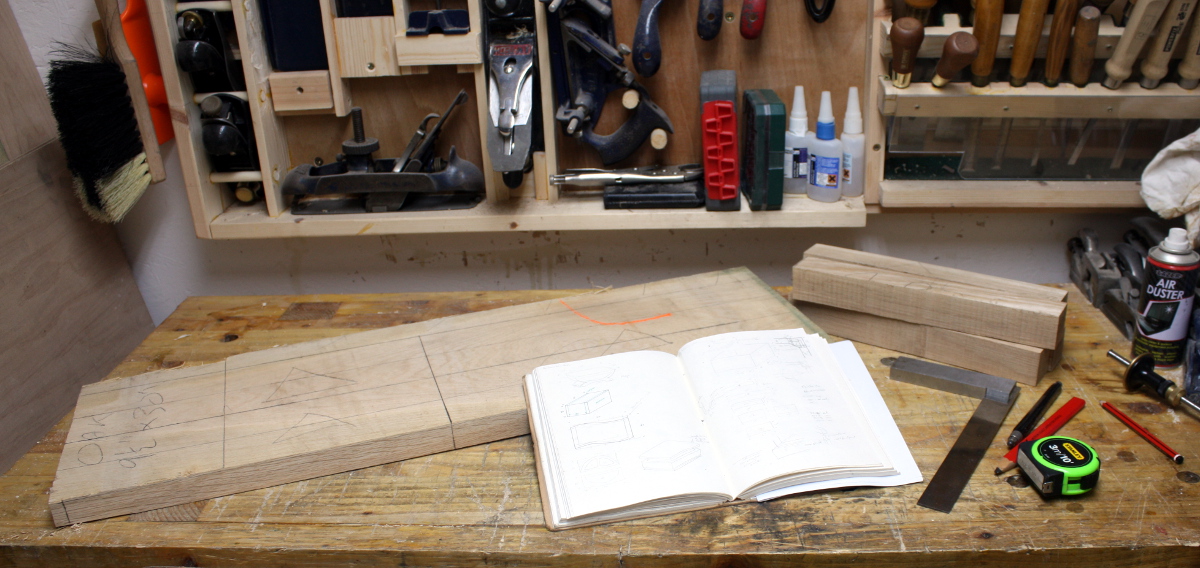
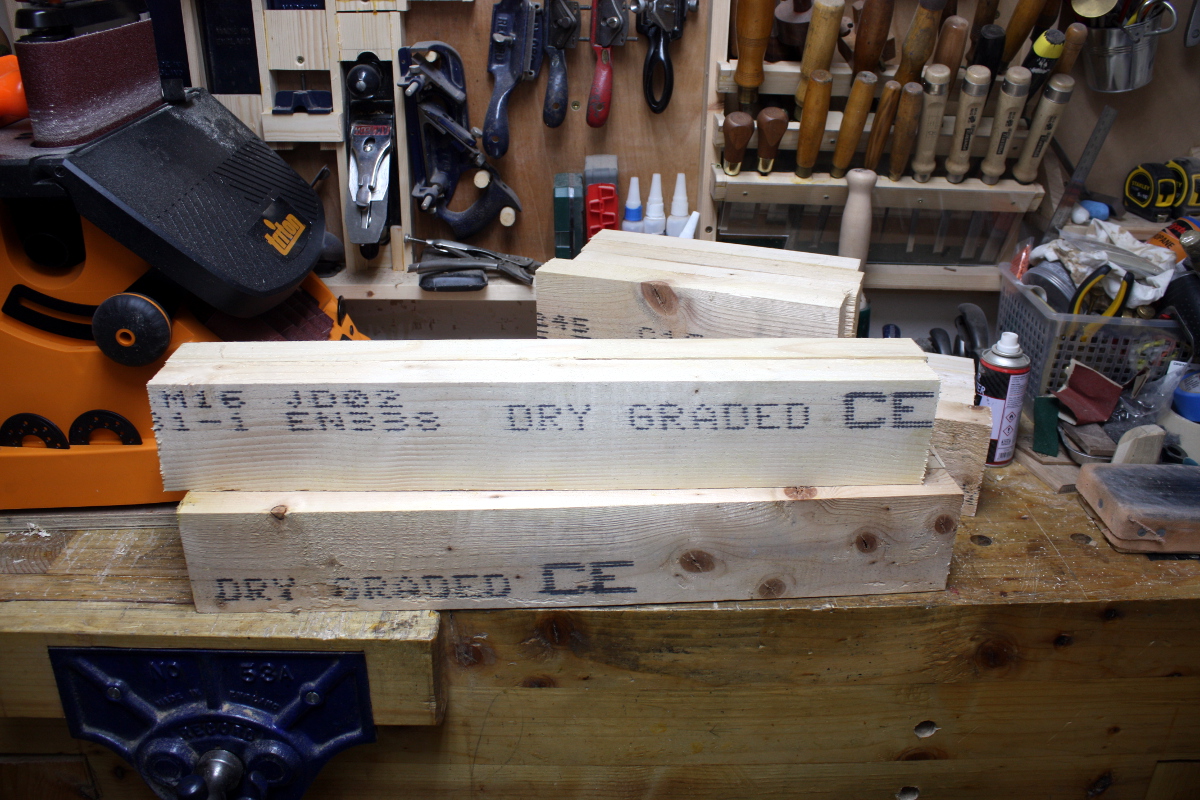
So, suitably annoyed I turned to the new project. Now it was 2100h by this point, so anything noisy was right out, but there was still some marking up to do. And I had to hunt up some timber for panels.

This should do it, but there’s a catch… that has to get resawn.
I’ll rip it down the centerline (well, not the centerline but the center line of the grain pattern, for symmetry) and trim off the edge waste with the bandsaw, but the resawing has to be done by hand because the panels are too wide (they’ll be 4 and five-eighths wide and who invented this stupid system of measurement and I’ll be converting this to mm as soon as I finish converting the rules-of-thumb on panel sizes and groove depths).

I remember the resawing from the cot. I’m not looking forward to this. I’m just hoping that it’s easier to resaw a 4 and 5/8″ board than an 8″ one. And maybe I’ve gotten better at this in the last year. Maybe.

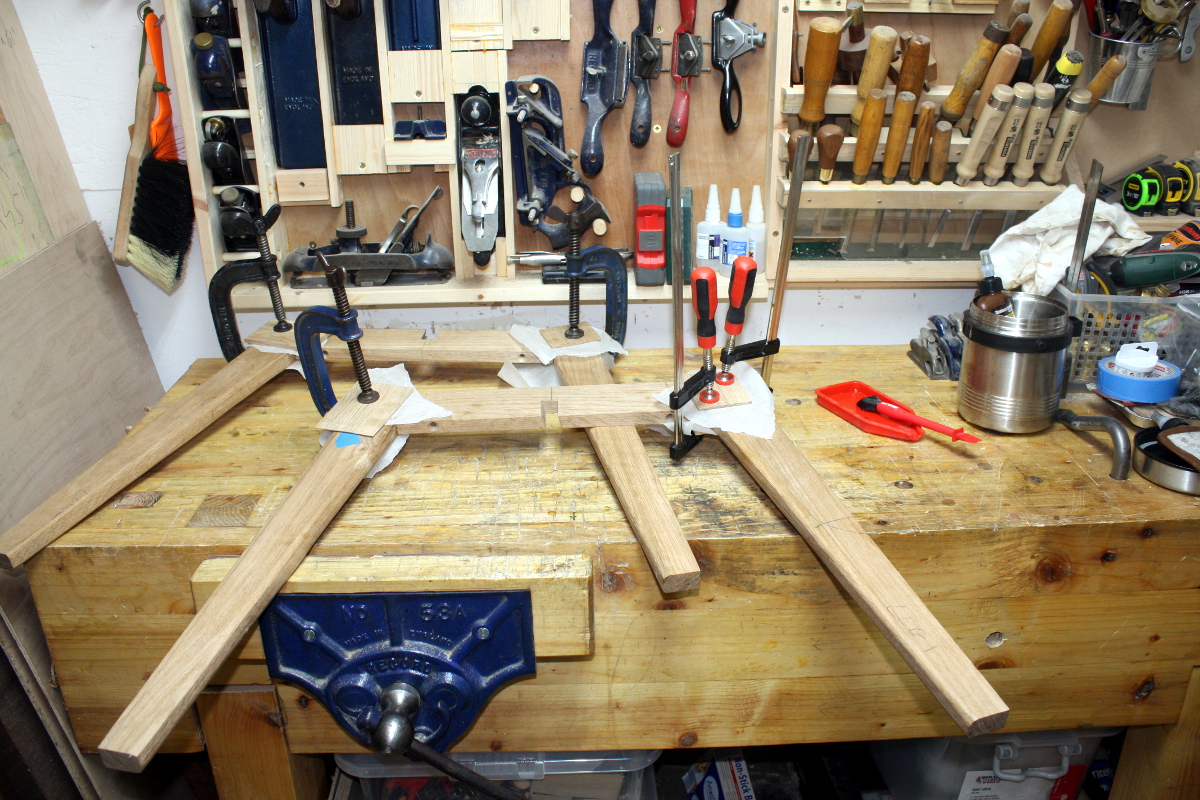
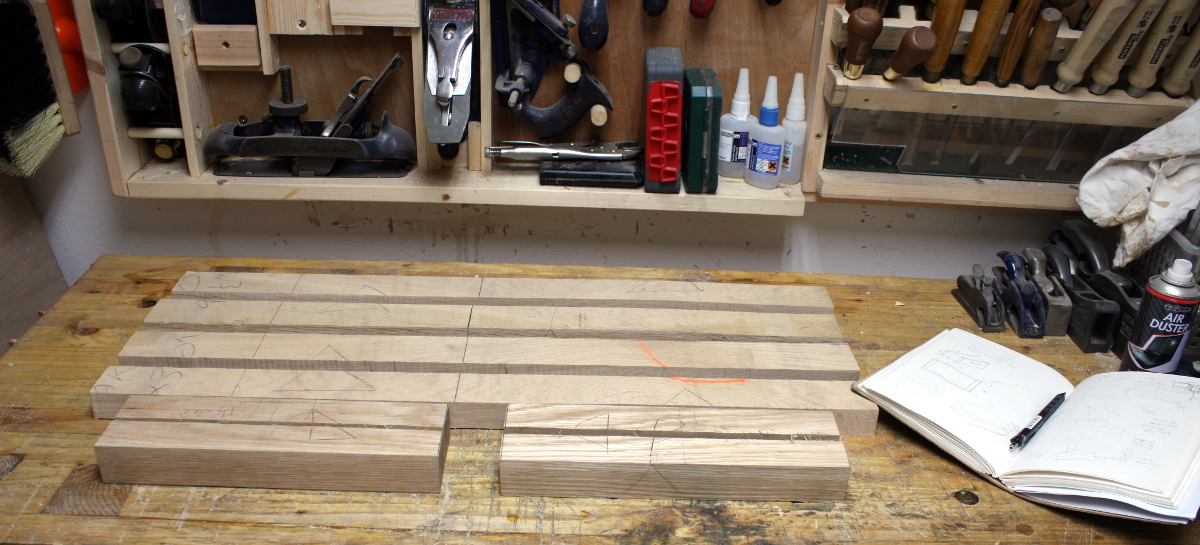
So the posts are cut long to leave horns (yes, that’s the term) above and below the mortices (and leave space for legs as well). Once the mortices are chopped and the tenons fitted those horns can get trimmed off but during the mortice chopping they give some extra strength to the piece. I forgot this when making the front legs in the sidecar cot and chopping those out was a bit of a faff as a result to avoid accidentally splitting them out.

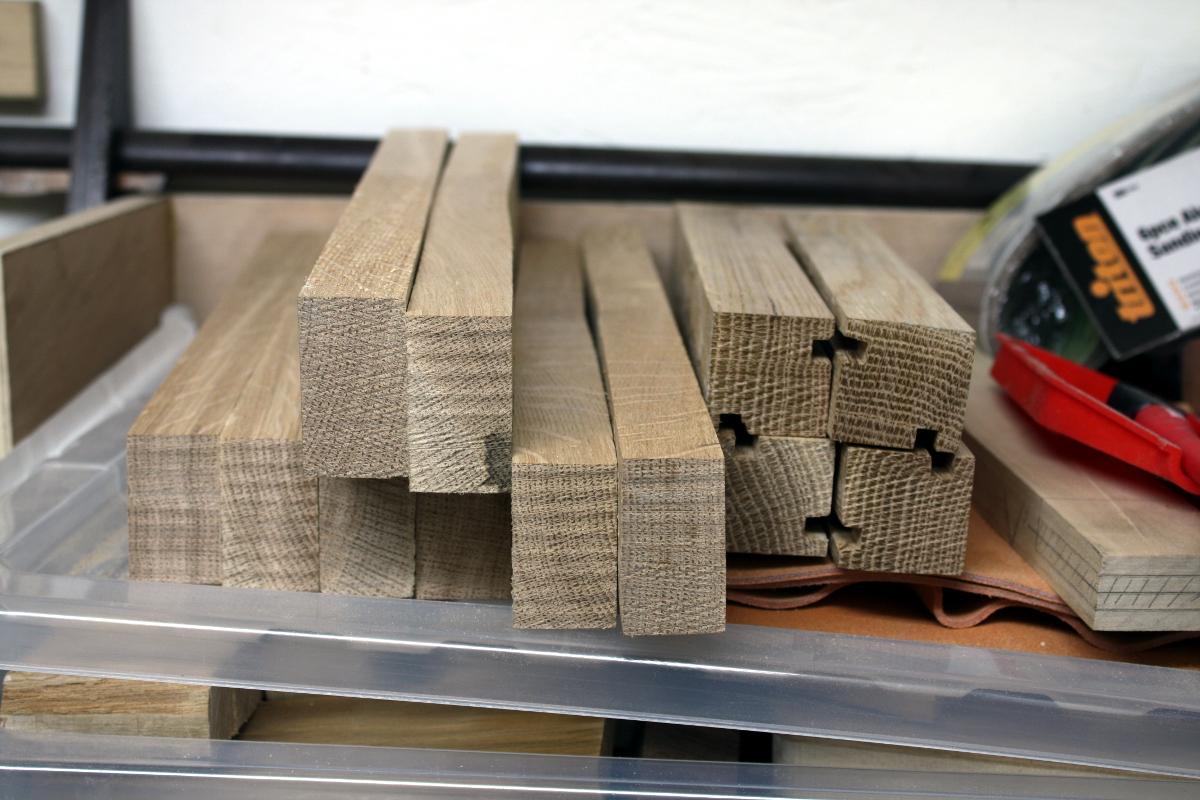
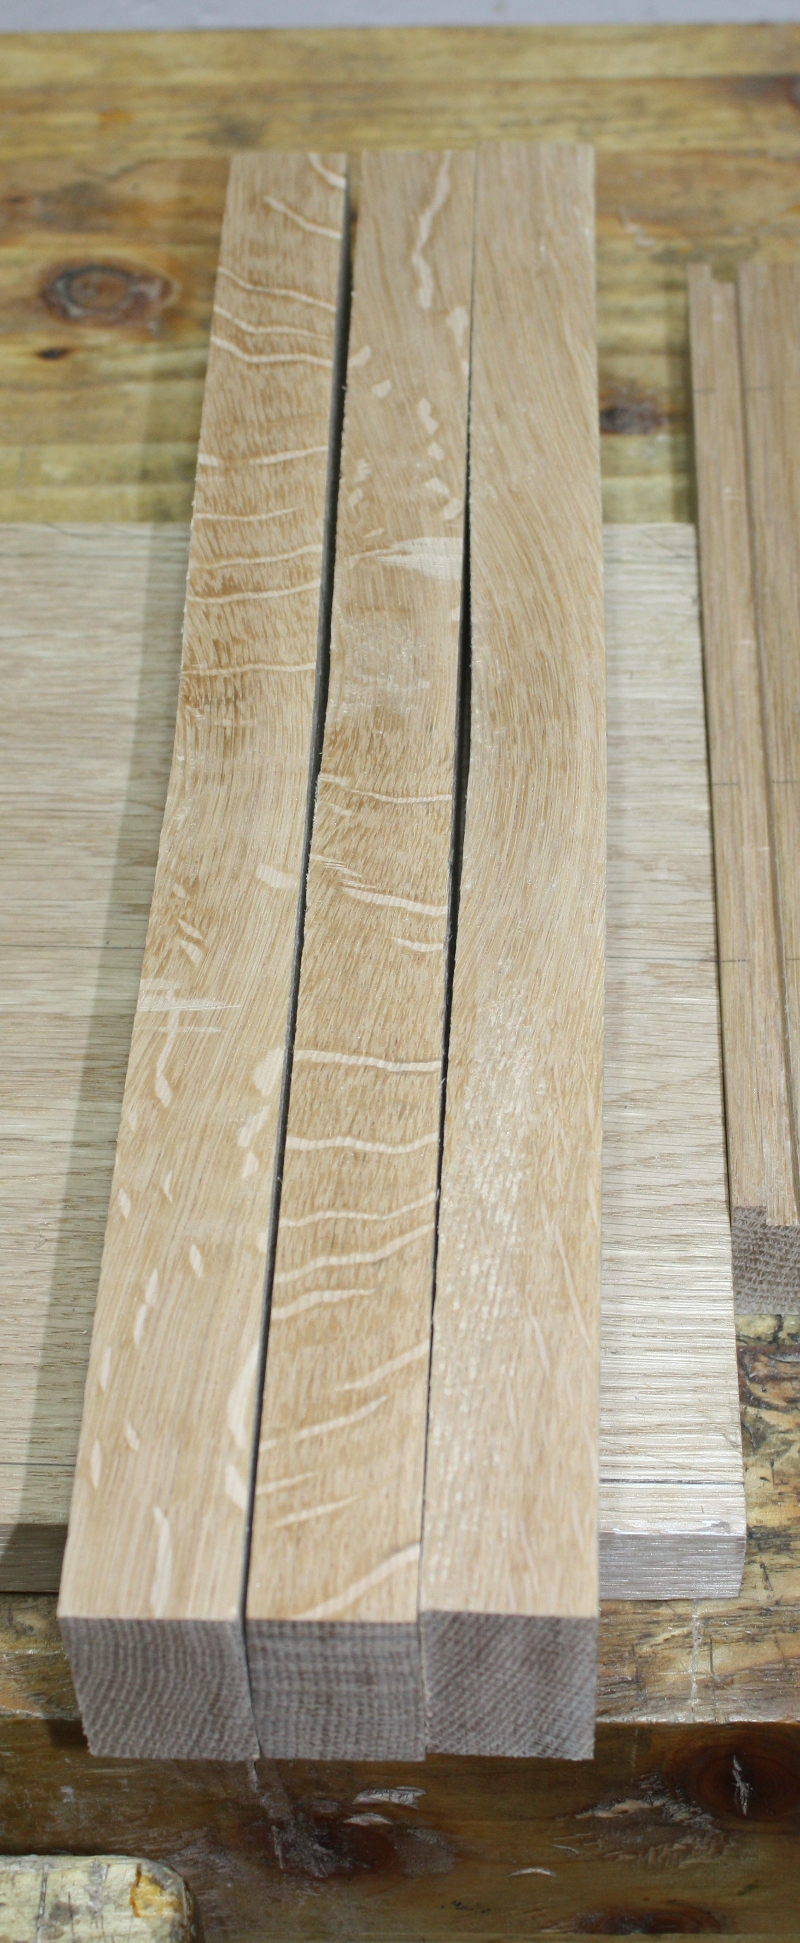
Then looking at the rails and stiles. The rails are straight enough, so I have face and edges nominated, and I marked them off for a 3/4″ thickness.

The stiles on the other hand, all have a kink that I’ll have to cut out.
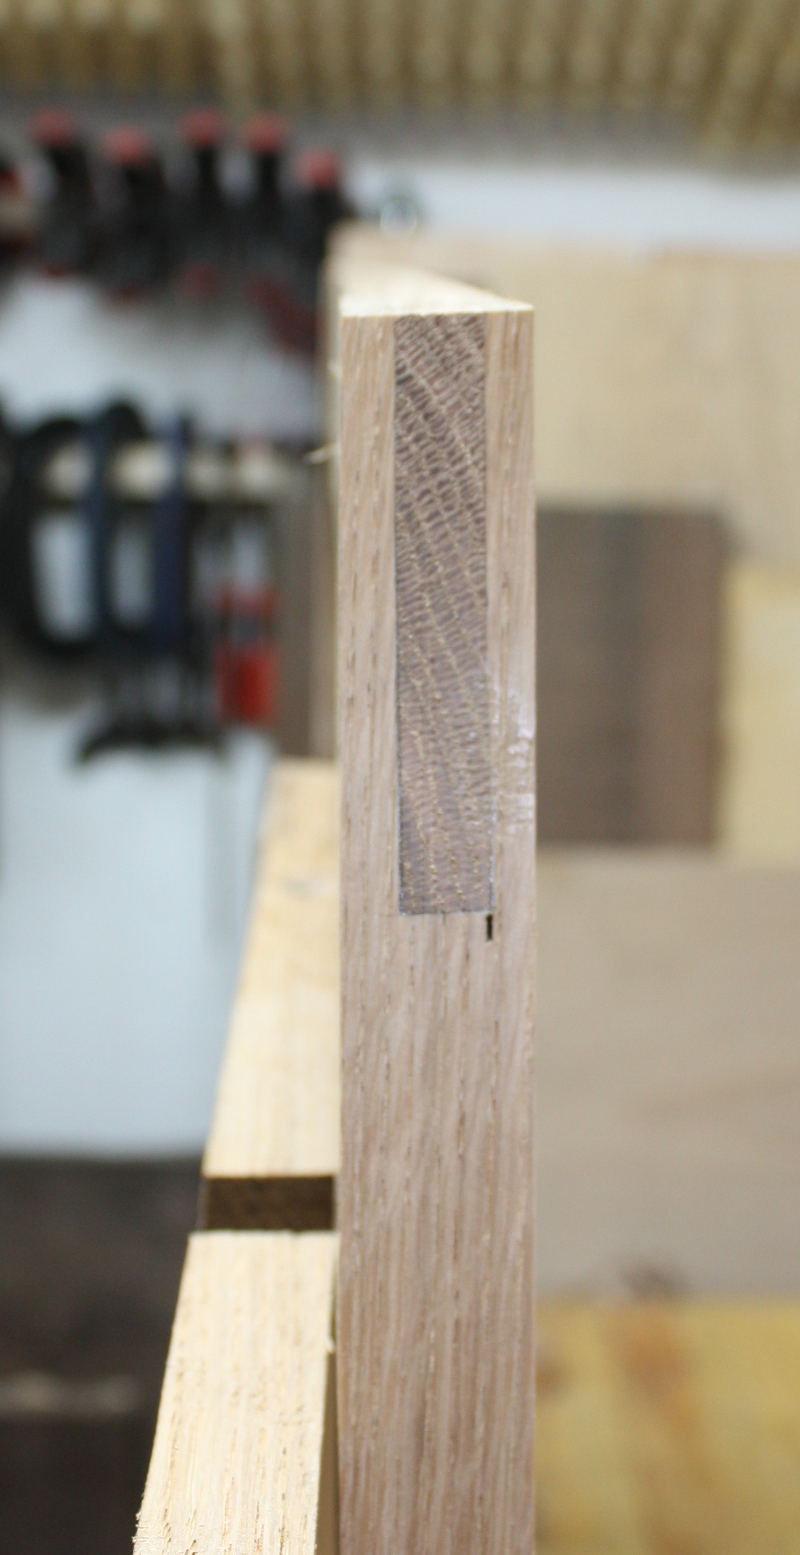
Lovely rays though.

I’ll just mark off the straight portion and roughcut that on the bandsaw and then plane the faces (I’ll do something similar on the rails – roughcut outside the line and plane the faces – I’d like to save a chunk of the waste though, quarter-inch stock is handy for boxes).

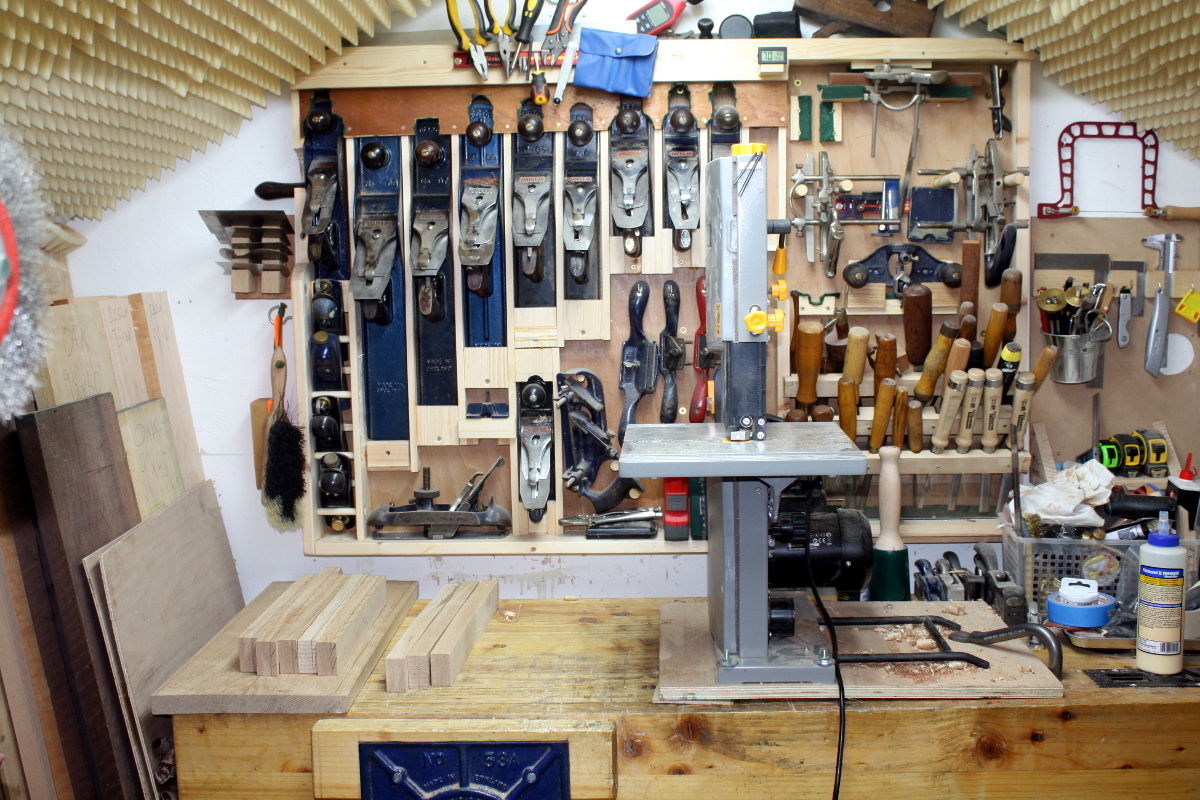
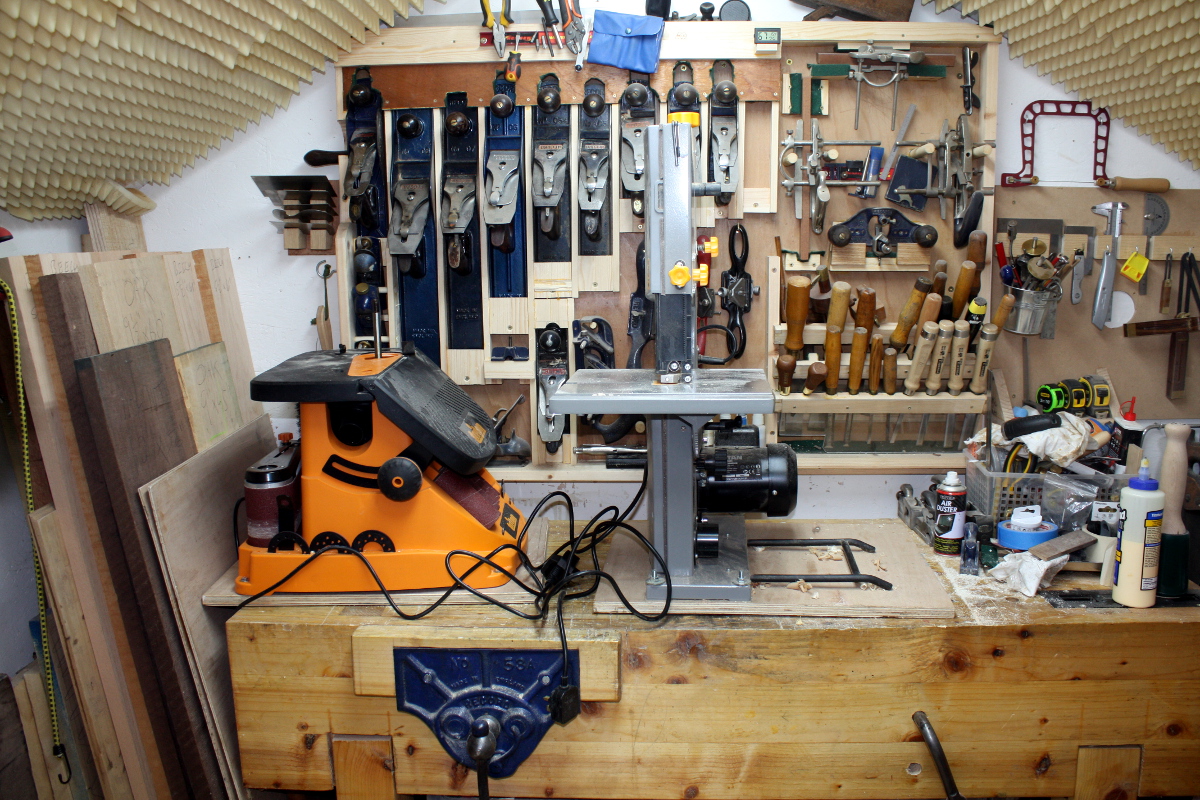
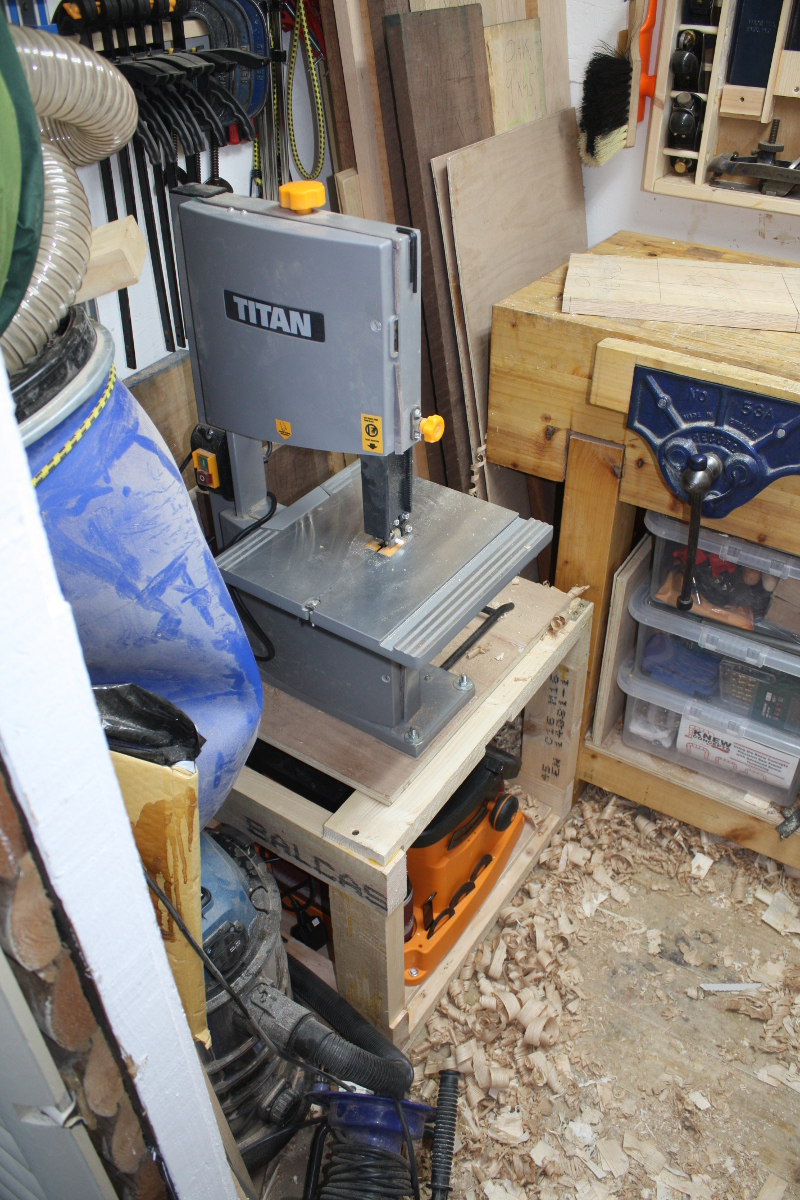
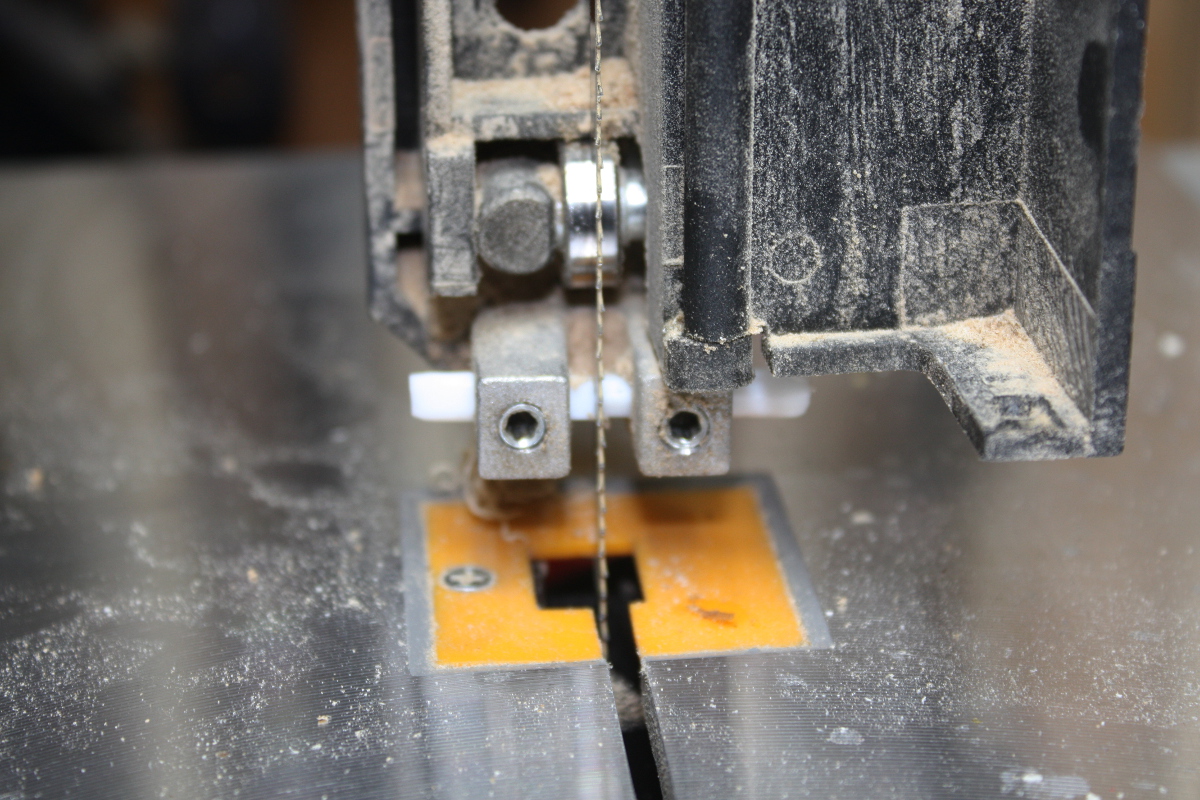
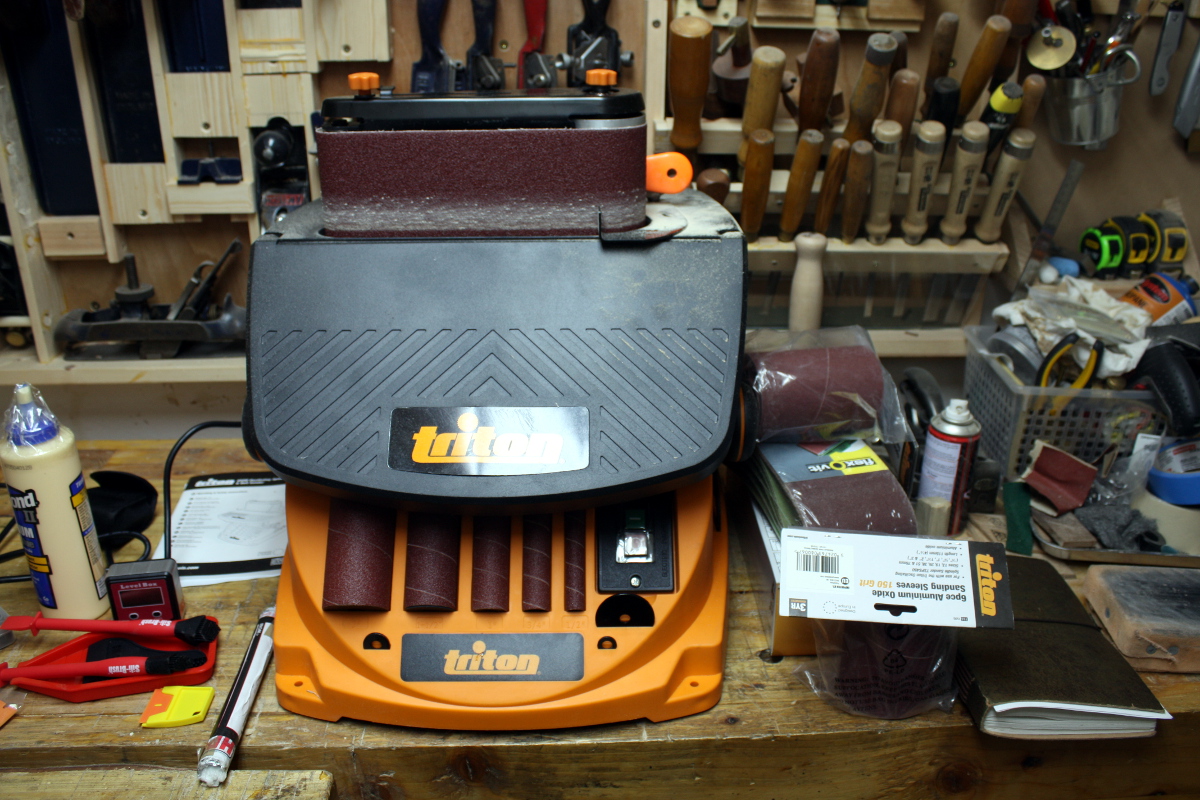
Prepped for tomorrow. I’ll run a scrap through it to see if those guides are behaving themselves first, but I may need to swap them out and maybe the blade as well.


03
Dec 17

Progress…

I actually managed to tick off almost every line on the to-do list for the week by Sunday night for a change. Before doing any “real” work though, I had to get the new interlopers off the bench. It’s been a while since I did framing-level work with 2x4s, but it’s like riding a bicycle…

…downhill on a wet slope towards a brick wall while blindfolded.

But since I didn’t care what the end product looked like, it was fast enough work…

Rough as 10-grit sandpaper, but it got them off the bench and me back to it. I might make something less… industrial at some point, but for now…

That’s the table legs profiled and rounded on the back (the front has to wait until the frames are glued up). Next to drill the holes for the tabletop attachment screws and that needed my big cordless drill…

I quite like that drill, it’s in magnificent condition for something that’s getting on for 70.

It is, by the way, a nice luxury to have a brace that’s dedicated to countersinking holes. You wouldn’t think it, but you tend to use it a lot…

And glueup. Hide glue again, hence the hot water bucket (hide glue and Irish winters don’t mix well). And that’s where I left it on Saturday evening.

On Sunday morning, I took off the clamps and things looked okay, so I got the tabletop up onto the bench and marked off the final sizes. Not much trimming needed in width, really just straightening up the edge there, but a good three inches came off the length because otherwise the table would be tippy.

I did try using the bandsaw to do the rough-cut there but it *really* didn’t like my new experimental bandsaw guides…

Teflon rod instead of the steel rod that had been there. Oh well. I might just have been overloading it with torque in the piece because it was so large it was almost unmanageable, so I’ll test it on some smaller pieces later and either leave or replace the teflon guides with the originals.

With it trimmed to size (at least roughly, the end grain is going to need a final session on the shooting board), it was on to smoothing the tabletop. Oddly the #4½ wasn’t getting it done even after touching up the blade on the diamond stones; I had it set to a really high cutting angle last time I was working with it, on some sapele; I guess it’s just not biting on the oak as a result, though I’m not sure why not. Oh well, out with the #4 instead and that got it done quite nicely. It’s not fully done; I want to use the #5 to smooth the underneath a bit, and attach the top and then I’ll come back and finish up the smoothing work on the top.

Then on to the next project and picking out the wood from the board to match the plans. This will be a blanket chest – if you know what that is, the scale might seem strange, but there’s a reason for it (just run with it being a very small chest for now). I had a 9×30″ oak board that I could get all the rails and stiles from, even if it has a nasty bow a few inches from one end; but I want a final thickness of three-quarters of an inch and it’s just over an inch now so I can get that bow out. The posts I already had gotten from some 8/4 oak at the end of last week.

The bandsaw might be fussy but it does let you get rips done fast… even if you then have to spend a while with the #5 to get the edges back to being clean again.

Just trying to get a feel for the overall size there (it will be smaller than this – the joints aren’t cut and the oak’s not thicknessed yet). There will also have to be panels, this is just the frame, but one thing at a time. And I have an idea for the floorboards as well.

Finally going to get to use the pigsticker on this one 🙂

All the grooves cut in the posts. I’m wondering whether to thickness the rails and stiles before or after grooving. I’m leaning towards after. I didn’t dive into the morticing either, it’s too late in the day at this point for that, I’d wind up morticing the wrong groove somehow.

So, last job of the day, glueing up a blank for another bandsaw box.

An offcut of walnut from a long rip that went badly (you can just see where the saw wandered there). It’s a bit small for anything else really, but for a bandsaw box it’s grand. Also, walnut. It’s basically cheating using this stuff (and at nearly €90 per cubic foot, it’s definitely pay-to-win cheating).

And I’ll leave things there for the evening. The last piece of hardware I need for the table should arrive on Monday, and I might be into the finishing before the end of the week if I’m lucky, as well as making progress on the chest and the bandsaw box.


29
Nov 17

Another interloper

No work in the shed last night, on account of aches, pains, freezing despite sitting beside the fire, and the usual pre-cold fun stuff. I crashed, went to bed, worked from home today (yes, you can type while under a duvet), and by afternoon was feeling somewhat more human.

So this evening when junior and mommy got back home, junior and I opened the large boxes from FFX and Rutlands that arrived over the last day or two and dragged the latest interloper to the shed…

It’s… slightly larger than anticipated. But not by too much. What it was was loud. The specs said under 85dbA, the meter says 96dbA. And when you start sanding, it peaks somewhere around 106dbA – 3dBA louder than the dang bandsaw. Hmmm. Maybe when it’s on the base and everything’s nailed down… yeah, who am I kidding. Not sure what to do about this. At least it doesn’t have a lot to do in the shed, it’s mainly for bandsaw boxes and the like.

Well, at least I’m all stocked up on glue for a while. I’m looking forward to trying the plastic razor blades as well to see how they cope with glue cleanup. The angle box may be useful for the bandsaw and the sanding table, all the dremel sanding paper should be useful for small parts, and the black-and-white tube there on the right up against the triton are some teflon rods that I’m going to use to replace the steel rods that are the bandsaw guides on the bandsaw. This way I figure I can tighten the guides up against the blade itself, turn it on for a minute or so and it’ll wear away the teflon to get the perfect spacing without damaging the blade. We’ll see. There are some smaller ball bearings in the post as well to try to replace the thrust bearings with so the larger blades don’t contact them when running without load, which is how every guide out there says to set them up (the bandsaw guide holder I have just won’t let me adjust that, because Cheap Tool 😀 ).

Also got a few grades of sandpaper for the sander. Now I have to figure out where to put all this stuff. I had a plan to put together a very, very rough platform from some 2x4s that were left over from making the bench…

The key here is to do this fast. Other projects are a-waiting, but until this is done I literally can’t get my bench back, there’s nowhere to put the Triton. So it’s all butt joints and glue and screws and forget face planing or anything we don’t have to do…

That’s the twp sides done. Next up, five crossbars (two up top, two undeneath which get castors later, and one at the back for cross-bracing), all of which will be lap-jointed to the sides along with glue and screws. And if I can find metal bracing brackets tomorrow I’ll use those too. This thing is going to be ugly and I don’t care, I’ll do a nicer one later on. Like, after this one breaks.

BTW, on the right, a Bosch power drill. On the left (well, in the middle really), a brace with a hex key screwdriver bit that doesn’t really fit the jaws. Three guesses which one crapped out on me after the second screw?

Hint: it wasn’t the seventy-year-old tool that has so much torque it could twist the screw into a pretzel if you wanted to.

Stupid batteries. If I wanted to replace them, I’d just buy a new drill – it’s almost cheaper that way (do you want one battery for 50 euro or two batteries and a new drill for 80?). Gah.