22
Apr 19

All sides now…

So, four day weekend so almost six hours in the shed 😀
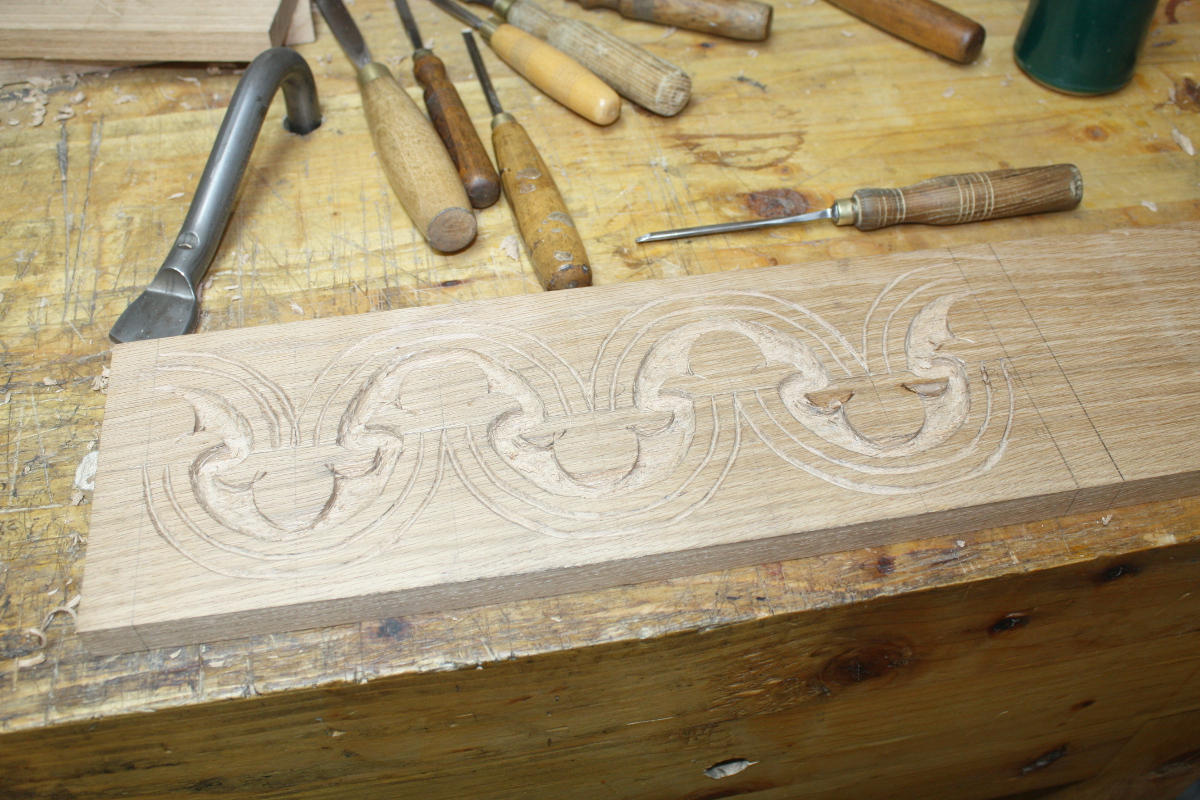
Got the last of the background removal done…

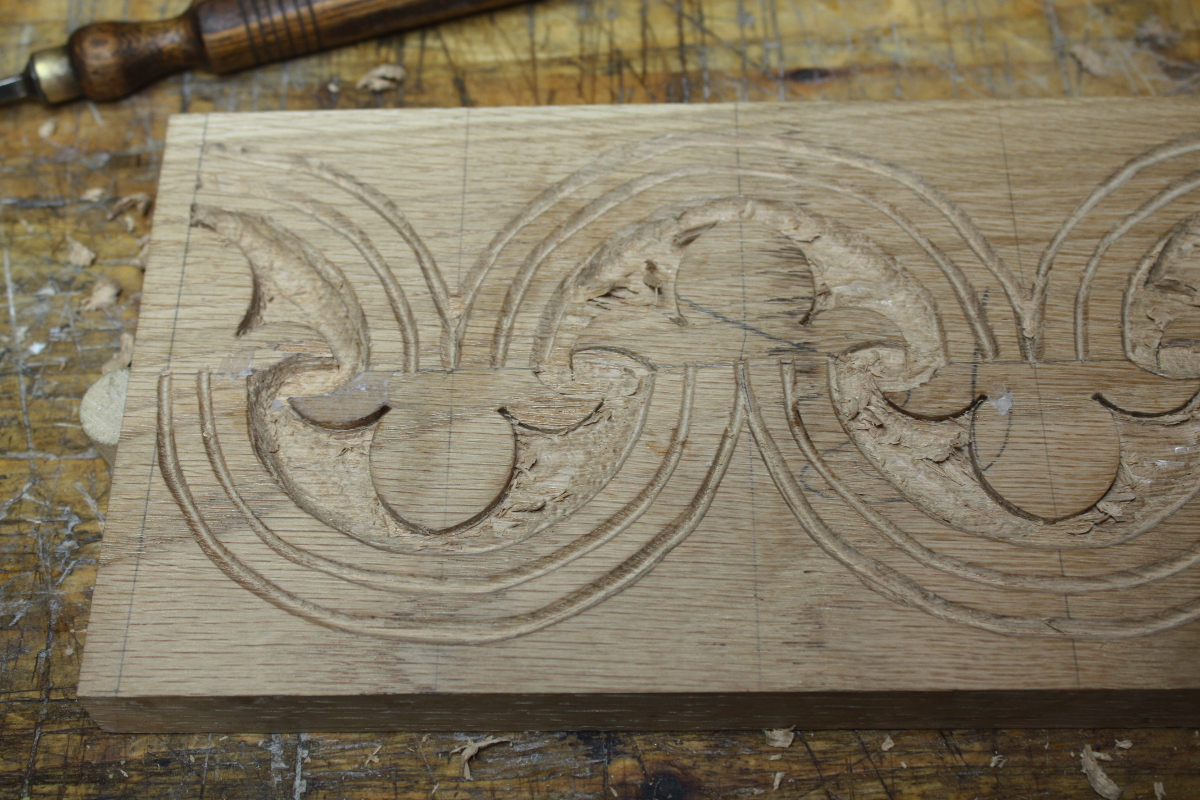
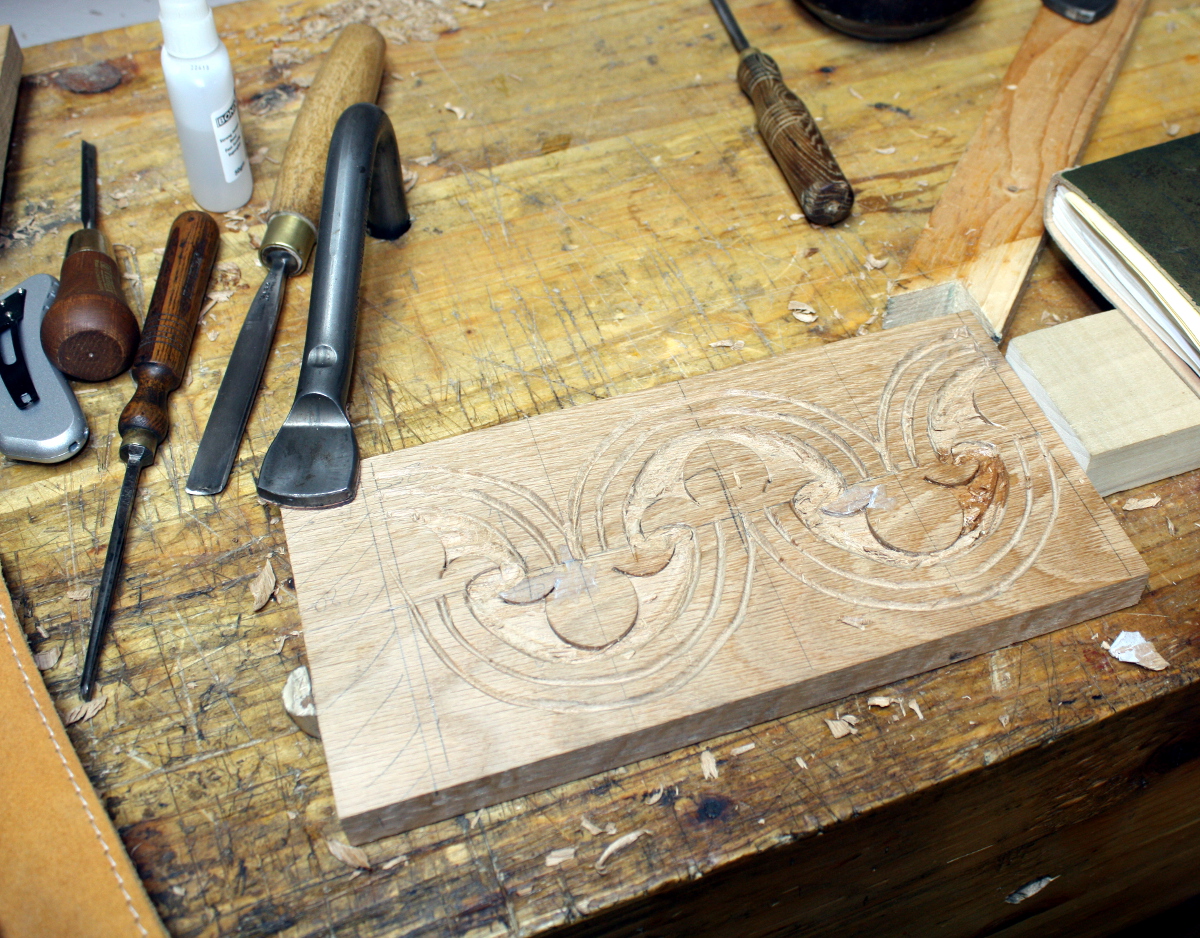
Mix of hand pressure on the gouges and whacking the everloving stuffing out of them with a mallet, and trying to get the background down about 4-5mm or so relatively uniformly across the background. Then to eliminate the unevenness, stippling!

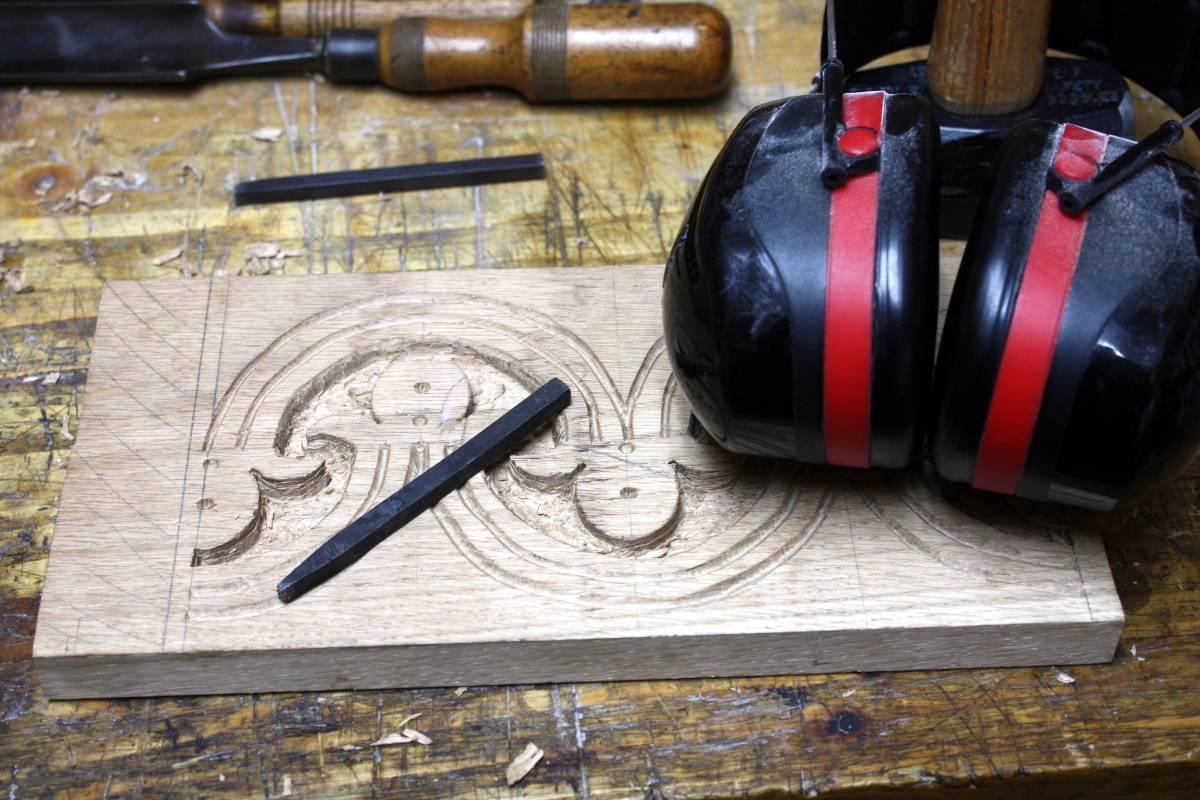
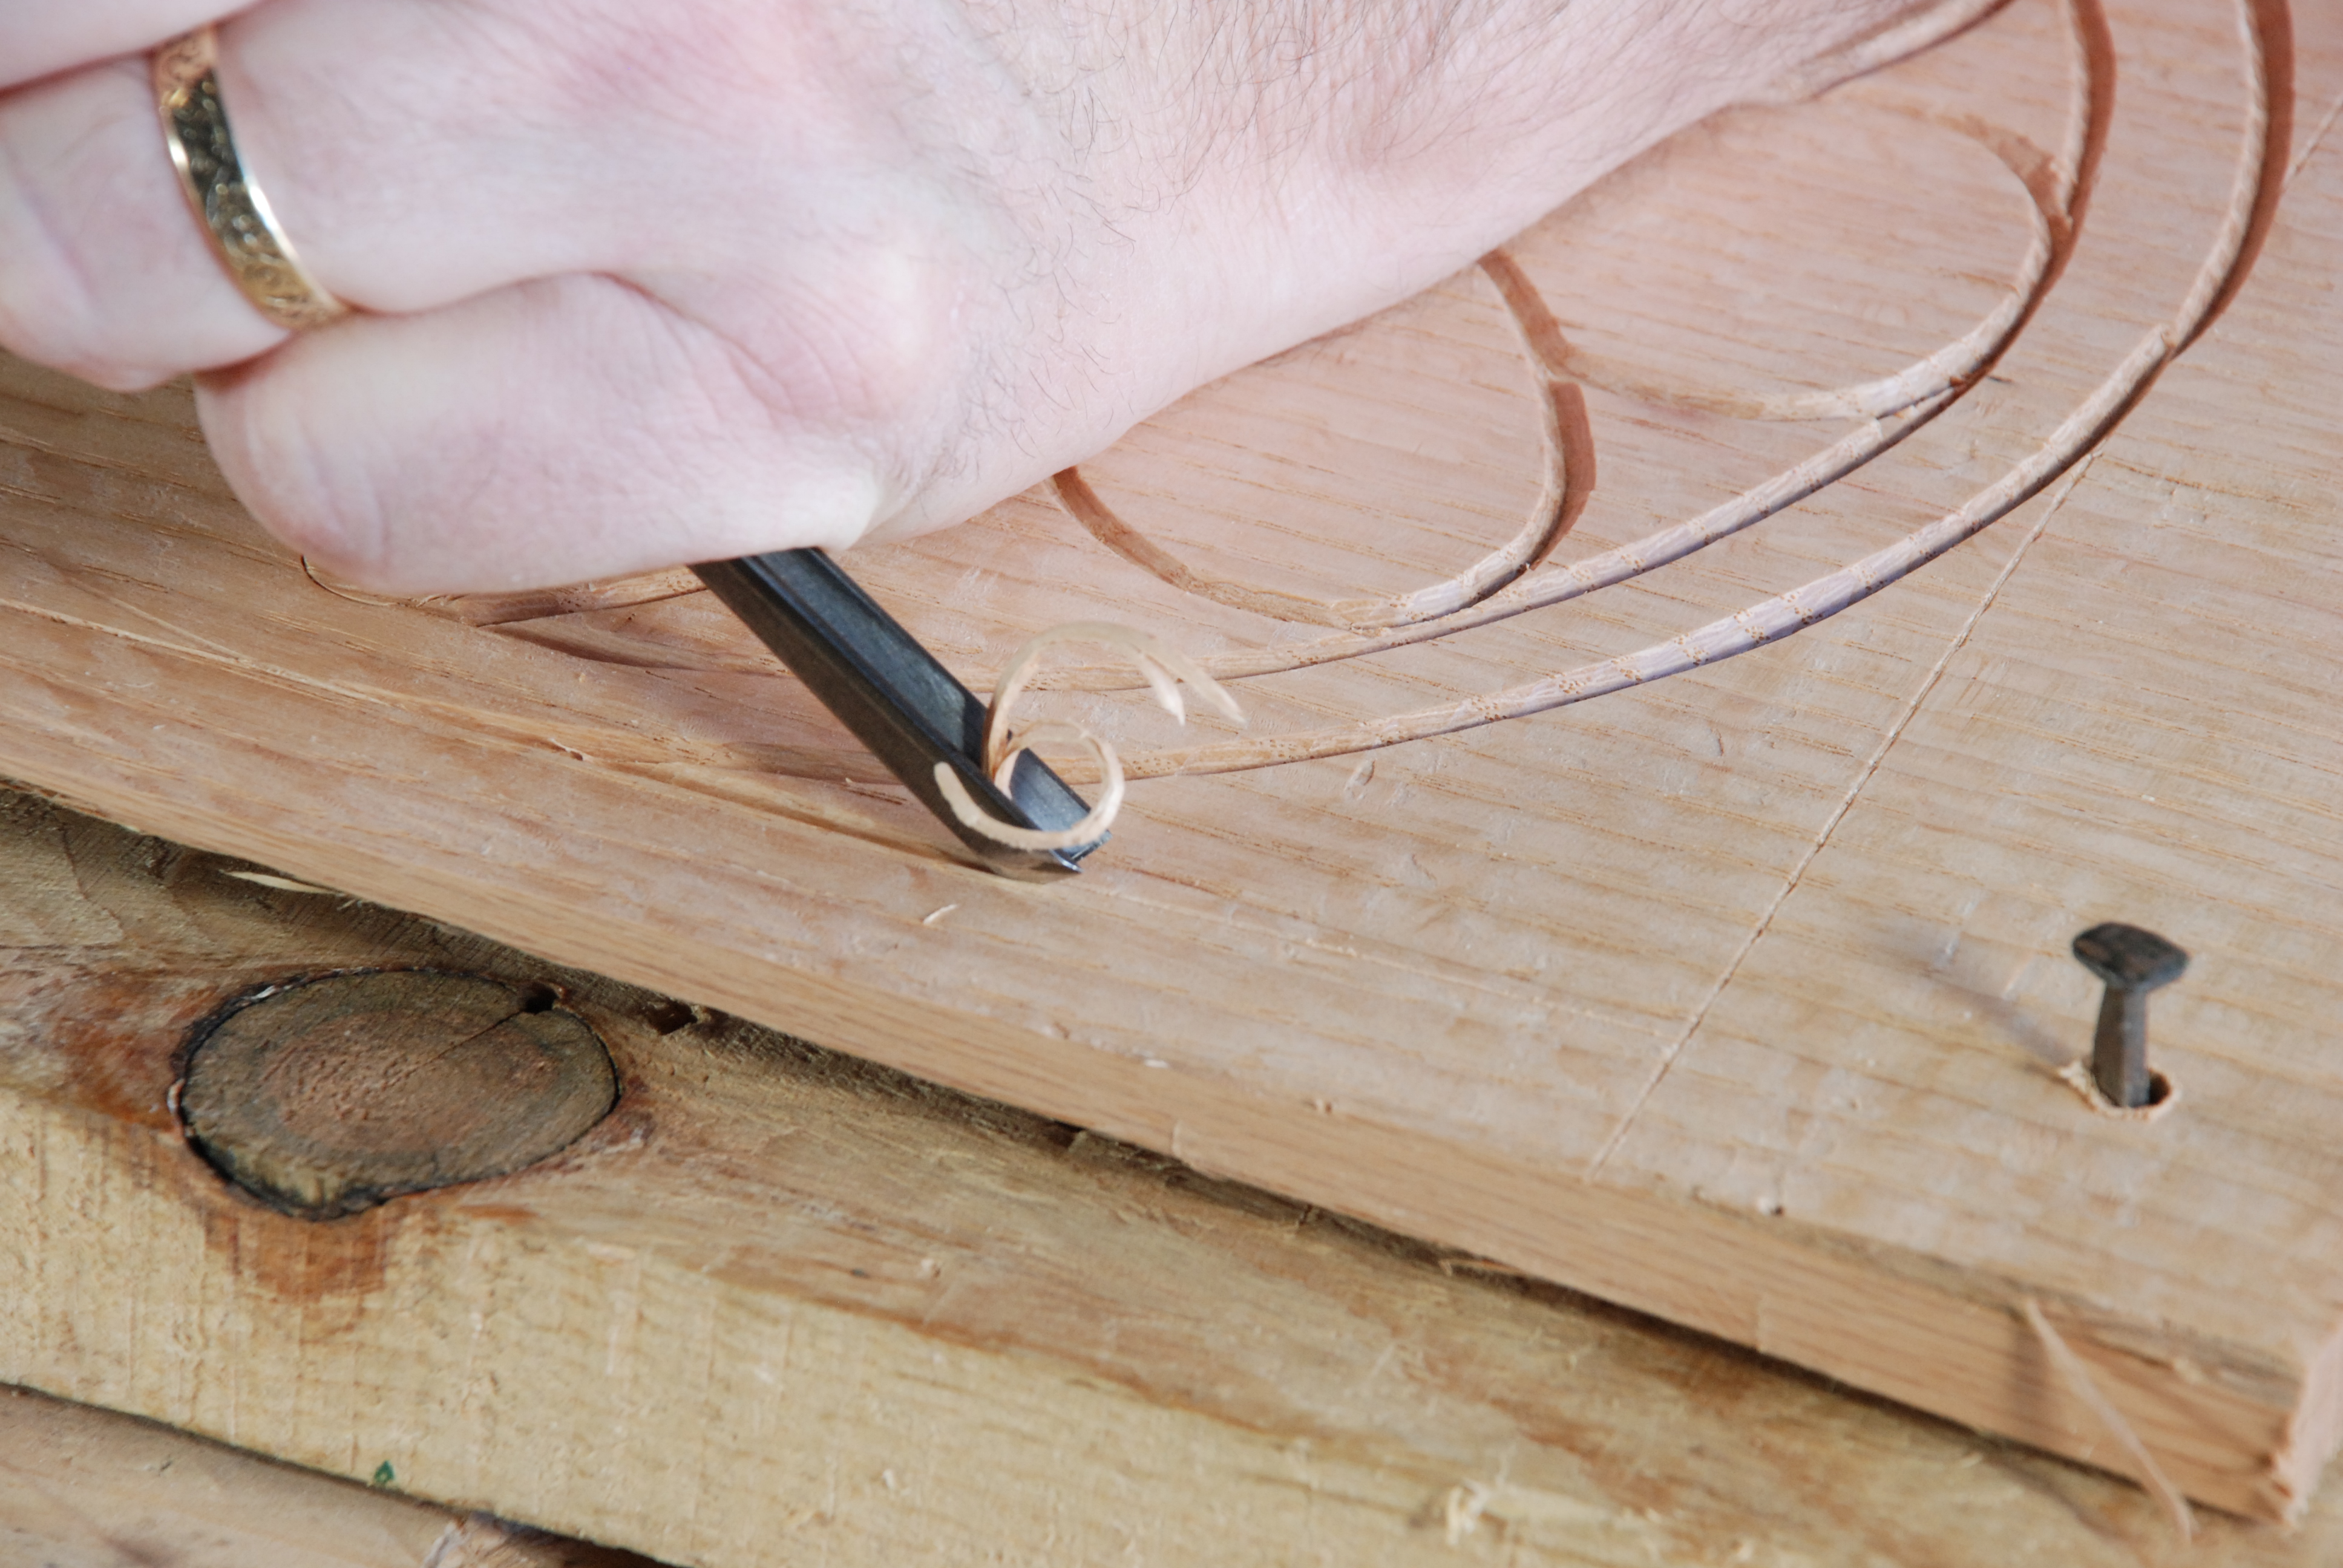
Basically, lots of spikes on the end of a punch, and thwack it with a lump hammer lots and lots of times until…

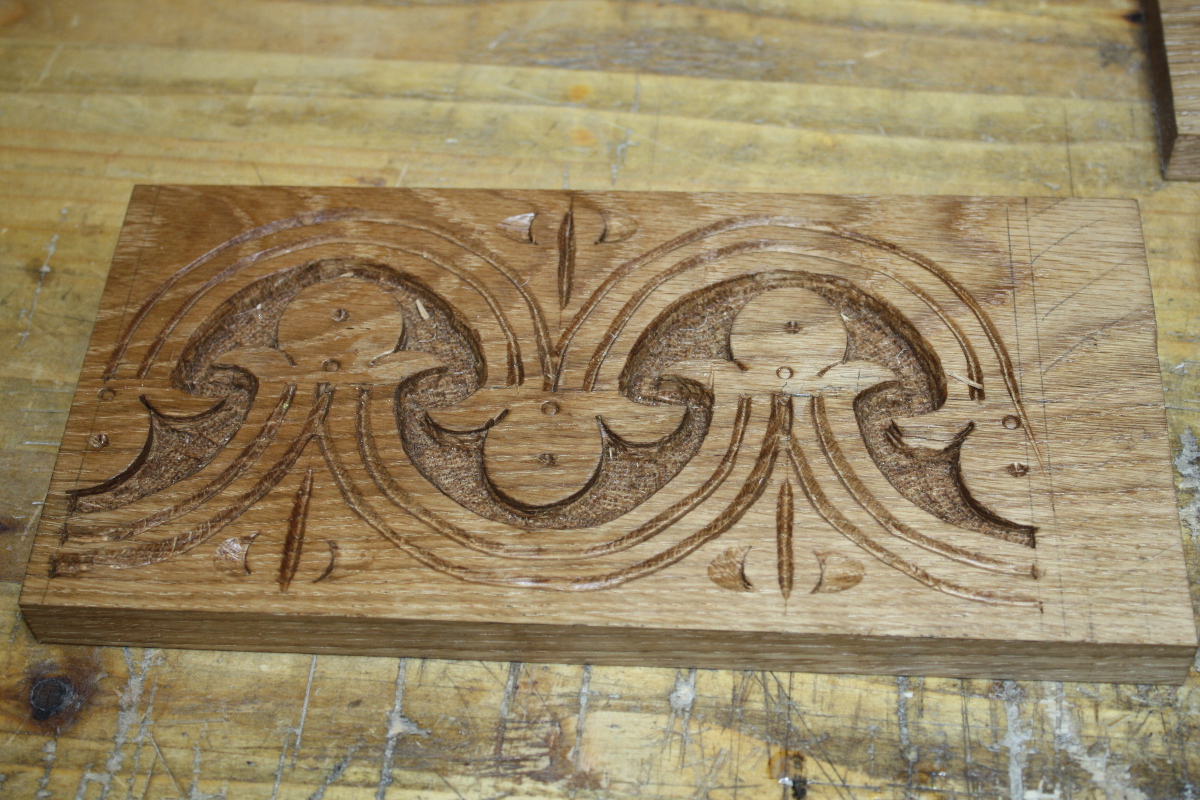
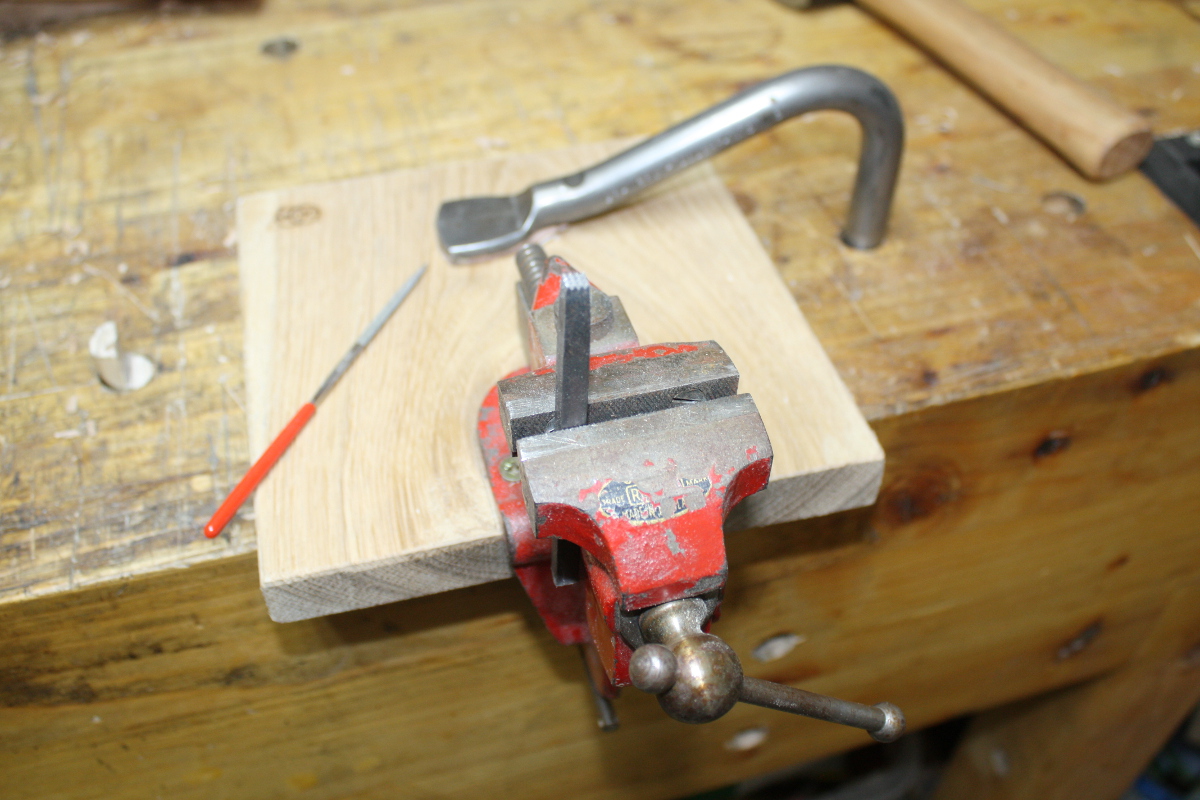
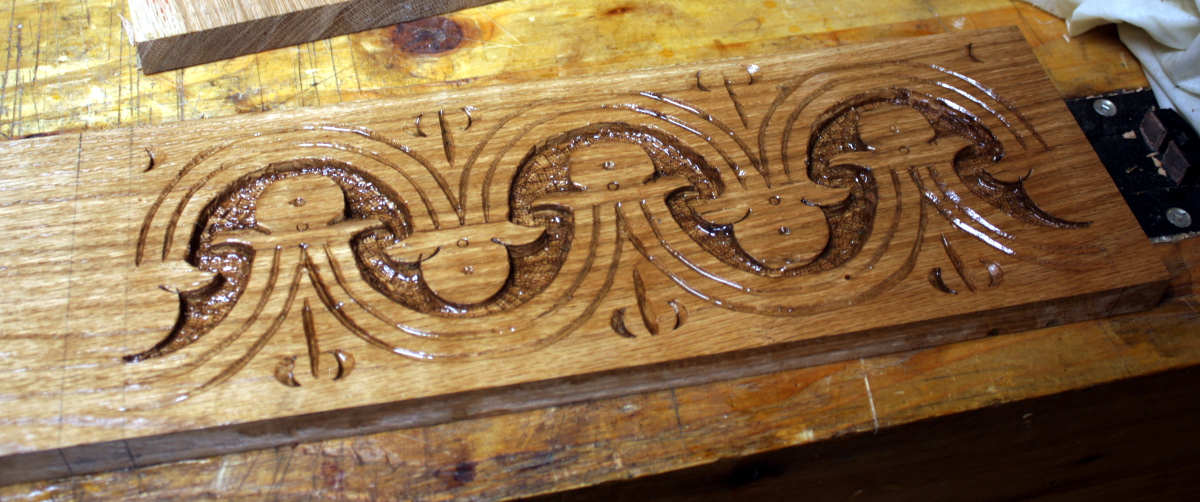
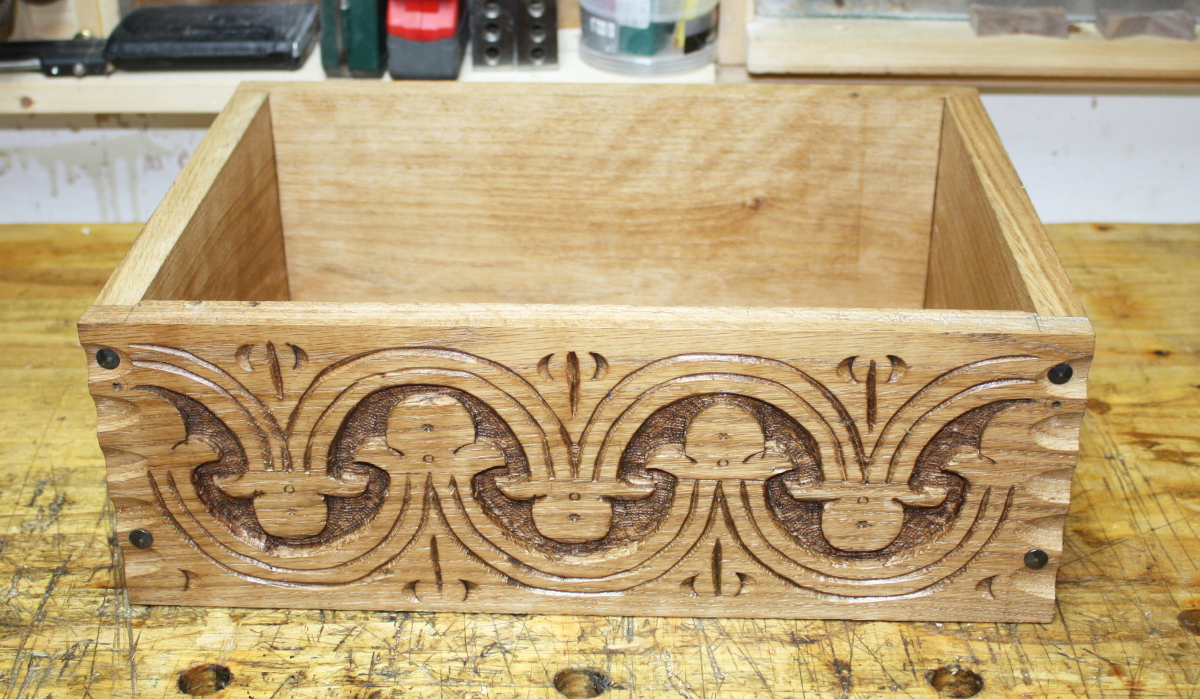
And then just douse it in boiled linseed oil to show it all up. There are some decorative punches as well, just five or six on the panel.

BTW, Peter Follansbee makes all this look easy. This is a LIE. HE LIES. The git 😀

Front, back, and both sides now carved and all bar the front wiped down with BLO. Next up, cutting off the excess length on the boards that I was using for workholding; and then scalloping out the edges of the front and back boards and drilling pilot holes for nails.

That done, marked out the front and back boards for a shallow rebate to locate the side boards (the joinery on these boxes is not normally very complex). Saw the shoulder, then stand the boards on end in the vice, hold your breath, stick the chisel in the line and split off the cheeks. A heart attack or two later and a bit of paring and fettling, then drive some cut nails home and…

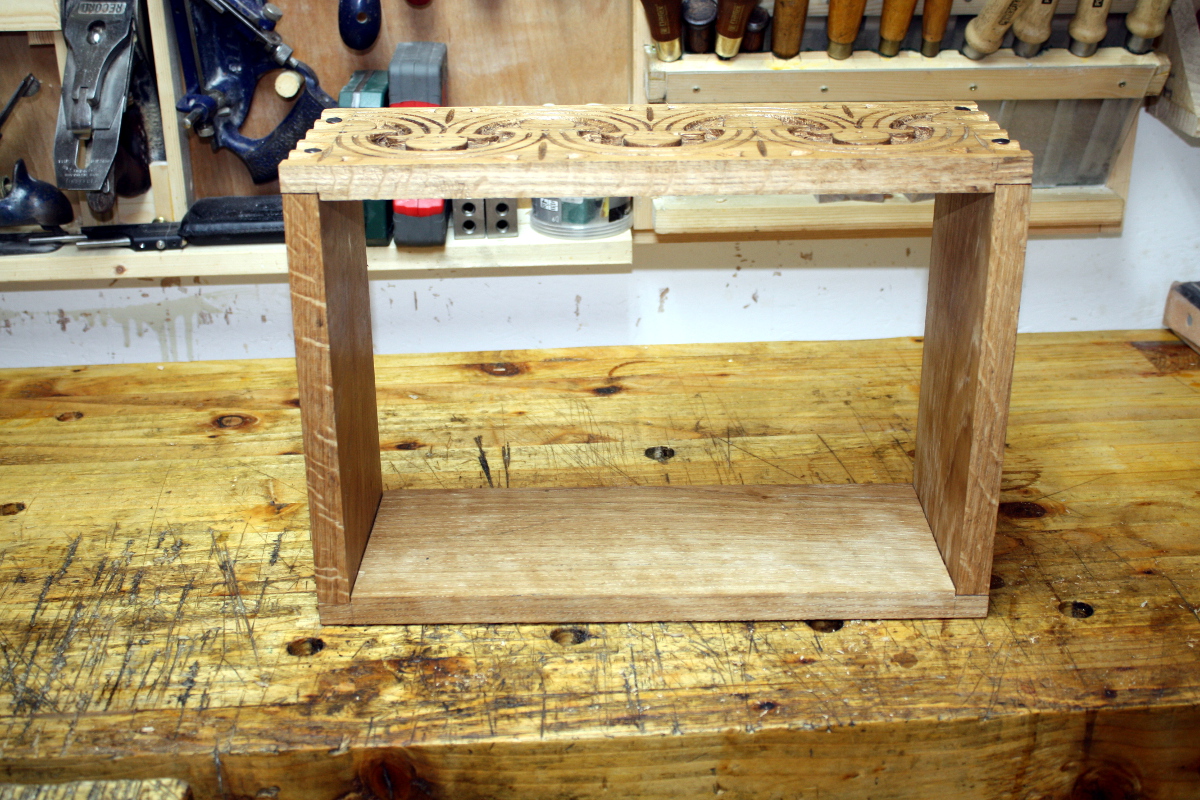
It’s not bad, it’s a little out of square:

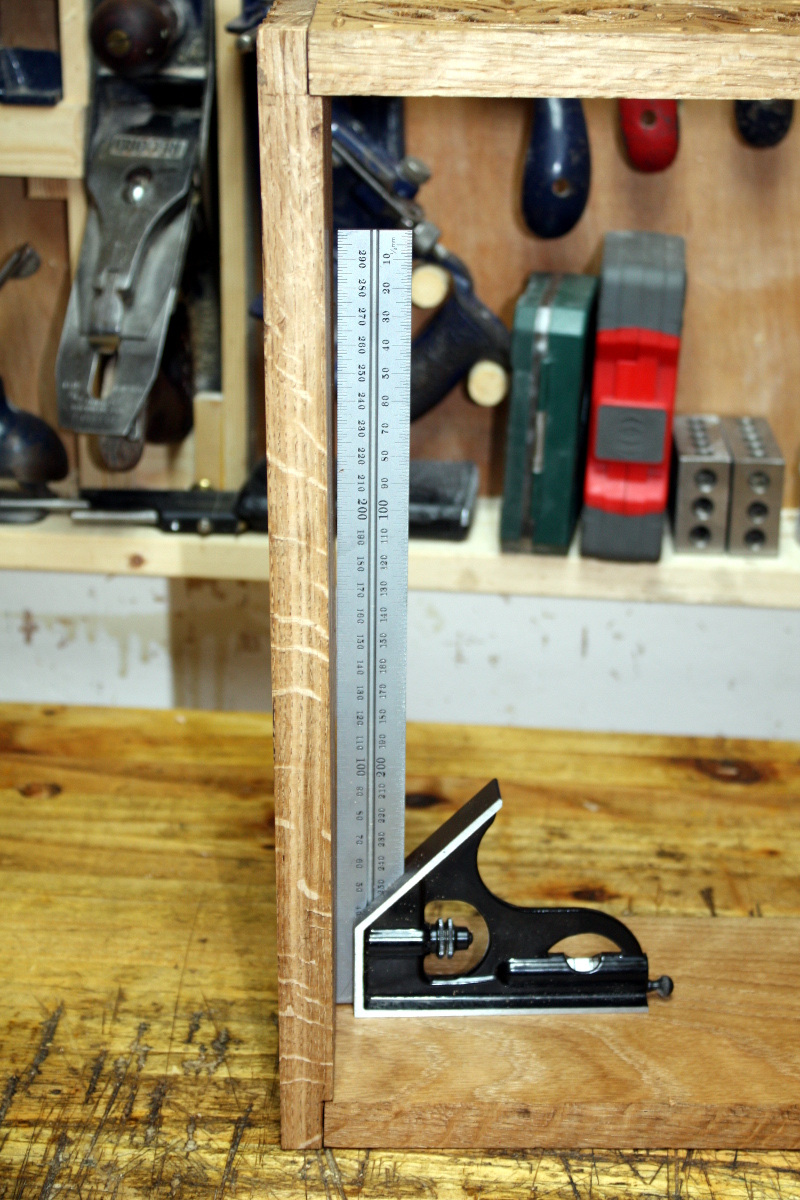
It’s only out of square by about 3mm overall though (corner-to-corner). That’s not too bad and the base will pull it into square (you can readily rack it to square with very light finger pressure right now).

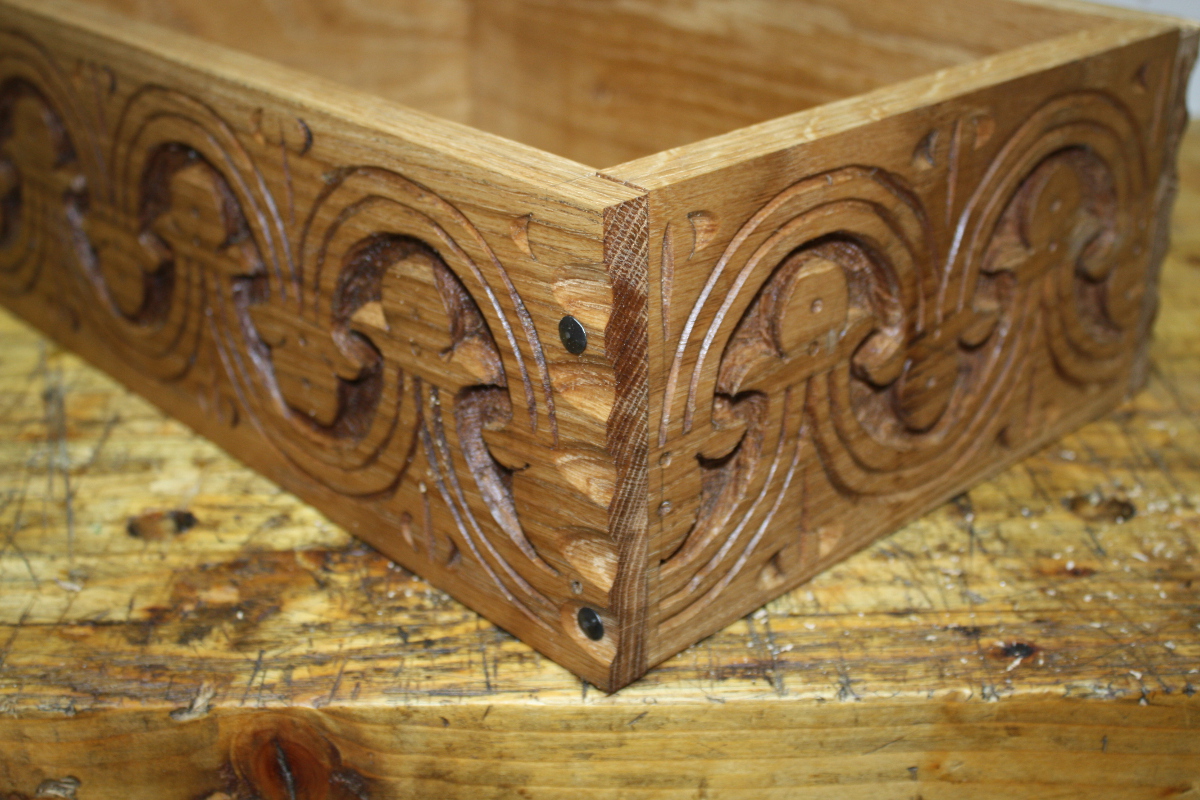
And I did manage to get the flow of the carving to look continuous, which was nice.

So not too bad overall (I might wind up disassembling it and reassembling it with a touch of glue and the nails to close up the < 1mm gaps before final assembly).

Next up, either the lid or the base. I haven’t made up my mind yet. Mind you, the way work’s been going, I may not get back to the shed till next April…


11
Mar 19

Chop, chop, chop… slice?

A (rare these days) workday evening half-hour in the shed, so onto the side panels.

End vice, does’ foot, holdfast, all the hold-it-down-on-a-flat-surface tools I have and it still jumps about if I’m carving towards the edge of the bench. Now I know why Peter Follansbee nails his work down to a large pine board before carving.

The joys of having a lot of good material and elbow room 😀

Still, the new gouges did well enough, the carving was a bit easier than before. One didn’t hold its edge too well though; I might have burned the steel on that one. I’ll have to take it back to the stones and rehone this weekend. For now, well, no point sharpening a dozen gouges if you only ever use one.

Also, new toy:

Someone recommended chip carving a while back when I was looking for decorative elements to add to a piece to distract from the terrible joinery and crappy finishing; it’s taken this long to get a knife for it. Nice knife handle actually; we’ll see how it holds up in use. Sanded off that awful varnish finish and dipped it in BLO, and on the way home today stopped off in Goughs and picked up some lime blanks (sod it, I’m not trying to chip-carve oak the first time out).

Doubt I’ll get a lot of time into this for the next while, but it’ll be a fun new thing for all that free time I have just kicking about 😀


10
Mar 19

The problem with having lots of gouges…

…is that you have to sharpen lots of gouges.

After noticing all the chipping out I was getting, and some awkwardness with the v-tool work, I took the entire carving toolroll out and took the grinder off the wall.

Then I pushed my luck by squaring the ends of the gouges and v-tools on the side of the stone. Don’t do this, it’s not a great idea for anything stressful and figuring out what qualifies as stressful isn’t clear. In my case I took off less than a half-mm or so of length at most and the thickness was minimal because it was at the edge.
After that, reground the bevel on everything to a more acute angle (around about 25 degrees or so) and even more acute on one of the v-tools for an experiment.

And then out with the diamond plates and lots and lots of rubbing stuff back and forth at a consistent angle while rotating the tool to grind the faces evenly – I’m understanding why things like Tormeks and Sorby’s belt grinder yoke are so popular with woodturners, this would be hellish if you had to be doing it every hour or two. Mind you, you can endure a fair bit of hell before shelling out €400 or so…

After all that, back to carving.

Mostly it was cleaning up the outline a bit (rechopping with sharp gouges did help) and taking down the background a bit further helped as well. Then stippling, but the main punch I use for that was in need of a touch-up as well. In case you’re wondering how that’s done, it’s not exactly complicated:

I do like that imp vice. Handy little thing. The diamond file is Lidl’s cheapest but it did the job well enough, and you have enough diamond coating left on it afterwards to do at least one more touch-up…

Still, did the job and I know I have a better set of needle files somewhere, I just couldn’t find them (having two projects in flight at once in a shed of this size is a mistake).
Then stippled the background and added a few small details like another v-tool cut and some stop-cut chips and so on, then daubed on some linseed oil to see what it looked like.

It’s okay… I’m not convinced yet. I do have another idea in the back of my mind that I did some testing with today but it’ll be a few days before I know what that turns out like. More on that later. Unless it’s embarrassingly terrible…