14
Jul 17

DerBlinkenLightzen!

8-pin microcontrollers are pretty neat things. I’d only used the larger PICs before, I didn’t see how these could be all that useful. And the 16C74s could do more… twenty years ago. These days, the 8-pin PICs have caught up with the older models in internal features, if not pincount. It’s really quite remarkable:

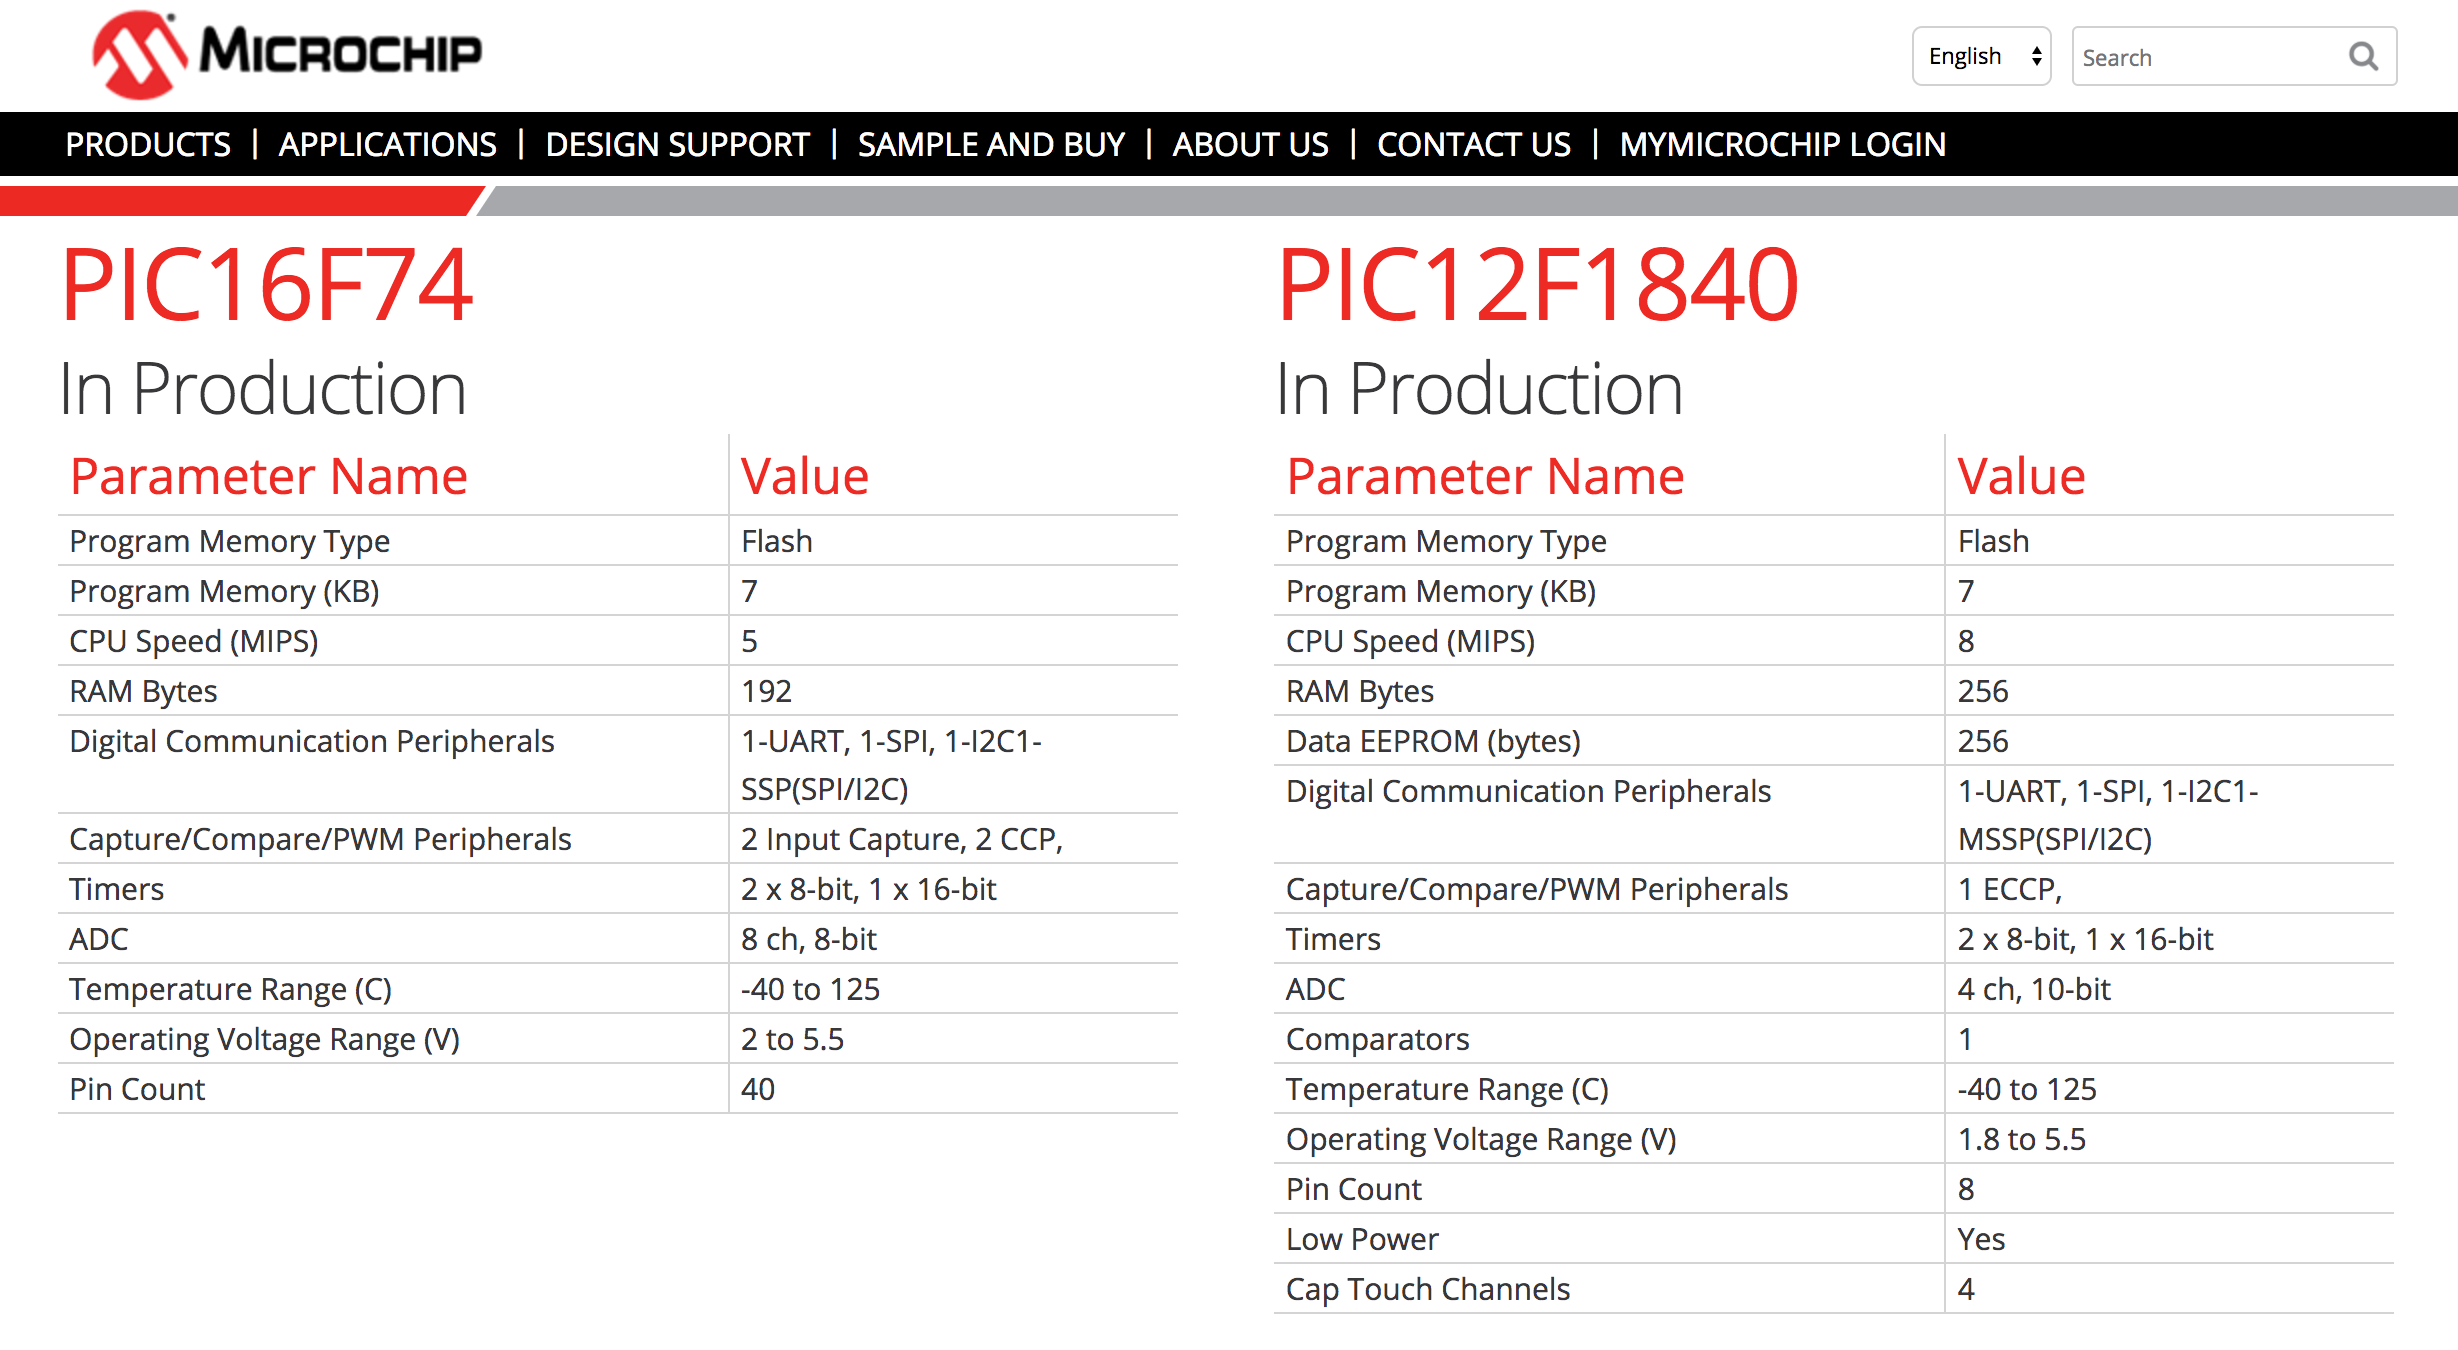
Same amount of program memory as the one from PICrat (actually, the modern version of the chip from PICrat, with the fancy flash memory), the CPU’s faster, it has more RAM, it has an internal EEPROM for persistent storage, same number of digital comms, one less CCP (but 32 fewer pins, so okay), half as many ADC channels (again, 32 fewer pins) but higher precision on those channels, same number of timers, a new comparator, a wider range of operating voltages and it takes less power (much less, it turns out).

Yes, it’s an 8-pin microcontroller; most of us forget that these shiny PCs are only a tiny, tiny, tiny fraction of the deployed computers in the world. These PICs probably outnumber them, and Moore’s law is in full swing on that side of the industry still.

So anyway, a fortnight or so back I’m watching a Big Clive video about making up a DMX cable tester with a PIC12F635…

…and I thought I’d like to play with a 12F so I bought a tube of them (they’re a lot less than a euro apiece) and a programmer. I splurged and got one of the higher-end 12Fs, the 12F1840, and then got to wrestling with resurrecting a 20-year-old toolchain.

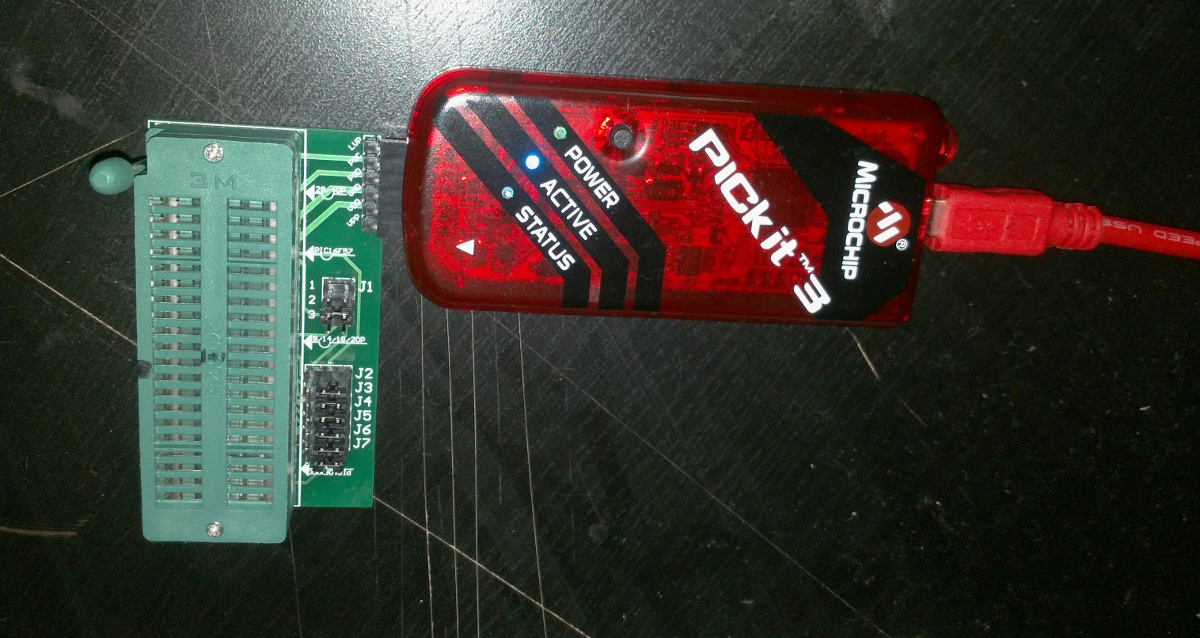
GPASM, it turns out, has improved considerably, and there’s finally a CLI for the PICkit3 (I remember it coming out and the sheer daftness of the dropping of the PICkit2’s pk2cmd program that rendered the PICkit3 useless on launch to anyone running linux at the time). It only took a few hours of rereading manuals and poking things randomly before getting the flashing LED “hello world” program to work.

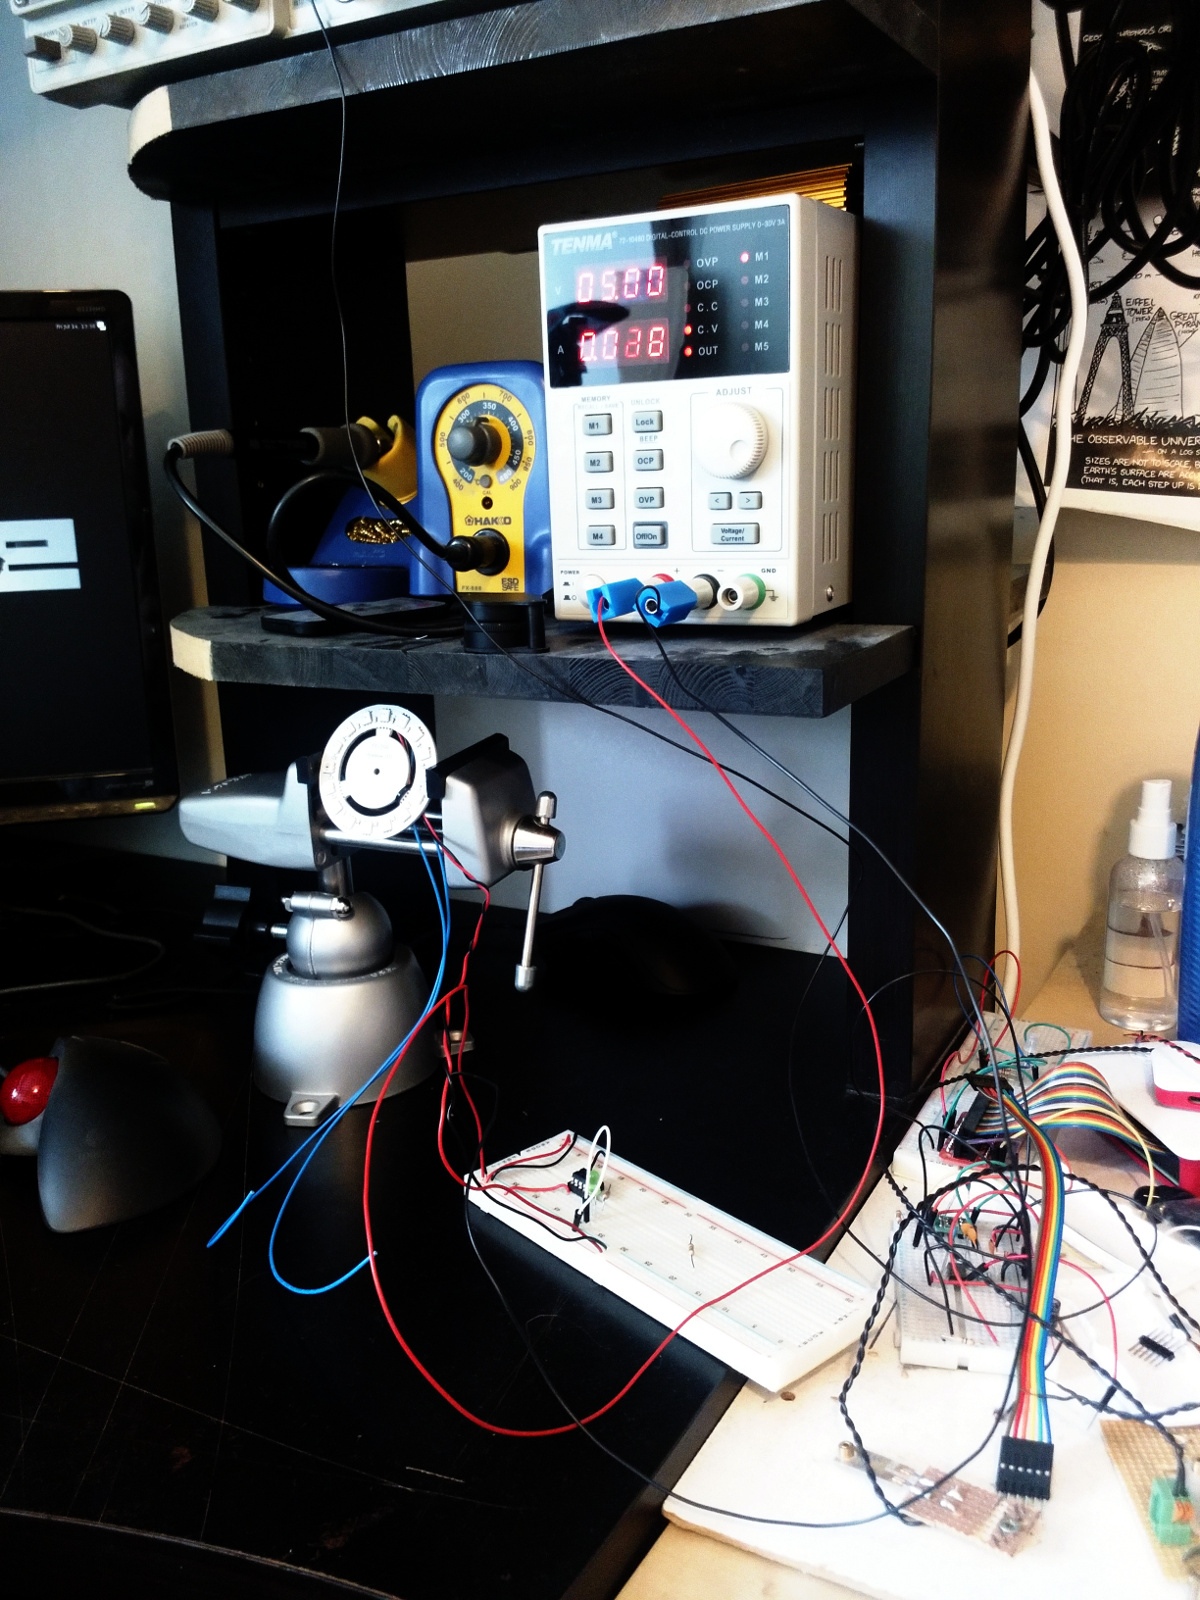
So, what’s next? Well, apart from the really neat WS2812 array in the vice there, which has a fun data protocol that’ll need a bit of programming work to hook up to (there is a C library for it, but I’ll have to rework that in assembly for my toolchain), and ignoring this idea I have for an interface between a sensor and an I2C link to a raspberry Pi that I have for another project, there’s also a little box dropped off by the postman to one side here. See, ebay’s one of those places where you can get fun toys for next to nothing if you look and are patient…

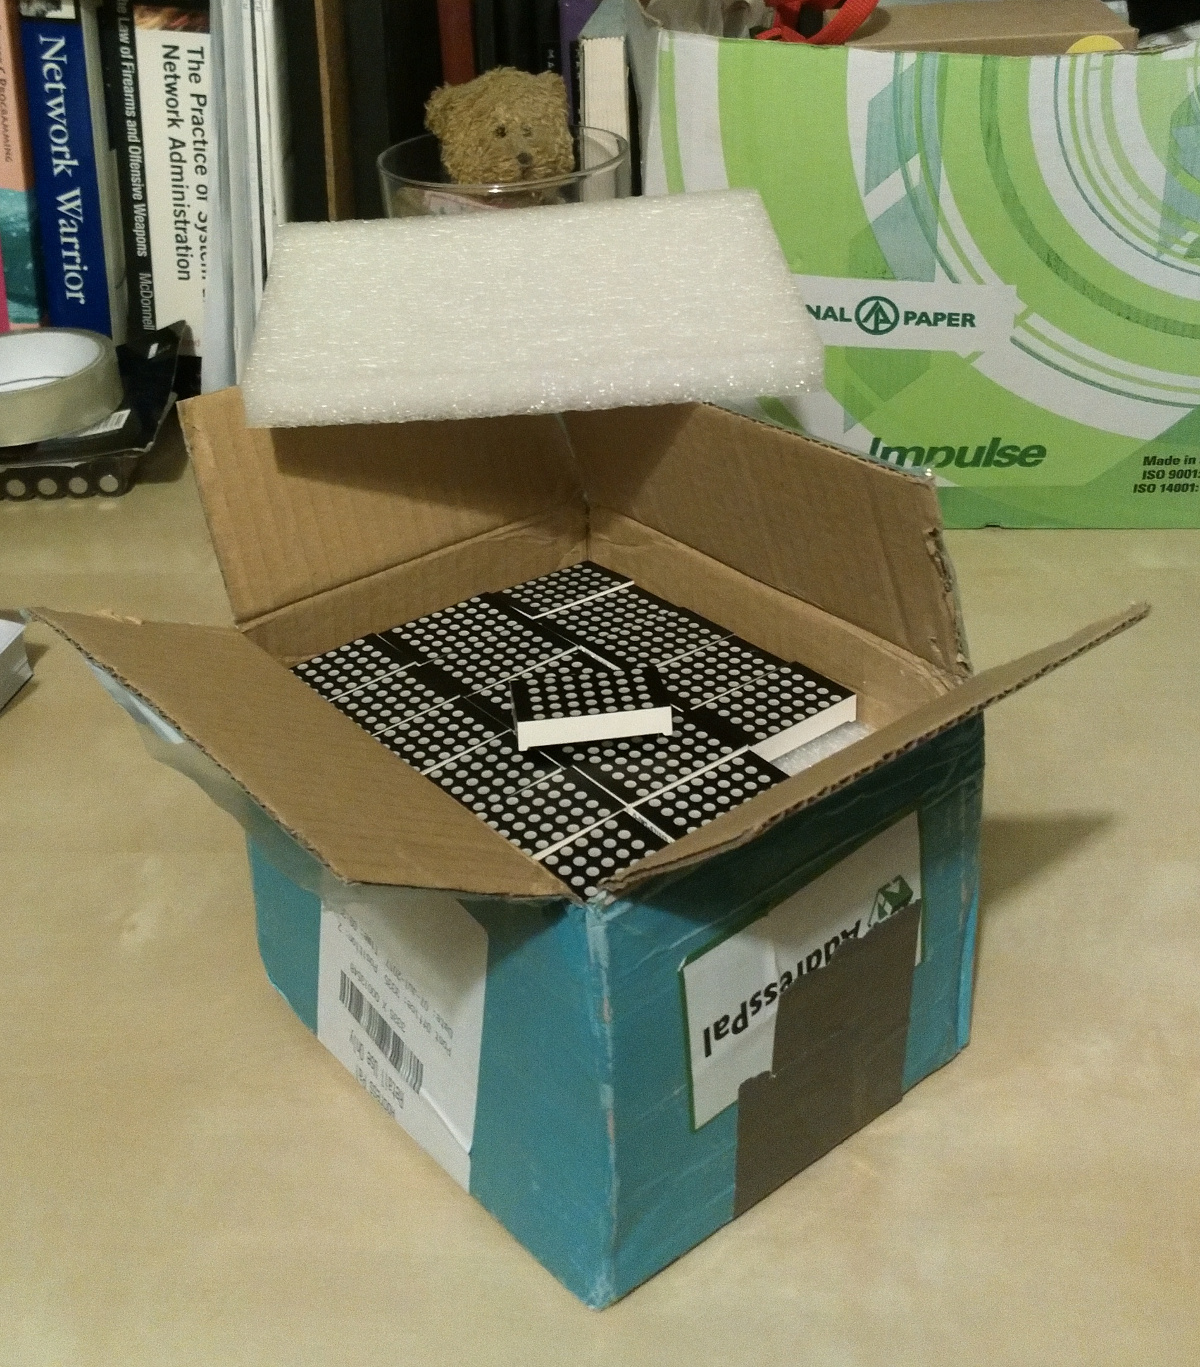
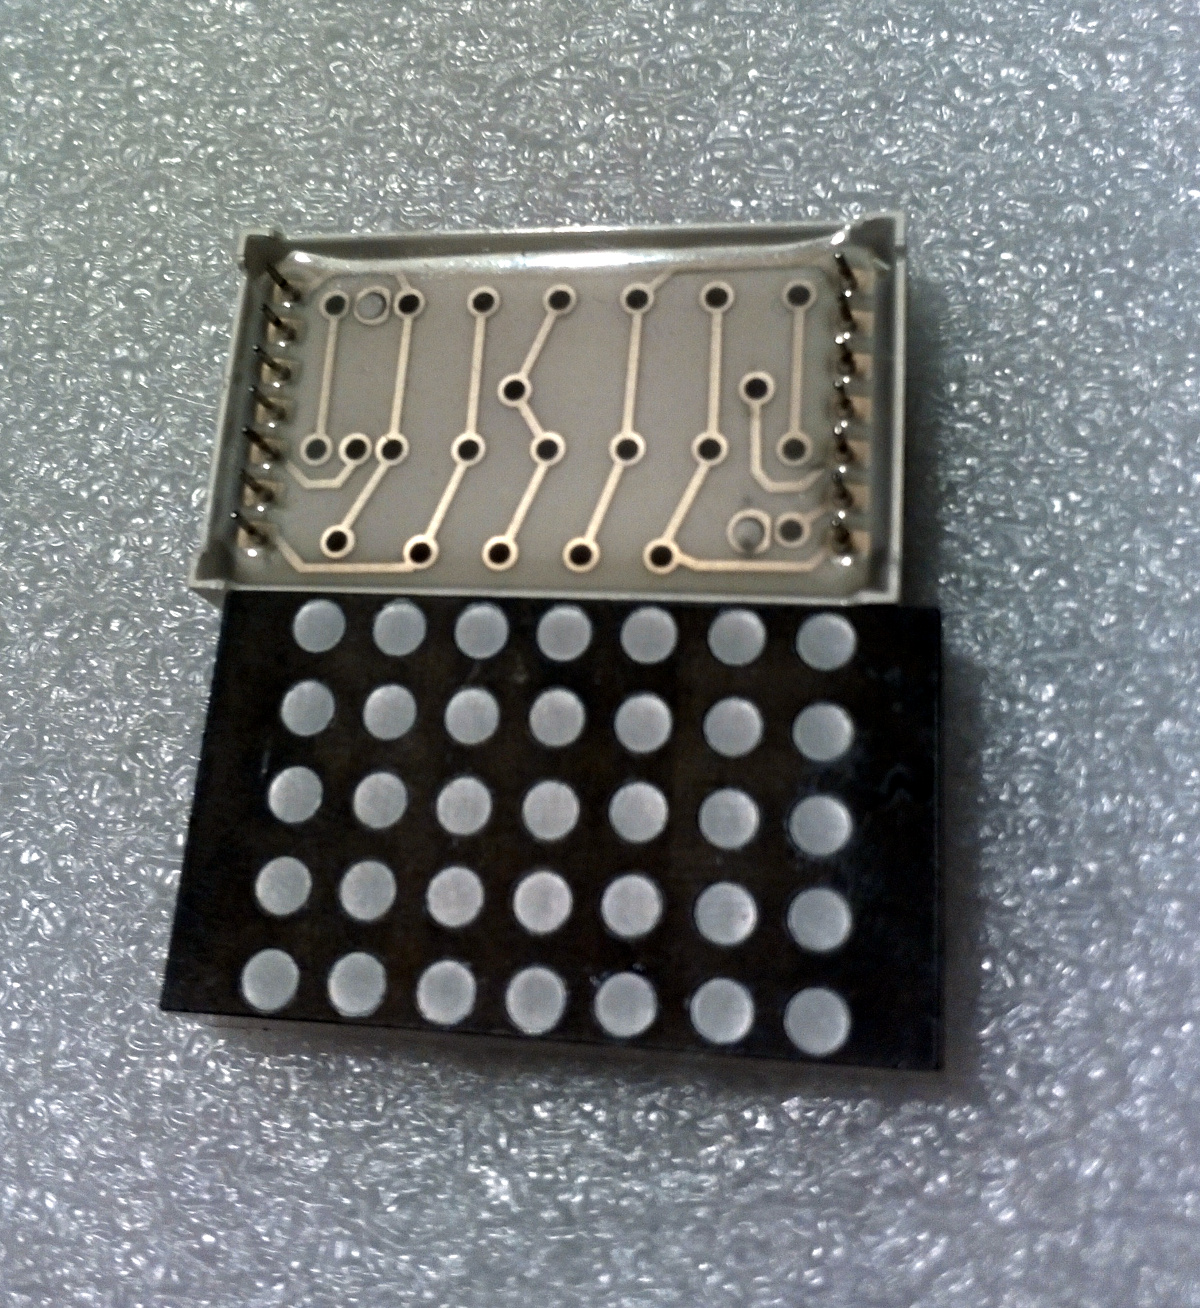
70 5×7 LED matrix displays for €17. 70! Mind you, I’ll need a few 74 series parts, some darlington arrays and a bit of wiring, but this could be fun…


26
May 17

Branding

So, lots of people who make stuff in wood (going back a few hundred or more years) made a mark on the stuff they build (assuming it’s good enough). Usually in an out-of-the-way place, even one where you’d have to disassemble the piece to find it; like signing one of two faces before you glue them together.

Sometimes it was a simple stamp made with a metal stamp and a few taps of a hammer:

Sometimes it was a paper sticker, and sometimes it was branded:


This wasn’t done out of the same sense that triggers graffiti by the way – some guilds from the 17th century onwards made it mandatory to mark every piece a workman made. Not every guild, but enough that it was considered commercial rather than odd or vain.

Well. Not vain for them 😀 For me, it’s pure vanity, but sod it, it was fun. And these days with 3D printing and CNC milling machines, it’s no longer a very expensive process involving difficult custom forging, it’s dropping €30 to €40 on a guy on etsy and giving him a design and waiting for a package to show up in the post three weeks later from Hong Kong. Living in the future has some benefits 😀

So here’s the design:

Not terribly big or fancy (by today’s standards – I suspect you couldn’t readily make this back in the 18th century). M for me, big C for herself indoors, in a venn diagram with a small c for junior in the middle, a common baseline and a random tangent forming an acute angle. So it’s uber-smarmy-symbolic is what I’m saying 😀

But who cares? I have my own branding iron 😀

Simplicity itself to use – hold by handle, point blowtorch at head until hot enough, press onto wood and rock back and forth slightly, quite gently, and you leave a mark in about ten seconds. I don’t think it’d cope with any kind of high rate of production, but that’s fine, I don’t produce stuff very fast 😀

Yes, I’ll brand that sapele, no I won’t be doing that today. Have to finish working on it first.

That’s not too bad, it’s almost discrete 😀

And nice and clean lines too. Have to admit, wasn’t sure it’d come out that well, didn’t know how good the brass CNC milling machines had gotten. But no, it came out fine.

Now I just need to buy a bigger blowtorch. The creme brulee torch isn’t cutting it 😀


12
Apr 17

Thermomorph

So I came across this goop watching Crimson Guitars recently (I don’t want to build guitars, I just find the woodworking part fascinating while finding the music part kinda meh).

Basically, take this plastic (which comes in little balls like styrofoam packaging), put a few tablespoons into hot water (60C/140F is where the magic happens) and it goes from hard white solid to transparent goop. Fish it out of the water with a spoon, give it a second or two to cool down so you can hold it without third-degree burns to your fingertips, and now you have something similar to mala (or plasticine or playdough or silly putty or whatever you grew up with); only when it cools down, whatever shape it’s in it sets up hard in.

When it’s back to being hard again, it’s a hard white plastic that you can saw, drill, file, tap (no idea how much load it’ll take though) or otherwise work. And when you’re done with it, put it back into hot water and it goes back to transparent goop again and you can reuse it. No idea how many cycles you’ll get from it, but I’m up to three or four so far with no sign of degradation.

So how’s it useful in the shed? Well, I use LED T8s to light the shed. Or more accurately, until last weekend I used one. Then the second one arrived last weekend and now I use two.

Thing is, when I ordered that second one, I accidentally ordered two of them. So I wanted to fit the third T8 and in between the other two is the only viable place left. But the roof has no handy single flat surface there (if I picked either of the two flats I’d get uneven light distribution and I’d go spare). So I need some blocks cut to the angle of the roof and attached so that I have a horizontal surface to mount the light to.

But I don’t know that angle, it definitely isn’t something nice like 30, 45, 60 or 90. It’ll be 57.423 degrees or whatever hastily-nailed-together-8-by-6 sheds use. So out with a few tablespoons of thermomorph, let it go transparent, cool back to translucent, and then shove a wodge of it into the roof angle (you can see it above in that picture).

And then when it cools, take it down and let it cool fully to harden fully.

And there’s your angle. Now take your saw and cut it in half so you have a flat face to present to the wood, and mark off the angles.

And now you just saw down the lines, then crosscut into two blocks, and start drilling pilot holes for screws and countersinks.

Then screw the blocks to the roof…

…and the mounting clips to the blocks…

…and then clip the T8 into the clips.

And done. No faffing about with cut-and-test-and-cut-and-test-and-plane-and-test-and-plane-too-much-and-test-and-curse-and-start-over-again.

Yeah, you could probably do this with a bevel as well, if you had a small 2-3 inch size one, but the thermomorph can get into small awkward spots a bit better than most bevels. Plus, as Ben Crowe was showing in that video above, you can replicate curves and other odd profiles just as readily as straight line angles.

And you can get different brand names as well (Multimorph, Polymorph and so on) as well as dyes in case you don’t like white, or even food grade versions of the stuff. And near-infinite shelf life too. So definitely some stuff to have handy in the shed from now on.